DIY Address Plaque
Sinkology is proud to present Kendra Williams, a home decor expert, DIYer, furniture refinisher, and busy mom as a guest blogger. Kendra runs the blog at Momtique and she is here to share some design ideas and inspiration around designing your home with copper and around your copper sink.
DIY Address Plaque
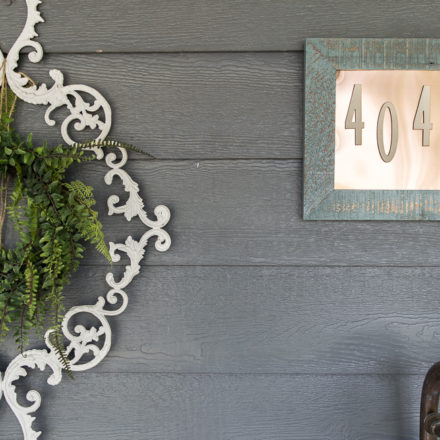
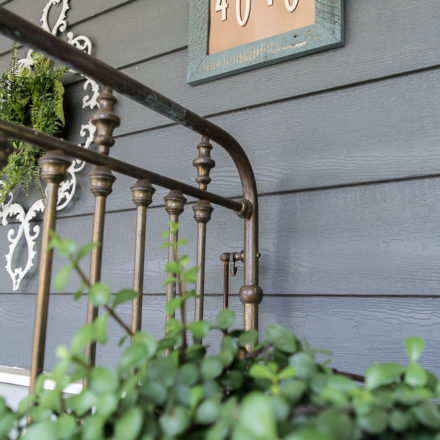
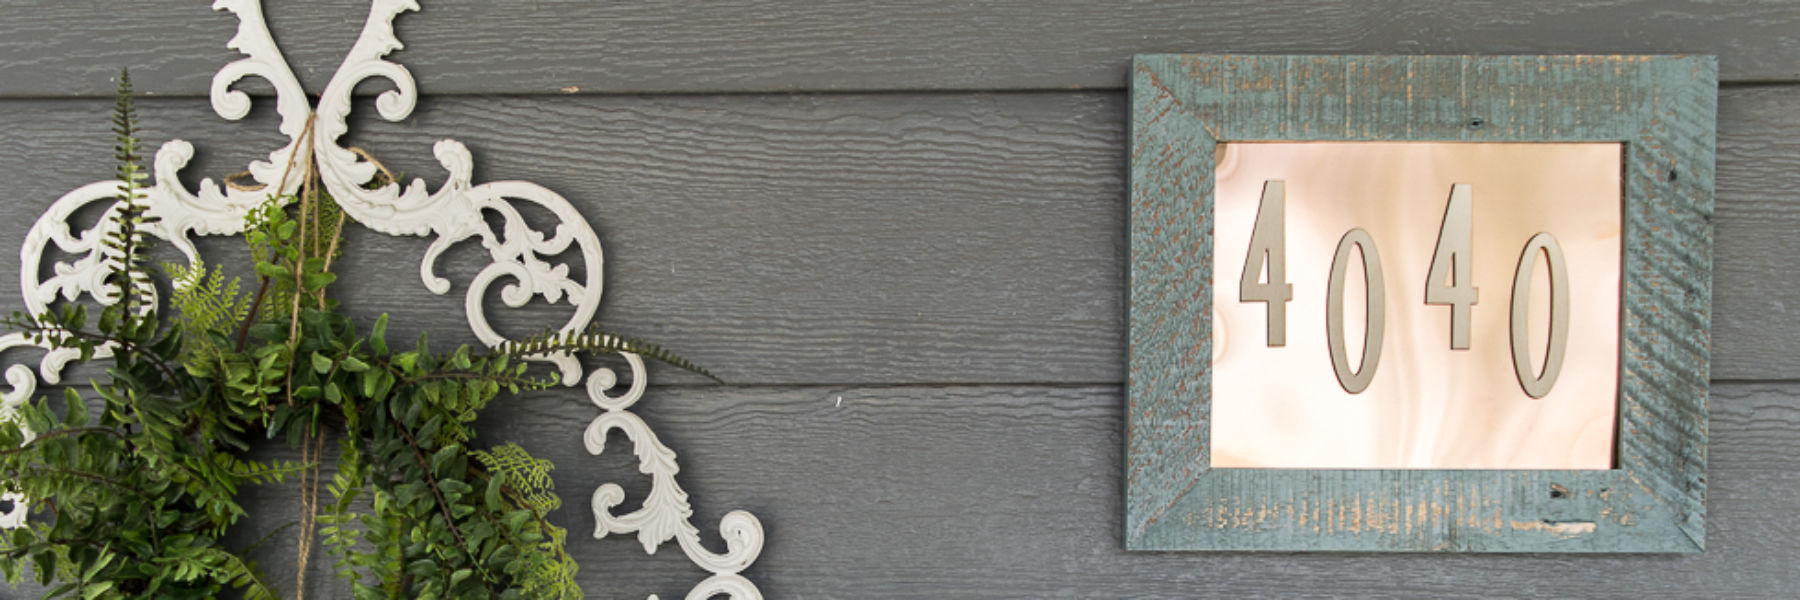
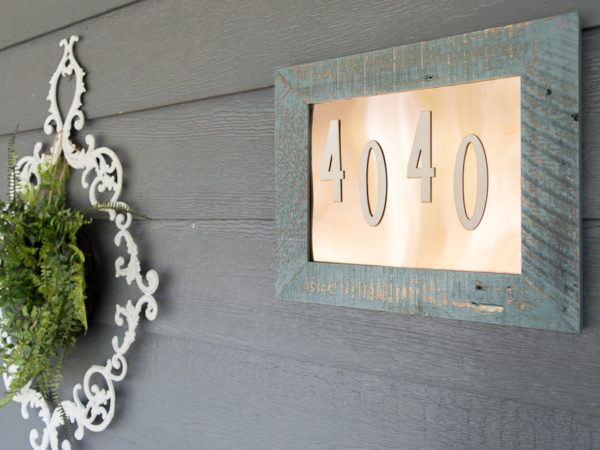
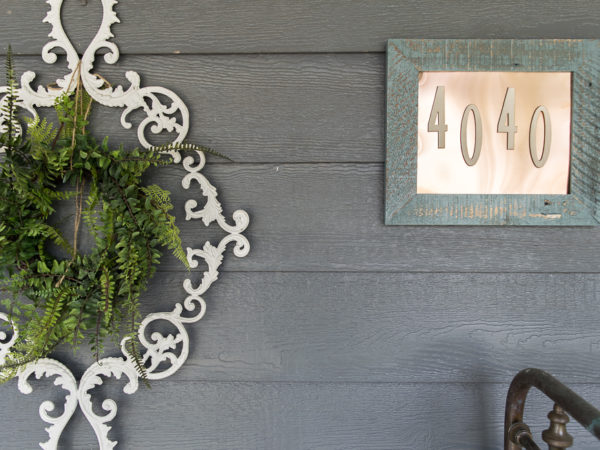
As summer comes to an end, it doesn’t mean you have to stop crafting and creating! Recently, my parent’s address plaque broke and I thought it would be a great idea to make them a new one. What I love about this particular address plaque is this, there are so many options for you to personalize it to your taste. I used a copper color sheet metal and a blue weathered frame. I chose these materials and colors simply because they appeal to me. The materials and color combinations are endless.
What you’ll need to make your own Address Plaque:
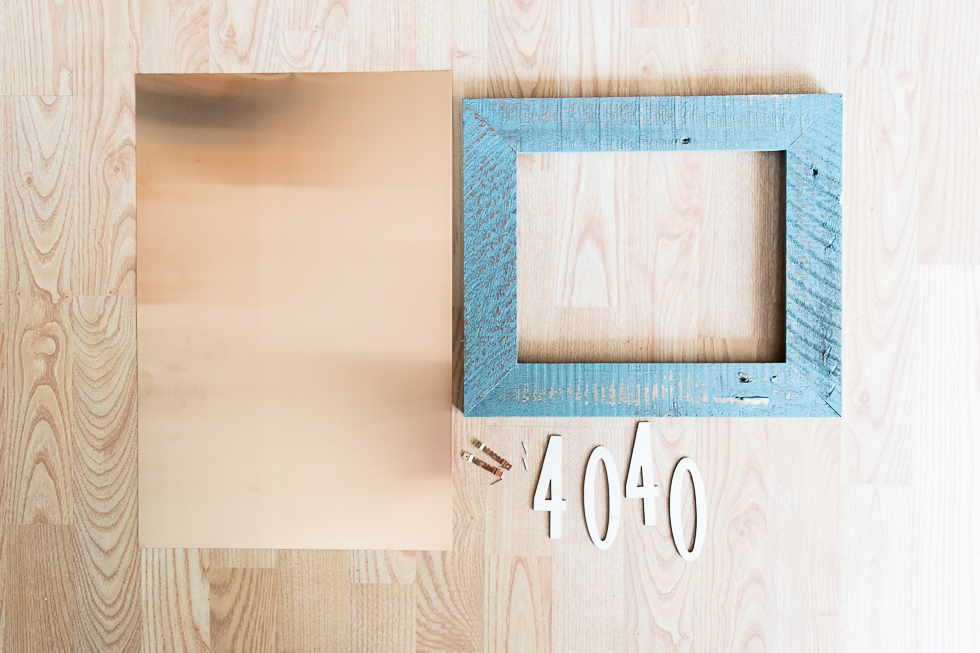
Sheet Metal – I used sheet metal but the options, you can use as a background, are endless. Some alternatives are: wallpaper or mod podge onto a piece of plywood, glass, small slats of reclaimed wood, or painted wood.
Frame – Right away I fell in love with this weathered blue frame. It was love at first sight. The color is so pretty and the size worked out perfect for the space the plaque was going to hang. I would suggest using an 8″x10″ or larger so that the address can visible.
Numbers – I was looking for a particular number style. I didn’t want anything ornate or too thick. These numbers were slim and modern, which is just what I was looking for. You can make your own numbers if you’d like or you can take the simpler route and buy them at your local craft store or online. Just make sure the numbers will fit inside the frame you’ve chosen. If the color of the numbers doesn’t suit your fancy, you can paint or stain them to your liking.
Hanging Hardware
Hot Glue
Super Glue
Scissors or Metal Cutter
Once you’ve decided on and selected the materials that suit your personal taste and style, you are ready to begin. How to make a DIY Address Plaque: Step 1 – Lay the frame on the sheet metal and outline the inside of the frame with a pencil.
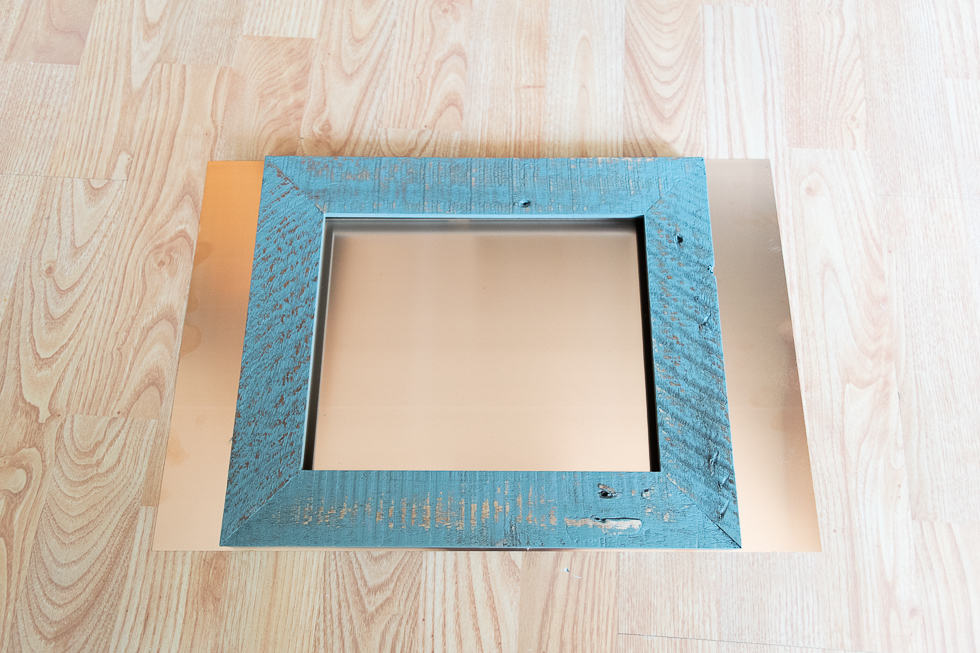
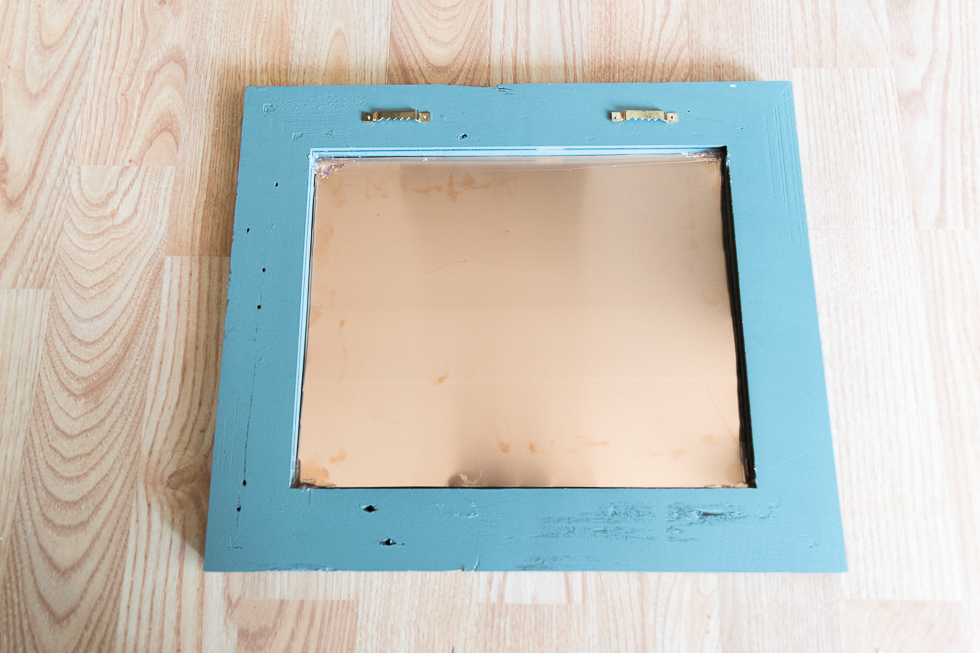
Step 2 – Carefully cut the metal on the line that you’ve outlined. Step 3 – Hot glue the inside corners of the frame. Place the metal sheet in the frame. Once you push down the corners, hot glue the back of the parameter of the frame. Step 4 – Apply the hanging hardware.
Step 5 – Once you’ve finished step 1-4, you can now turn your frame over and apply the numbers. Make sure you decide exactly where you want them to go before you glue them down. Once you’ve positioned them, you can apply super glue on the back of the letters and put them in the same spot. I didn’t paint or stain my letters, but if that is something you would like to do, make sure you do so before you start the first step. The numbers do need time to dry before you glue them on to your background.
Guess what? You’re done!

I just love the way it turned out! I staged it on my patio before I handed it over to my parents. I’m definitely going to be making one for myself.
Questions about your Sinkology fireclay farmhouse kitchen sink? Our Sinkologists are here to help! Contact us or follow us on Facebook, Pinterest, or Instagram for more helpful tips and design ideas.