DIY String-Wrap Votives
DIY String-Wrap Votives
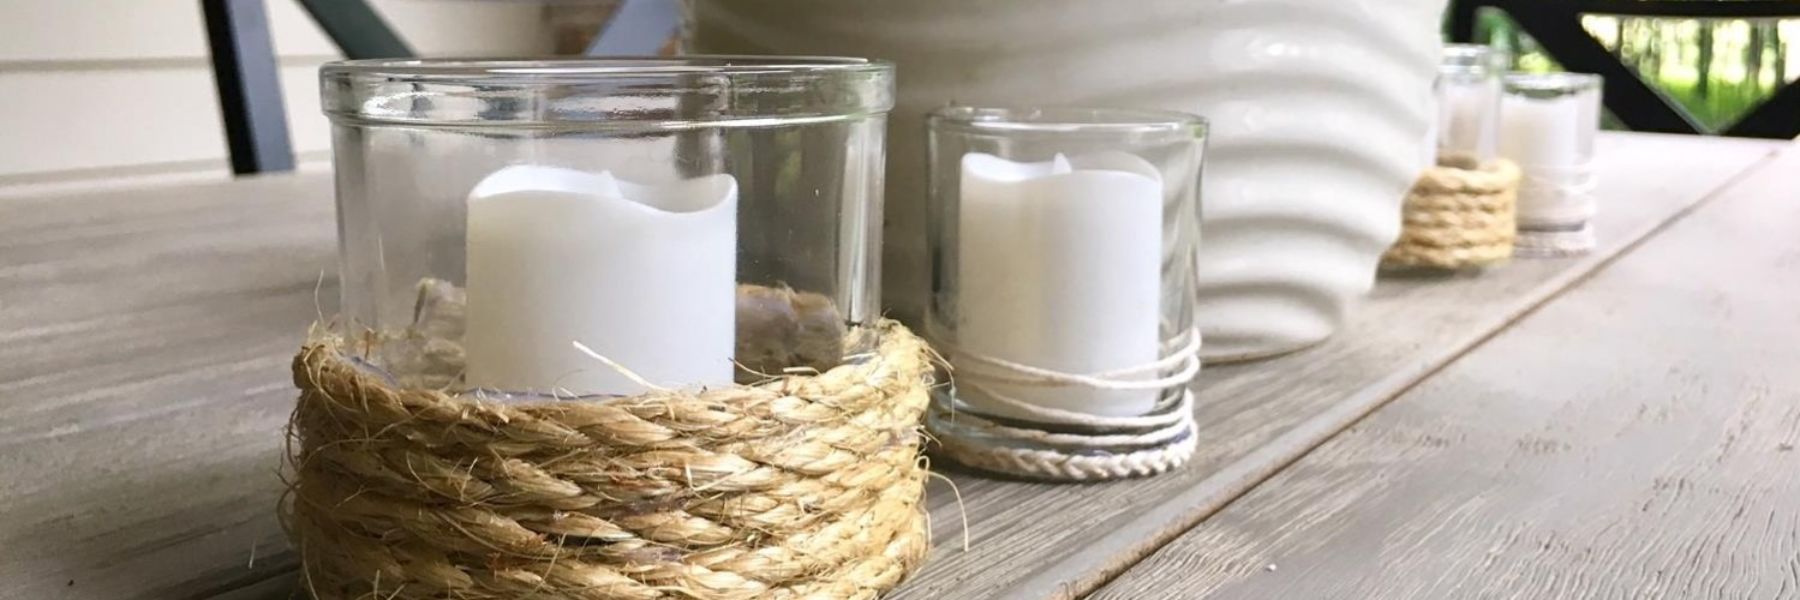
We’re about halfway through summer and I finally started switching things up on our back patio with a new table and chairs…cue the happy dance! We hosted dinner with friends the other night and I was looking for a fun way to dress up my new table. I had a bunch of clear glass votives, but they were looking a little blah. So I came up with a super easy DIY that I thought I’d share with you all. String-wrap votives! I’ve seen various iterations of this on Pinterest – it’s such an easy project that can be done with a variety of different materials on a variety of different things like votive holders, vases, wine bottles, etc. Check it out below!
-Assemble Your Supplies
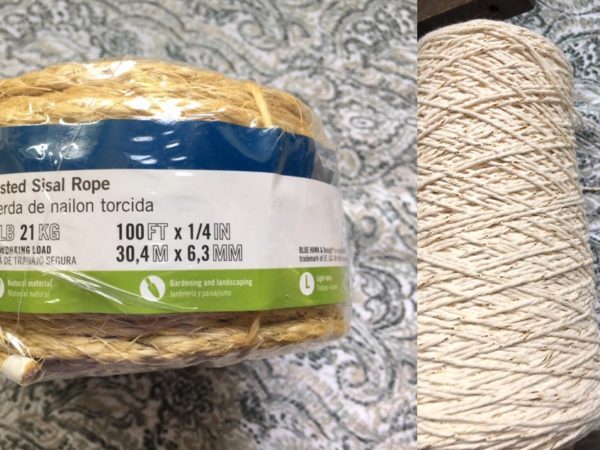
You literally need three things to complete this project: glass votives, a hot glue gun and some sort of string. I used two different types of string: baker’s twine that has a metallic thread woven through it (who doesn’t love a pop of metallic?) and twisted sisal rope, which you can get at any hardware store.
-Decide on a Pattern
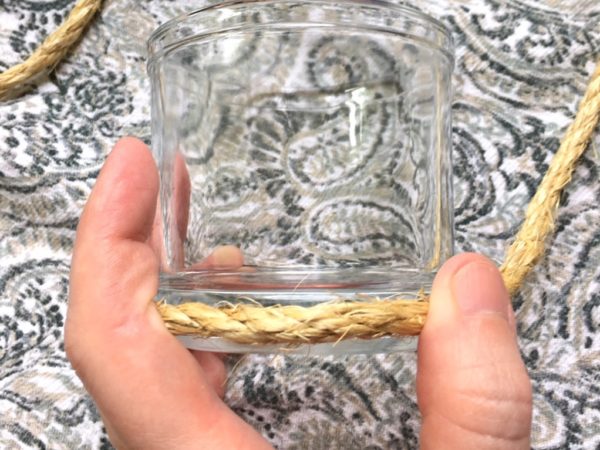
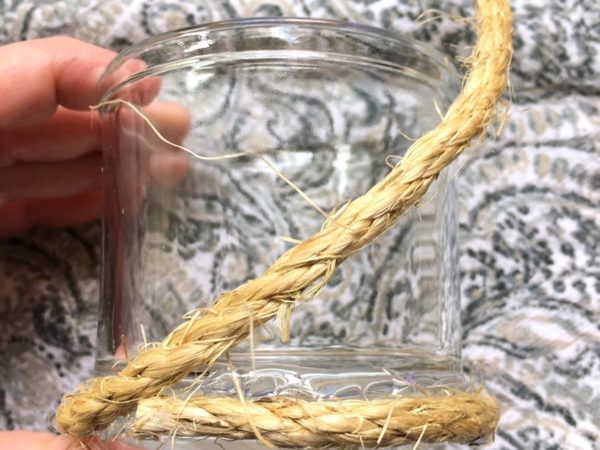
You should have an idea of how you want to wrap your string around the votive holder. Because the sisal rope is pretty thick, I chose to wrap that in rows halfway up larger votive holders. The baker’s twine is much finer, so I did random criss-crossing up and down half of standard-sized votives. Then, to make a bigger statement, I added a braided section at the bottom of each of these smaller votives.
-Start Wrapping and Gluing
Put a small dot of hot glue at your starting point on the votive. Anchor one end of your string and wait a few seconds for the glue to set. From there, start wrapping in your desired pattern. For the rows of sisal rope, I worked in sections around the votive, putting a small section of glue down and adhering the rope. Wait a few seconds for each section to set so the rope doesn’t pull away from the votive. When you’re finished, anchor the loose end with another glue dot. I made sure to start and end in the same place so you have a designated “back side” of the votive…just in case the loose ends don’t match up exactly.
Add a Candle and Enjoy! Once the glue is completely dry, add a candle to your votive. If these are going outdoors, consider citronella votives like these ones, which will help to keep bugs at bay. Add these to a tabletop or shelf and you’re done! I added these to my outdoor tabletop for an instant style upgrade. I love the texture and coastal feel of the sisal rope with the gray-wash table! This is a simple DIY that only takes a few minutes to jazz up dollar store candle holders or anything else you think needs a little something. Happy crafting! 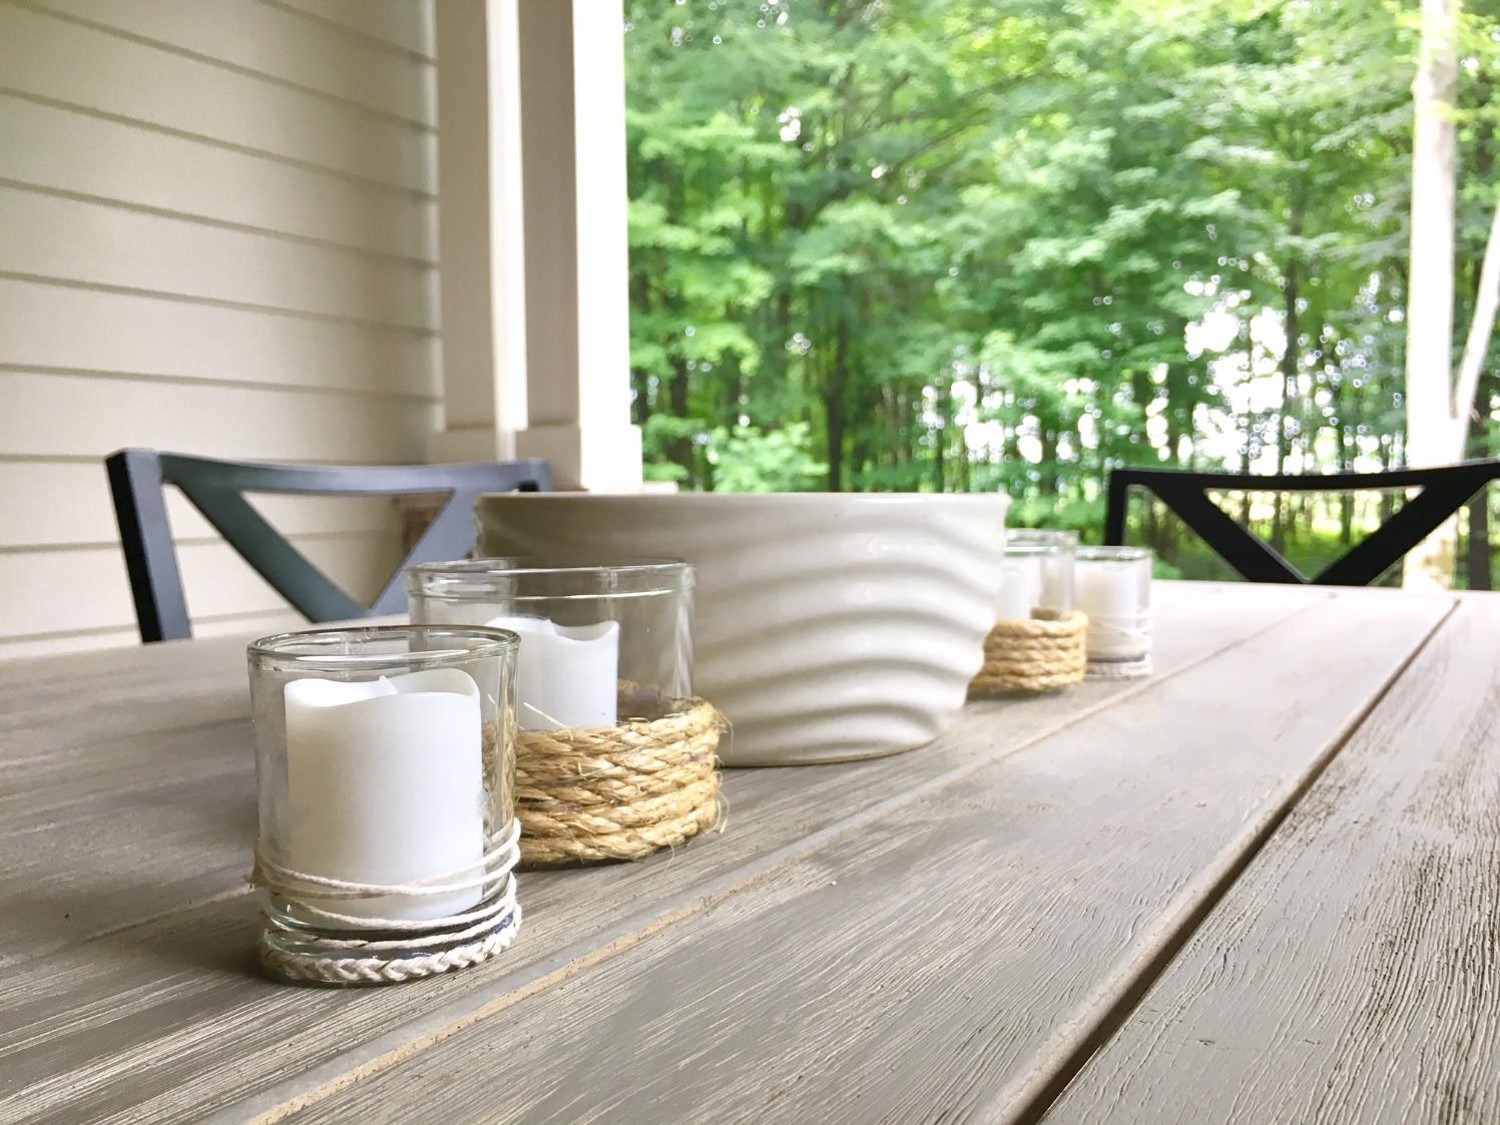
If you have any additional questions during your search for the perfect copper, fireclay farmhouse sink or granite sink, our Sinkologists are here to help. Contact us or follow us on Facebook, Houzz, Pinterest, or Instagram for more helpful tips and design ideas.