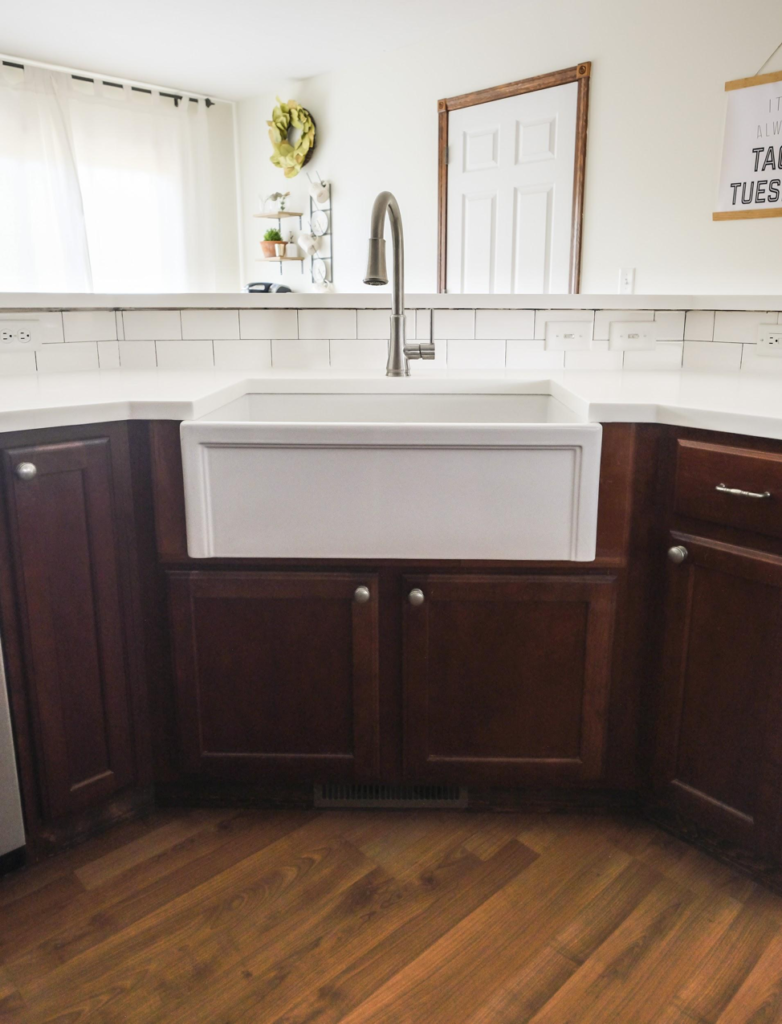
Fireclay Farmhouse Kitchen Sink Step-By-Step Installation
Sinkology is proud to present Ashley Carpenter, a homebody, decor obsessed, DIYer that loves fitness, happy people and wants nothing more than to be on the lake soaking up the sun with good people and good music. Ashley runs the blog Joyfully Growing and is here to share her recent kitchen remodel with us, and the installation of her new Bradstreet II Fireclay Farmhouse Sink.
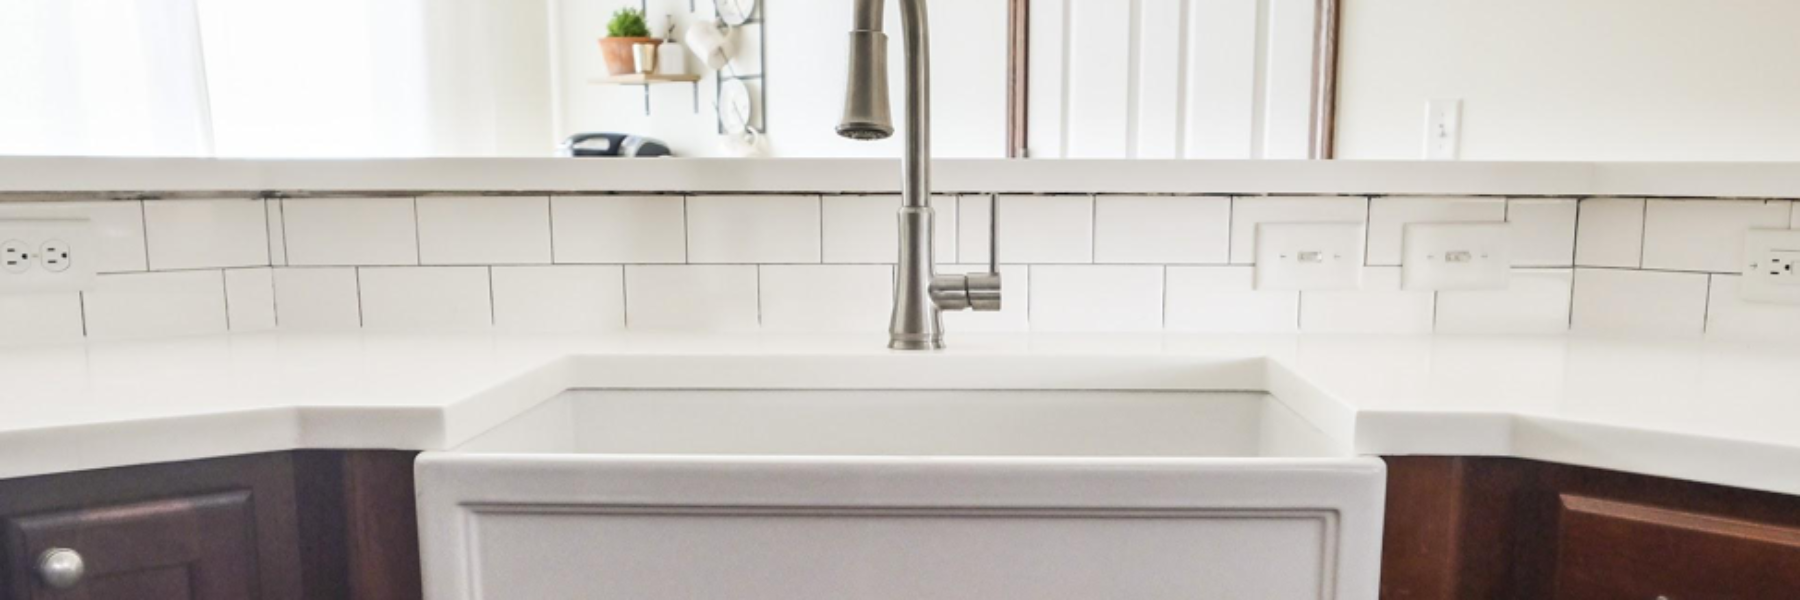
Adding an apron-front farmhouse sink to your kitchen will not only elevate the overall feel of the room, but the functionality can’t be beat! Installation can be a bit tricky, so follow this step-by-step tutorial to add some farmhouse flair to your kitchen.
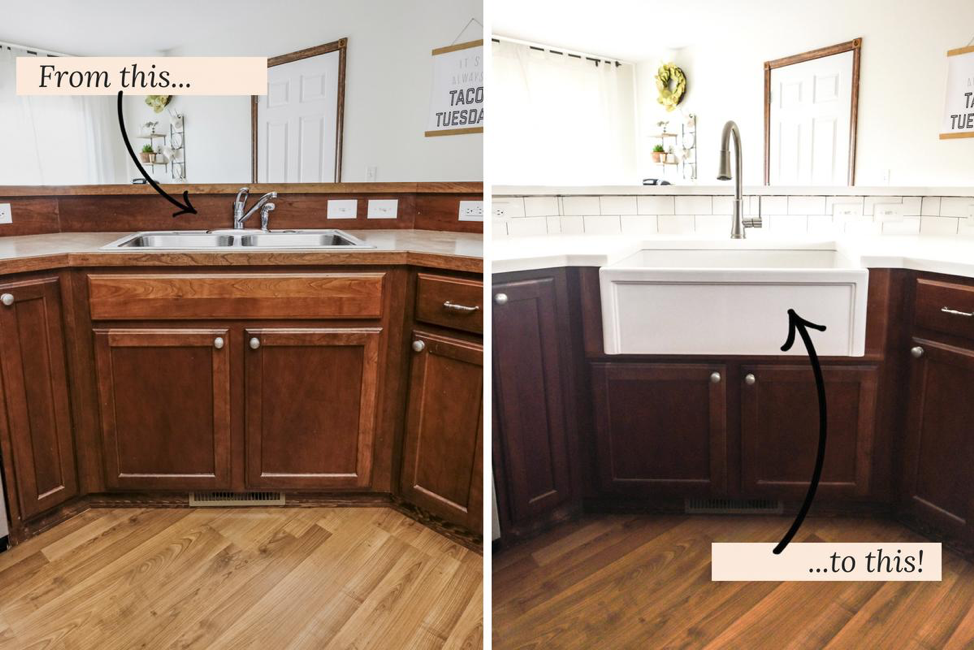
How to Install a Farmhouse Sink
Prep the Area
To get the sink ready for removal, turn the water lines off (there are usually two valves inside the base cabinet under the sink).
Disconnect the fittings and remove the water lines. Remove the drain pipe under the sink. Use a small bucket or a towel to catch the water inside the P-trap as you remove it.
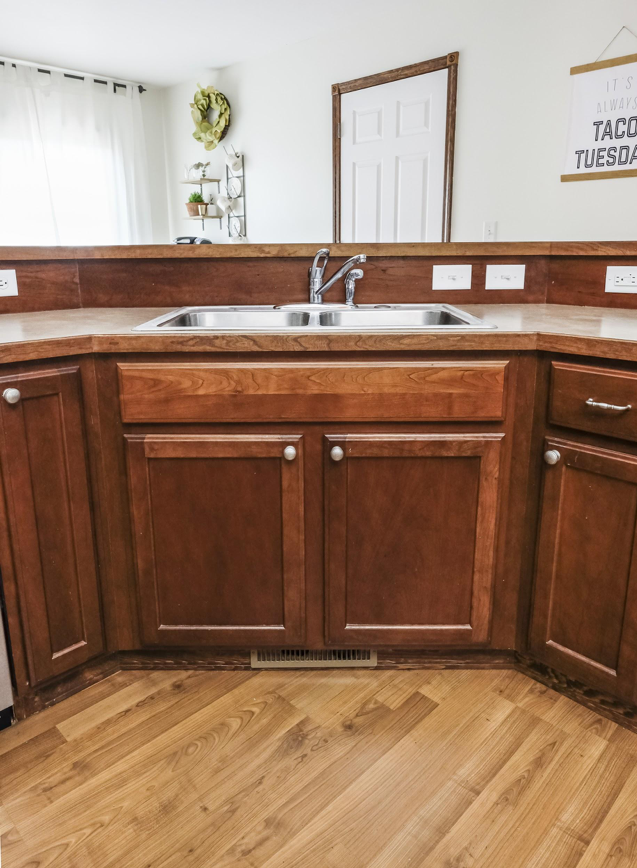
Remove countertops
First, remove all of the lower cabinet drawers, doors, and all contents.
Next, remove the screws in the base cabinets that are holding the countertops to the cabinetry.
Then use a utility knife to cut through the silicone beads to help free up the countertops.
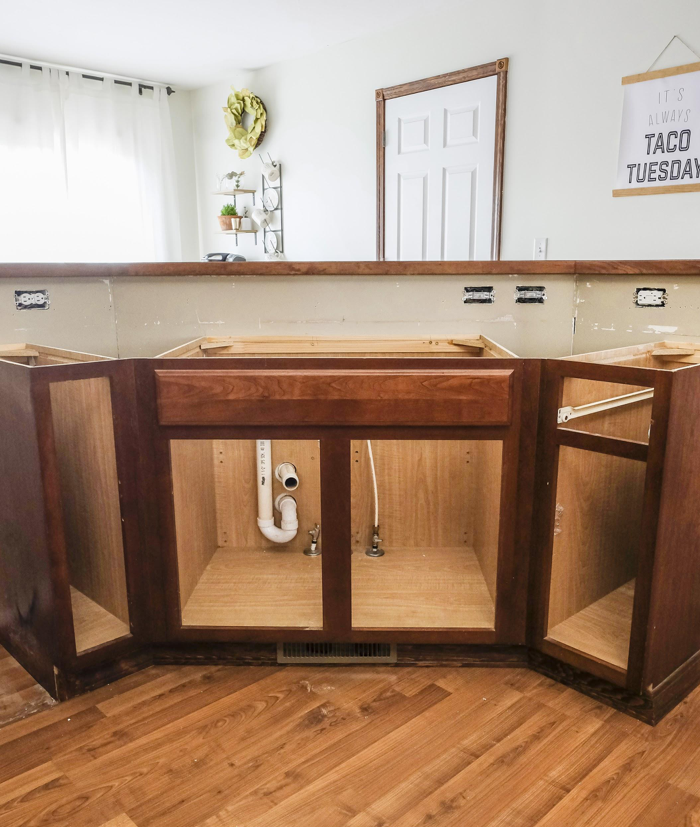
Most laminate countertop removals can generally be handled by one or two people. But, if you have tile, concrete, or stone countertops, you’ll want to get as many friends as possible to help lift.
Build a support frame
Most farmhouse sinks are extremely heavy, and the Sinkology Bradstreet II Fireclay sink we used is no exception. Around 85 pounds! While that may make it a little more difficult to handle, it makes up for it in durability!
To install the sink properly, you’ll need to build a frame out of 2x4s to support the weight.
To retain as much usable cabinet space as possible, we built the frame by screwing 2x4s right to the sides of the base cabinet. This kept the framing from eating into the storage space below the sink.
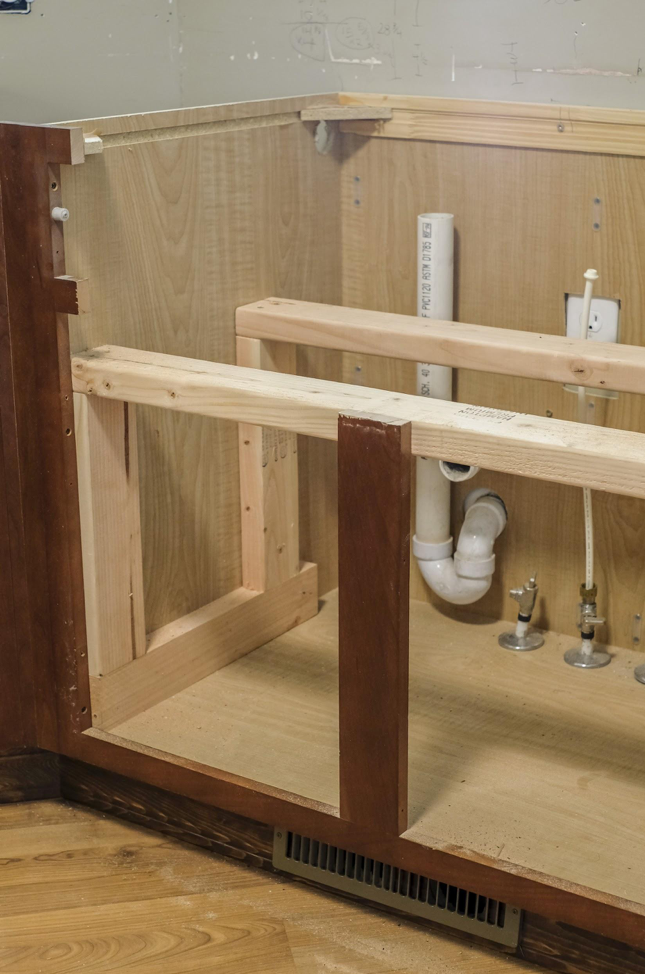
For an ‘undermount’ sink, the top of the sink needs to sit ⅛” under the countertop. To determine how tall your framing needs to be, measure the inside height of the cabinet, minus the height of the sink, minus ⅛”.
Lastly, make sure the 2×4 frame is a tight fit behind the cabinets. You will need to mount a trim board to this 2×4 in a later step.
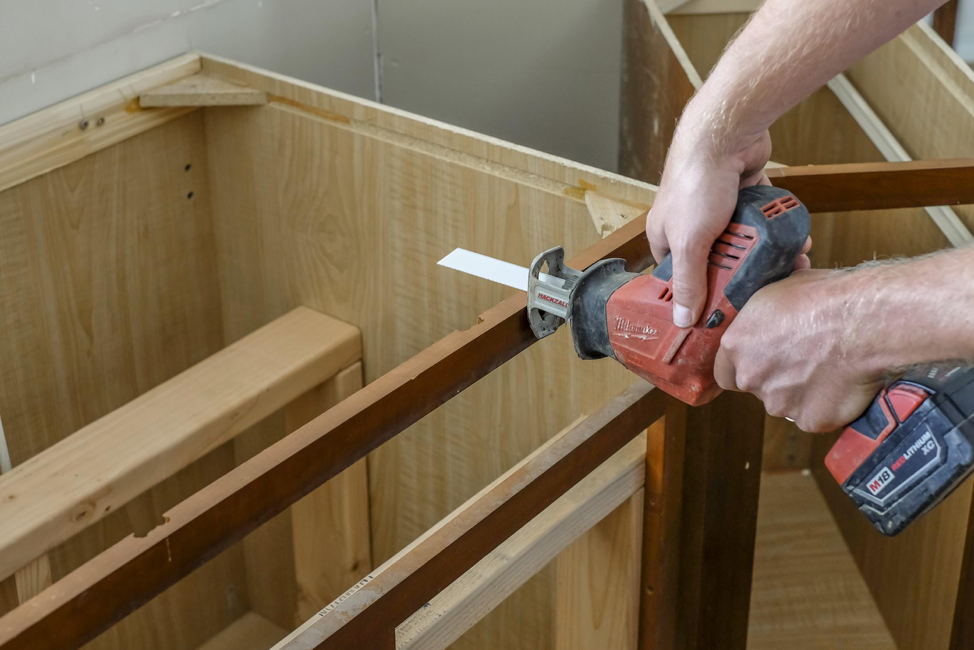
Cut existing cabinets
This part can be a little intimidating, but it’s actually pretty easy.
Remove the false front panel (the fake drawer under the old sink). They are usually held in place with little spring clips – just pull hard to remove.
(Important: save the false front panel to use as a trim board in a later step.)
Carefully measure and mark the front of the cabinet where the new farmhouse sink will protrude through the front. Plan for a ¼” gap on either side of the sink to give yourself a little wiggle room.
These cuts do not need to be 100% perfect because the gaps will be covered up with a trim board.
Double check your measurements to be sure the sink will be centered before you cut! If everything looks good, start cutting!
Keep the pieces you remove. They will be repurposed after the sink is installed.

Install the sink
Now that you have a frame in place and a cutout for the apron front, all you need to do is slide the sink right in. For now, the sink just rests on top of the framing – no need for fasteners or adhesive.
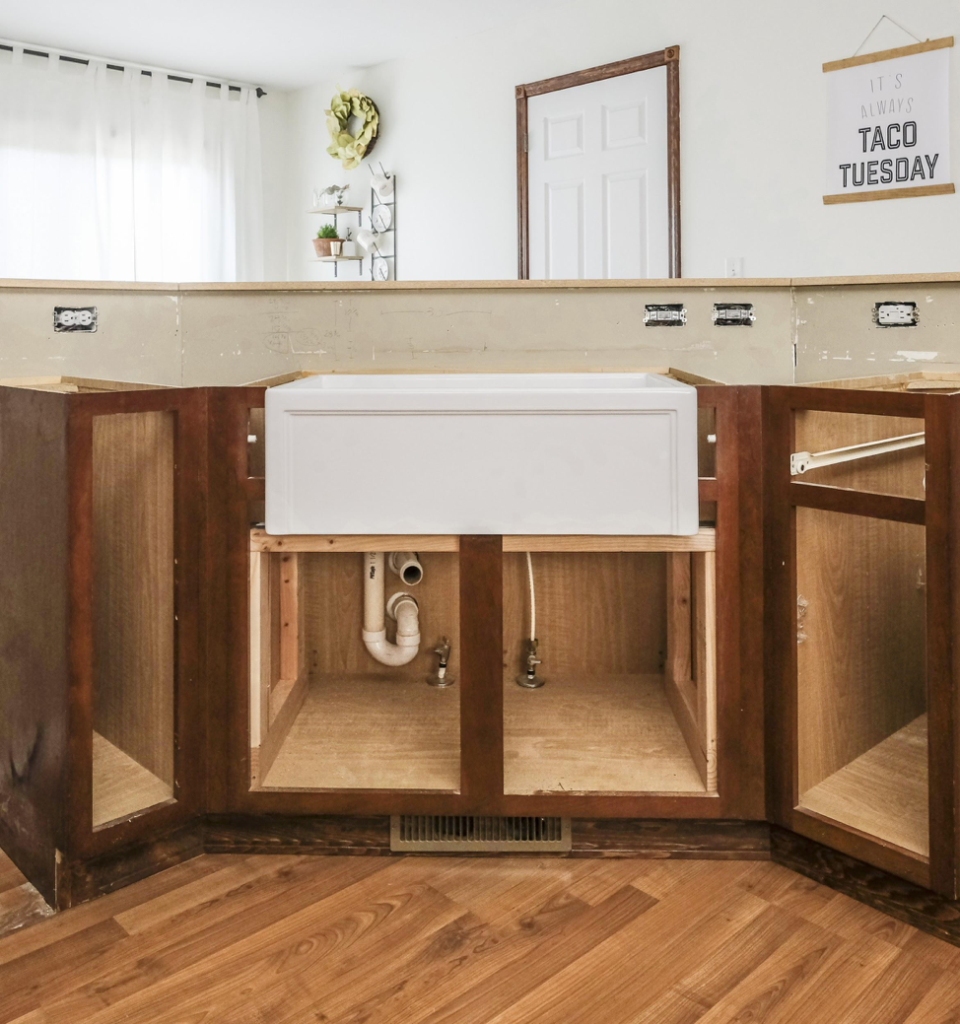
The ¼” gaps on both sides of the sink leave room to make final adjustments when the countertops get installed.
Use a level to make sure the sink is even in all directions so that water will drain properly. If needed, adjustments can be made with shims.
Install countertops
We hired professionals to install our new countertops (LG Hi-Mac solid surface countertops in ‘Arctic White’).
If you plan on hiring a pro, make sure you contact the installer BEFORE you remove the old countertops & sink. They will want to come measure everything before you start any demo work.
Our countertop installers used silicone to seal the seam between the underside of the countertops and the top of the sink. Once the silicone dries, it also holds the sink firmly in place.
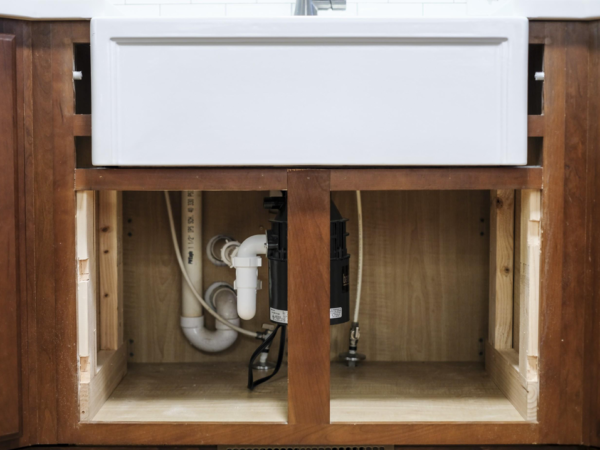
Reconfigure base cabinet
Make sure to wait until the silicone has fully dried and cured before you resume work on the sink/cabinets (usually 24 hours).
Using the wood you saved from step #5, install the new top of the base cabinet.
Mount the boards directly onto the 2x4 framing with a finish nailer. This will cover up the 2x4 and make the base cabinet look complete.
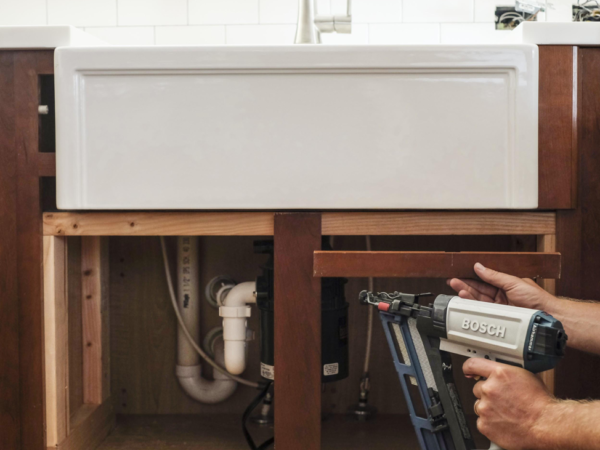
At this point, the front of the cabinet should be completely flat - and ready for the cabinet doors to be re-installed.
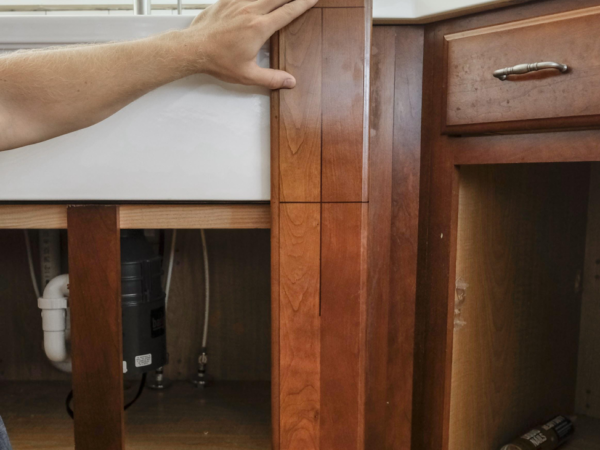
Add trim around sink
Use the old false front panel (from step #5) to cut new trim boards to go around the sink.
Measure and cut one for each side, as well as one for the bottom. To make the trim boards look seamless, we glued them together before installing.
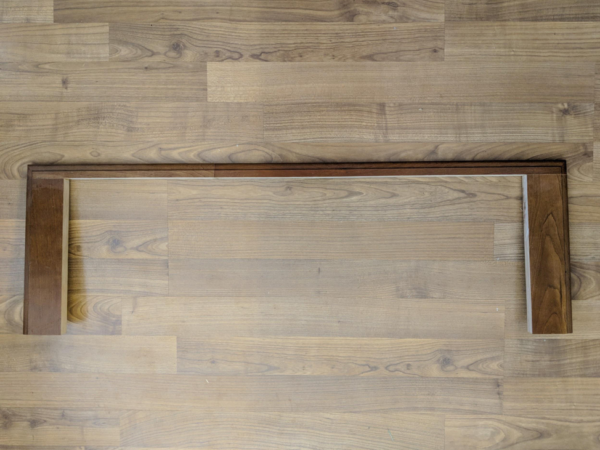
Using the old spring clip hardware made it easy to put it up in one step. (Another option would be to use finish nails, or adhesive to hold the trim boards in place.)
**We chose to reuse the existing trim pieces in order to match our existing cabinets. If you are planning on painting or refinishing your cabinets, there's no need to repurpose the old pieces. It would be easier to create the base cabinet and trim pieces in steps 8 & 9 from scratch, if possible.
Cut Cabinet Doors
Measure the new opening for your cabinet doors. Use this measurement to decide by how much the doors will need to be cut down.
Make sure the bottom of the cabinet doors will line up with the other cabinet doors in the kitchen. Our doors needed to be cut down by exactly 3”.
To keep the existing look on the face of the cabinet door with the raised frame, we decided to cut a piece out from the middle. This allowed us to shorten the door overall without losing either the top or bottom frame.
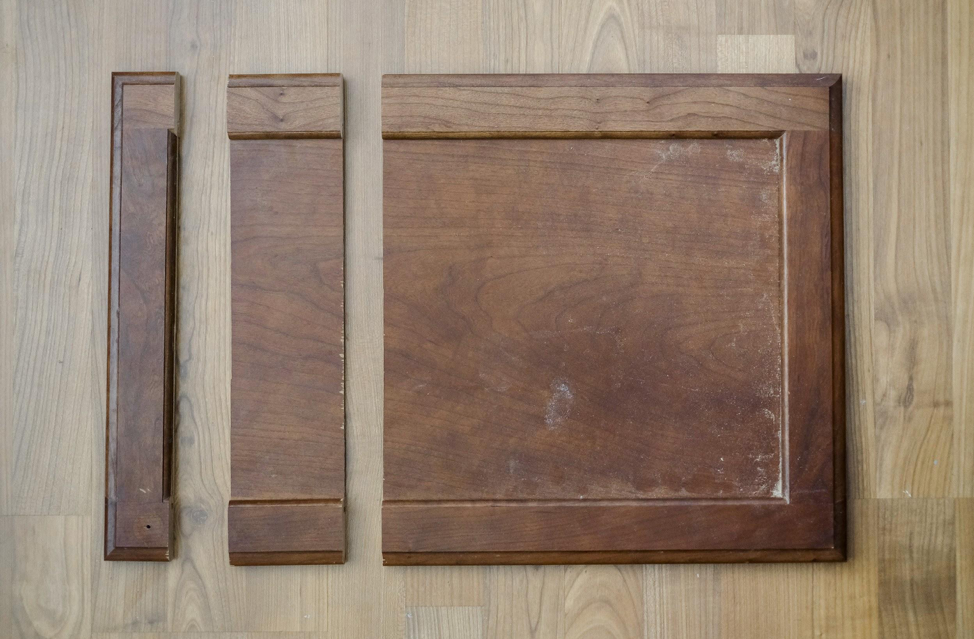
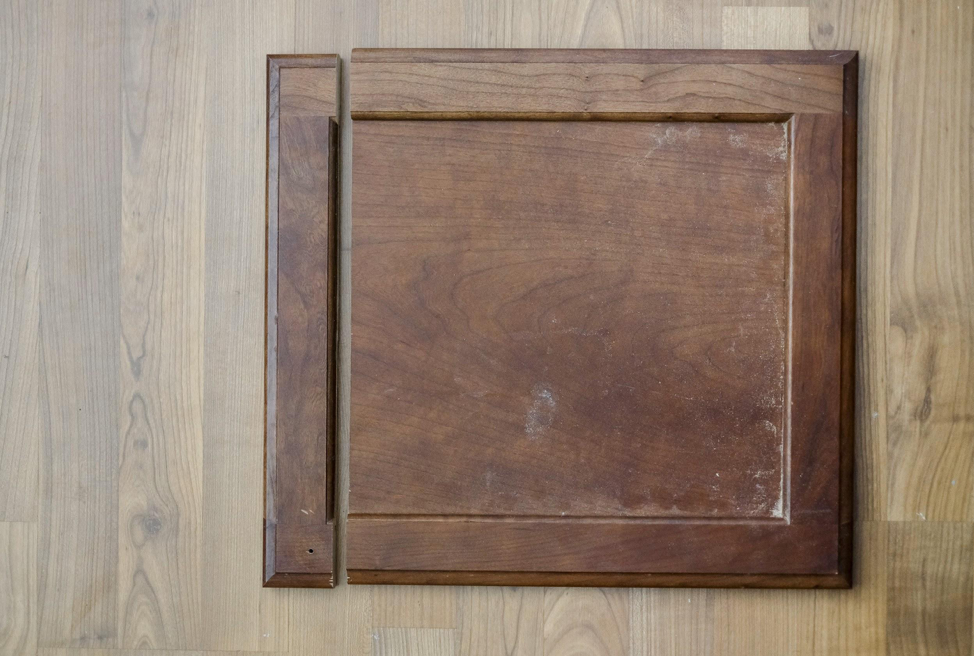
Next, remove all hardware from the doors including pulls, and hinges.
Use a table saw to cut the top of the cabinet doors off in an inconspicuous spot – in our case, this was right below the top frame (as seen in the photos above).
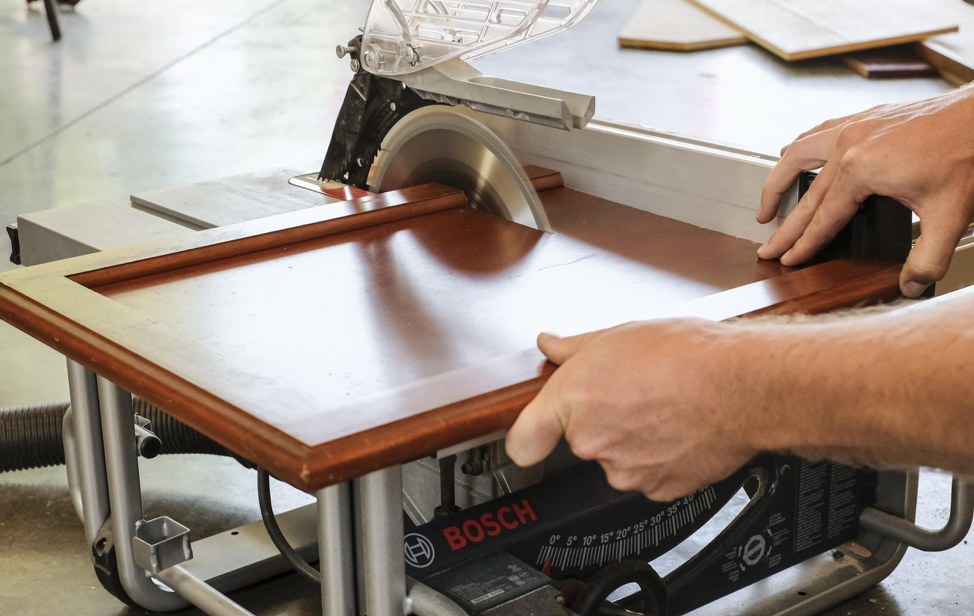
Then, cut 3” (or your measurement) off the body of the door. These cuts need to be very precise using a high tooth count finish blade to make the cleanest possible cut. If you have to make this cut by hand with a circular saw, you’ll need a track kit.
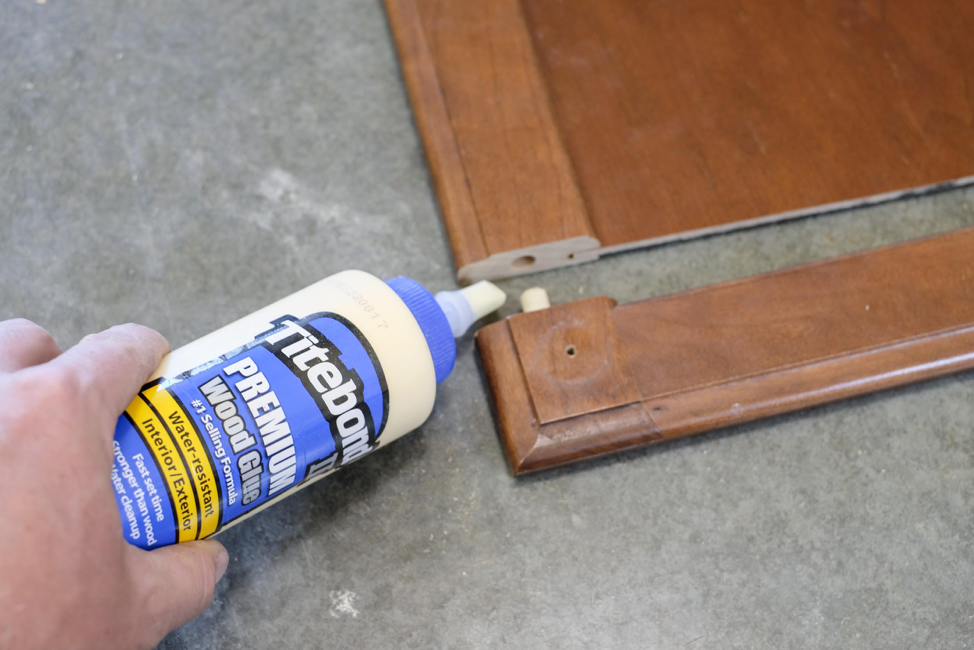
Use wood glue and dowels to join the top frame of the door to the cut down bottom piece.
To hold the pieces together while the glue dries, use ratchet bar clamps for 24 hours.
Reinstall the door pulls and hinges, and reattach the new doors!
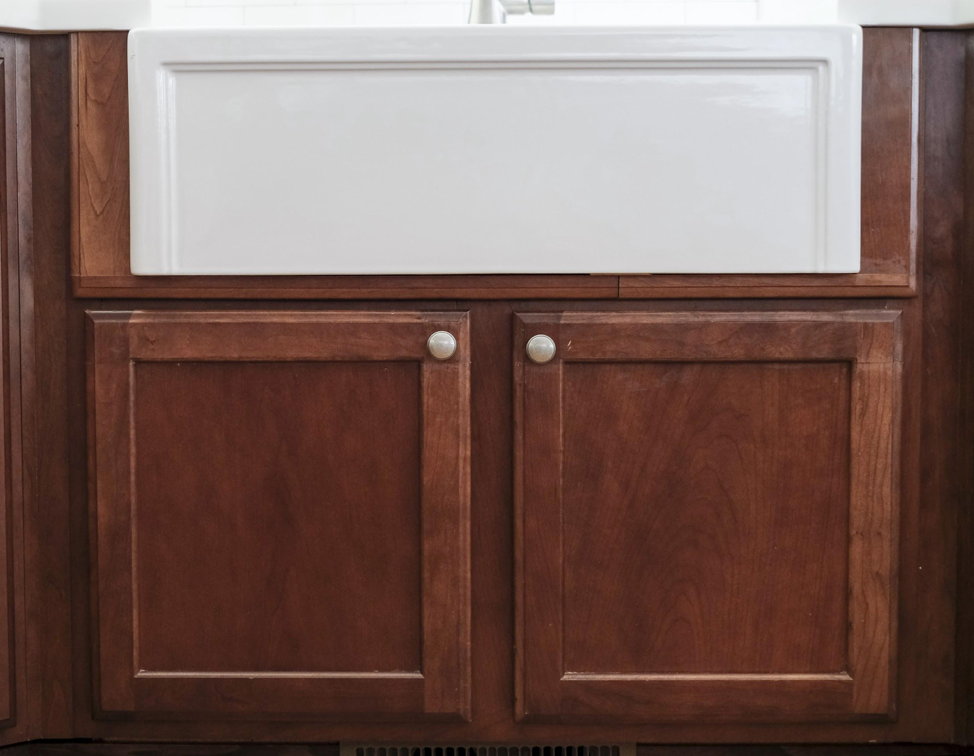
Now, all that’s left to do is hook up the plumbing and reattach the garbage disposal. Oh and stare in awe at your beautiful new farmhouse sink! 😉
If you have any additional questions during your search for the perfect copper or fireclay sink, our Sinkologists are here to help. Contact us or follow us on Facebook, Houzz, Pinterest, or Instagram for more helpful tips and design ideas.