Copper Stamped Key Chain

Happy Spring! Each month, I try to bring you a new DIY project that I haven’t attempted myself. I enjoy sharing simple crafts that require minimal supplies, have only a few steps, and need no specific skills. This month is no exception. Initially, I planned to create DIY spoon-stamped plant markers. I gathered rose gold spoons, silver spoons, a hammer, and metal stamps. Although I had never stamped metal before, I was eager to try.
However, my first attempt was a complete failure! The spoons were too strong to stamp, and each hammer strike left only minuscule etchings. After researching, I discovered that specific metals are needed for stamping. This led me to change direction. Instead, I decided to make key chains using cute copper round metals, which are soft enough to hammer, that I found at my local craft store.
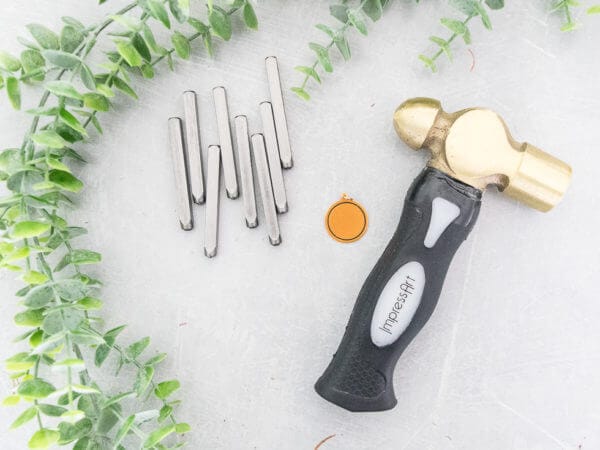
Materials Needed for a DIY Copper Key Chain
A Hammer: I used a hammer made for stamping, but I feel as though a regular hammer would do the trick.
Something to Hammer: Like I mentioned above, certain metals are going to give you a lot of trouble, so keep that in mind.
Metal Stamps: I ordered mine online for about $20, but I also saw them at my local craft store. And remember to be careful and use gloves and goggles. Don’t hammer your finger!!!
Now that I have all of my supplies, I wanted to make a cute little key chain that had the word “HOME” imprinted on it.
I taped down my metal round on a flat solid surface so that I could use the tape as a marker to keep my letters in a straight line. It also helped keep the round in place
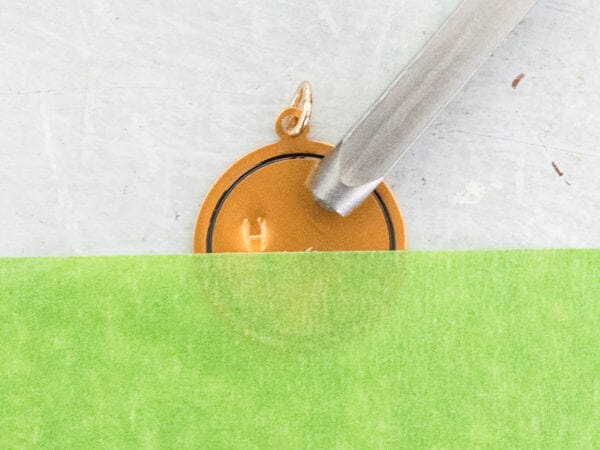
The best way to make sure each letter is right where it should be, and to also get the best strike, is to stand up over the the item you’re stamping when you strike it.
After you get your first letter stamped, it’s pretty simple from there on out. Make sure each letter is lined up and strike once with some force.
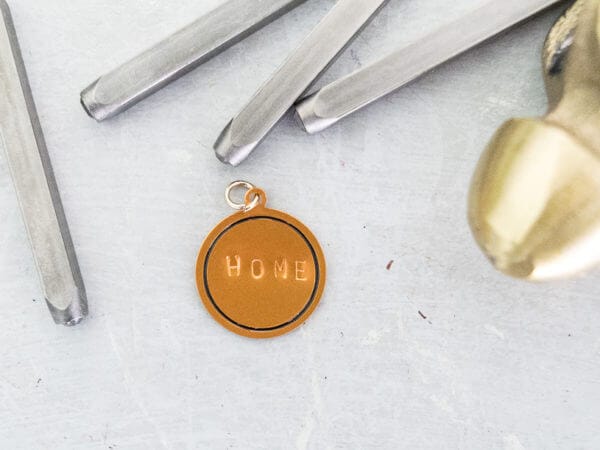
And that’s it! Wasn’t that easy? Although, my new key chain definitely has some flaws, I really don’t mind the little imperfections. I could have obsessed over getting the “HOME” perfectly straight, but I chose to embrace it. I also added a little black ink to get those letters to pop.
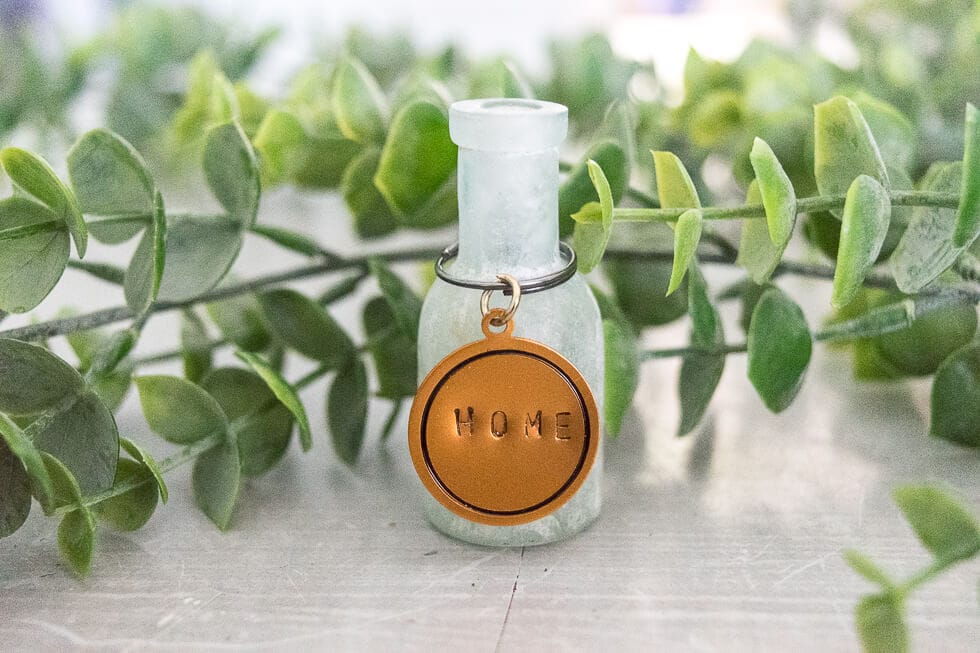
The possibilities are endless. Now that I know how to do this and I have the needed tools, I’m going to make several to put on my blue glass bottles. I’m thinking the words “LOVE”, “JOY”, and “HAPPY”. I hope you give this simple little DIY a try. Think of the gifts you could make!!!
You Might Also Like:
Home Décor DIY: Happy Fall Sign to Welcome Guests
If you have any additional questions during your search for the perfect copper, fireclay farmhouse sink or crafted stainless steel sink, our Sinkologists™ are here to help. Contact us or follow us on Facebook, Houzz, Pinterest, Instagram, or TikTok for more helpful tips and design ideas.