Merry Christmas DIY Sign
For those last-minute overachievers who have all of their shopping and wrapping done well ahead of time, I’m bringing you a simple DIY “Merry Christmas” sign. This will help put the finishing touches on your home just in time for family and friends to arrive at your doorstep. I am not a professional sign maker and I have only successfully made one other before this “Merry Christmas” sign. So, rest assured, if I can do this, you can too.
What you’ll need:
Plywood
Edging
Paint
Stain
Pencil
Stencil
Copper Sharpe
Glue/Staples/Nails
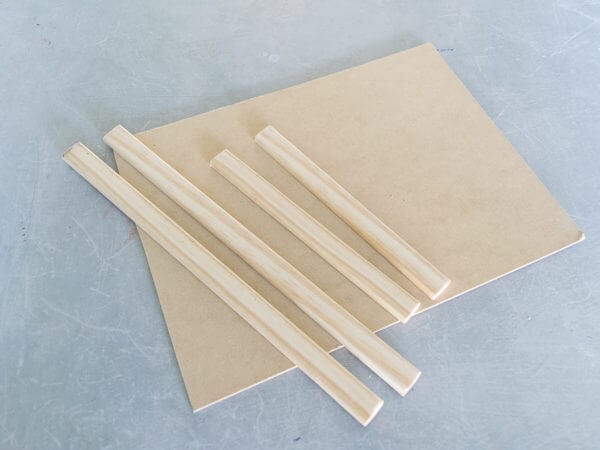
1. Cut Edging and Plywood
First, cut the plywood and edging to the size of the sign you’re setting out to make. For my sign, I cut the supplies to make an 8”x11″ sign. If you don’t have the tools to cut the wood, chances are, your local hardware store may be able to cut it for you. Additionally, make sure to measure carefully to ensure the pieces fit together perfectly.

2. Paint and Stain
The second step is to paint and stain your supplies. Paint the plywood whatever color you would like your sign to be. I chose white paint because of it’s neutrality. While the paint is drying, stain the edging. I used a dark walnut stain color.
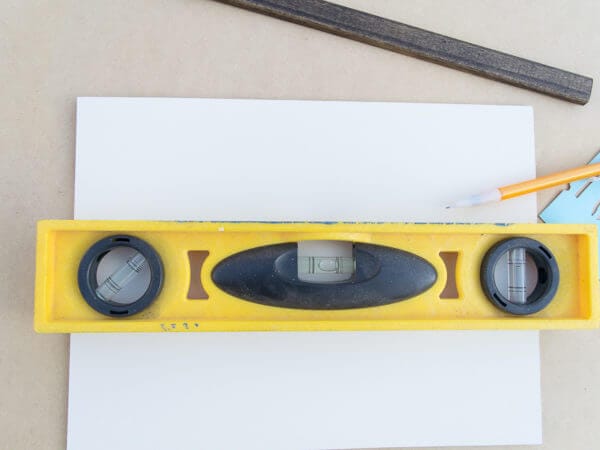
3. Base Line
The next step, and possibly the most crucial, is to draw a base line to show you where to start each stencil. The last thing you want is a crooked sign. If you’re like me, and you can’t draw a straight line to save your life, make sure you use some sort of ruler. Draw the line very faint so that you can easily erase and paint over the line when you’re done.
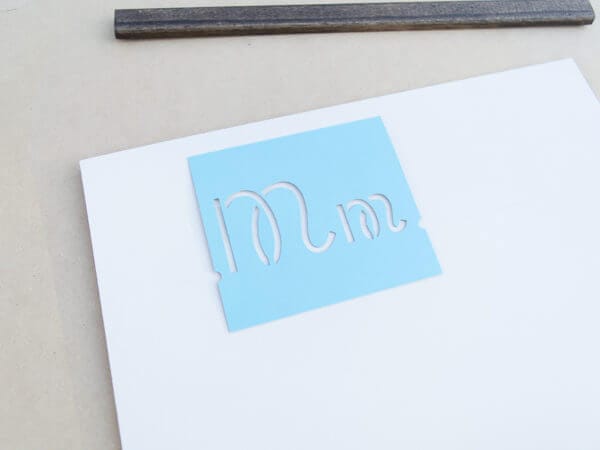
4. Stencil Time
I was able to easily find stencils at my local craft store. These particular stencils are an inch or two tall. I’m making a small 8″x11″ sign, so these stencils are the perfect size. Instead of paint, I used a copper-colored Sharpe to fill in the stencil. Using a Sharpe helped limit the bleed through.
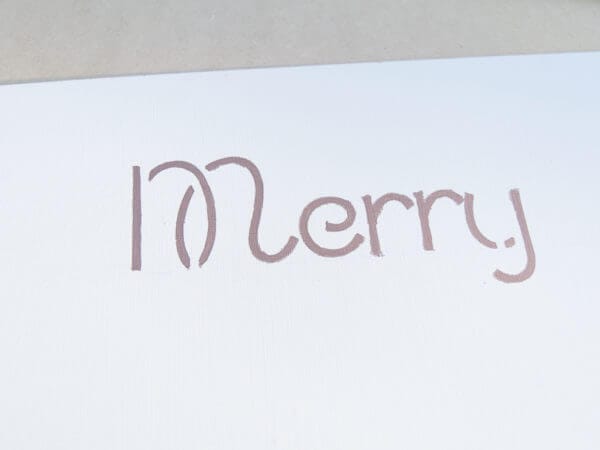
5. Touch Up
Once the stenciling is done, the sign will most likely have a few areas that might need a little paint touch up. Use a small craft paint brush and go very slowly around each letter to smooth it out.
Before I could glue on the edging, there was one last step. Because I rarely ever do things right the first time, I had to cut the right side of the plywood about a half of an inch and also sand a little bit off of the right side edging to make the “Merry Christmas” completely center.

6. Glue
Next, glue on the edging. I used wood glue and it worked perfectly. Also, to add a little more character, I distressed the entire sign so that it would look a little worn and not so perfect.
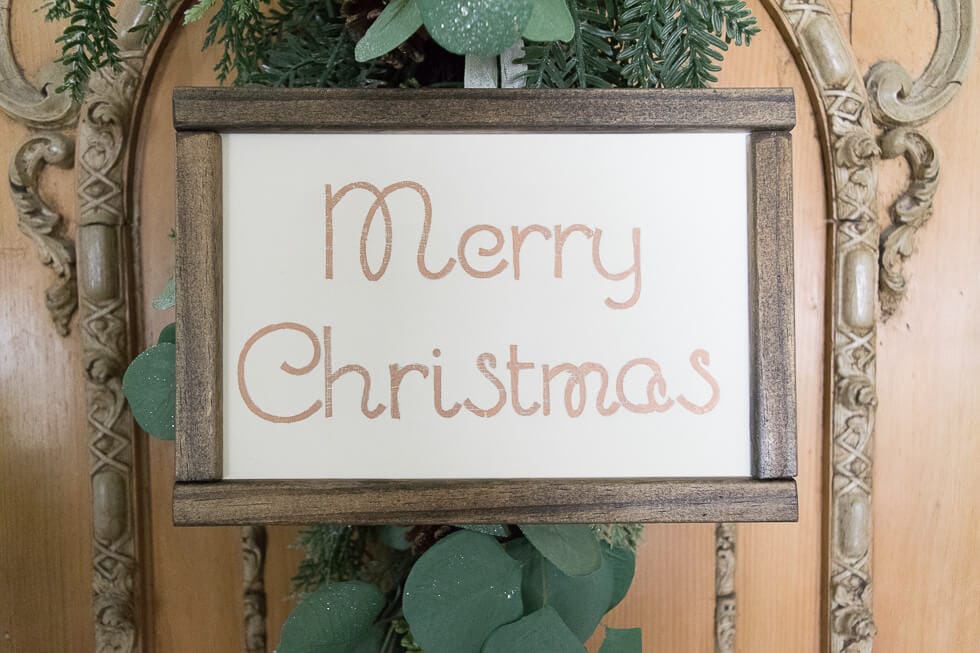
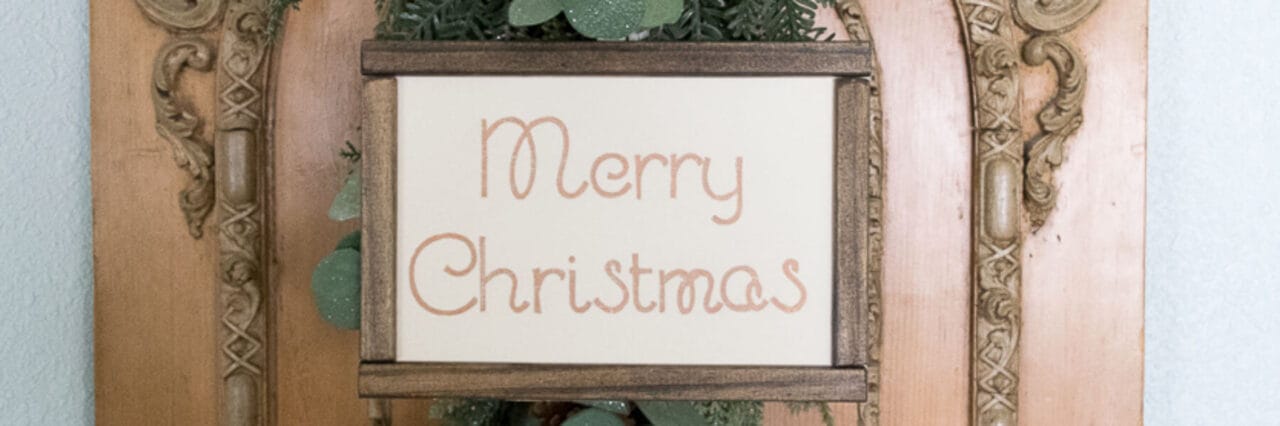
Merry Christmas DIY Sign
Here it is! I love the copper lettering, white background, and dark-stained edges. I hung my new “Merry Christmas” sign on one of my antique doors with a little Christmas greenery in the background. Additionally, I love the way it turned out. It’s the perfect little touch of DIY holiday cheer for my home.
I love this little DIY Merry Christmas sign so much that I think I’m going to make another one! I have an identical antique door on the other side of my buffet that is now calling for some holiday cheer.
You Might Also Like:
Christmas Morning Country Breakfast Bread Pudding (in a jar)
If you have any additional questions during your search for the perfect copper, fireclay farmhouse sink or crafted stainless steel sink, our Sinkologists™ are here to help. Contact us or follow us on Facebook, Houzz, Pinterest, Instagram, or TikTok for more helpful tips and design ideas.