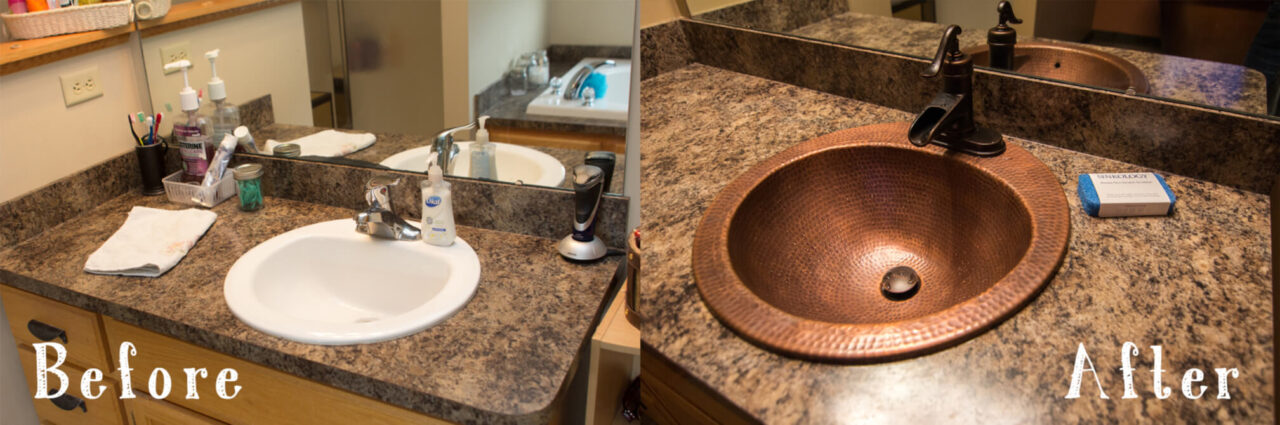
How to Replace a Copper Bathroom Sink: The Bell Drop-In Copper Sink

Replacing a drop-in sink in your bathroom can seem like a difficult job, but with Sinkology, it can be quite simple. We have designed our products to, not only be highly functional, beautiful, and long-lasting, but also to be easy to replace with the right tools and the right instructions.
We recently had one of our Sinkology professional plumbers replace an old porcelain bathroom sink with a drop-in copper sink. To help demonstrate the proper steps and provide useful tips for easy installation, we documented the process through video.
In this video, we installed:
- The Bell Drop-In Bathroom Copper Sink
- The Ashfield Centerset Rustic Bronze Faucet from Pfister
- A Rustic Bronze Pop-Up Overflow Drain
- Sinkology Installation Kit (including caulk gun, clear and copper colored silicone, and cleaning cloth)
The tools you will need include:
- Painter’s tape
- Plumber’s putty
- Plumber’s tape
- A putty knife or razor blade (to cut old caulk)
- Adjustable wrench
- Silicone tube (clear or copper colored)
- Caulk gun
- Bucket or water receptacle
Before getting started, turn off the power, shut off the water, and unplug any nearby electronics.
Pro tip: Because your new copper sink is metal, it can have fine edges (particularly around the drain and rim). If you plan on placing the copper sink on the floor during the transition, make sure to protect your flooring with an old blanket or towel.
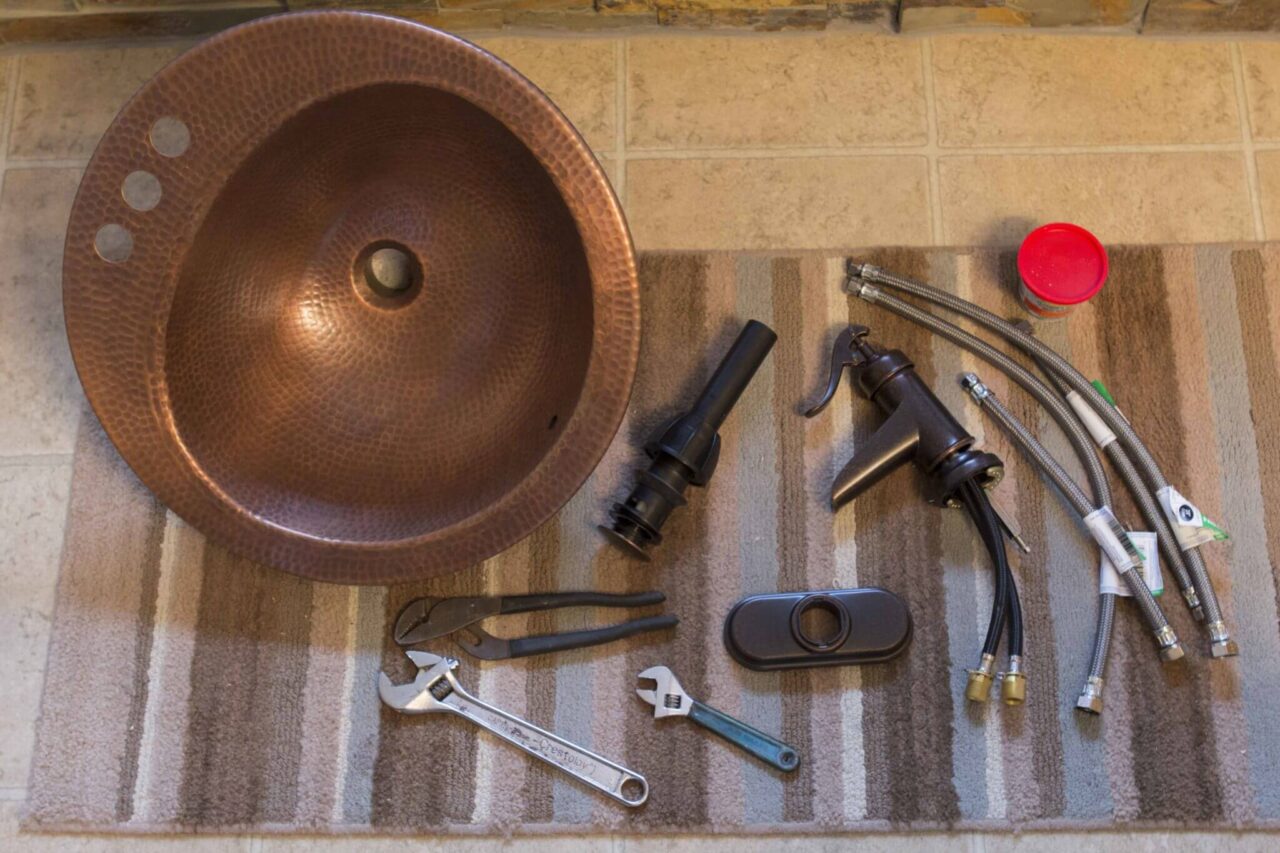
- 1. Gather the products being installed and the tools you will need.
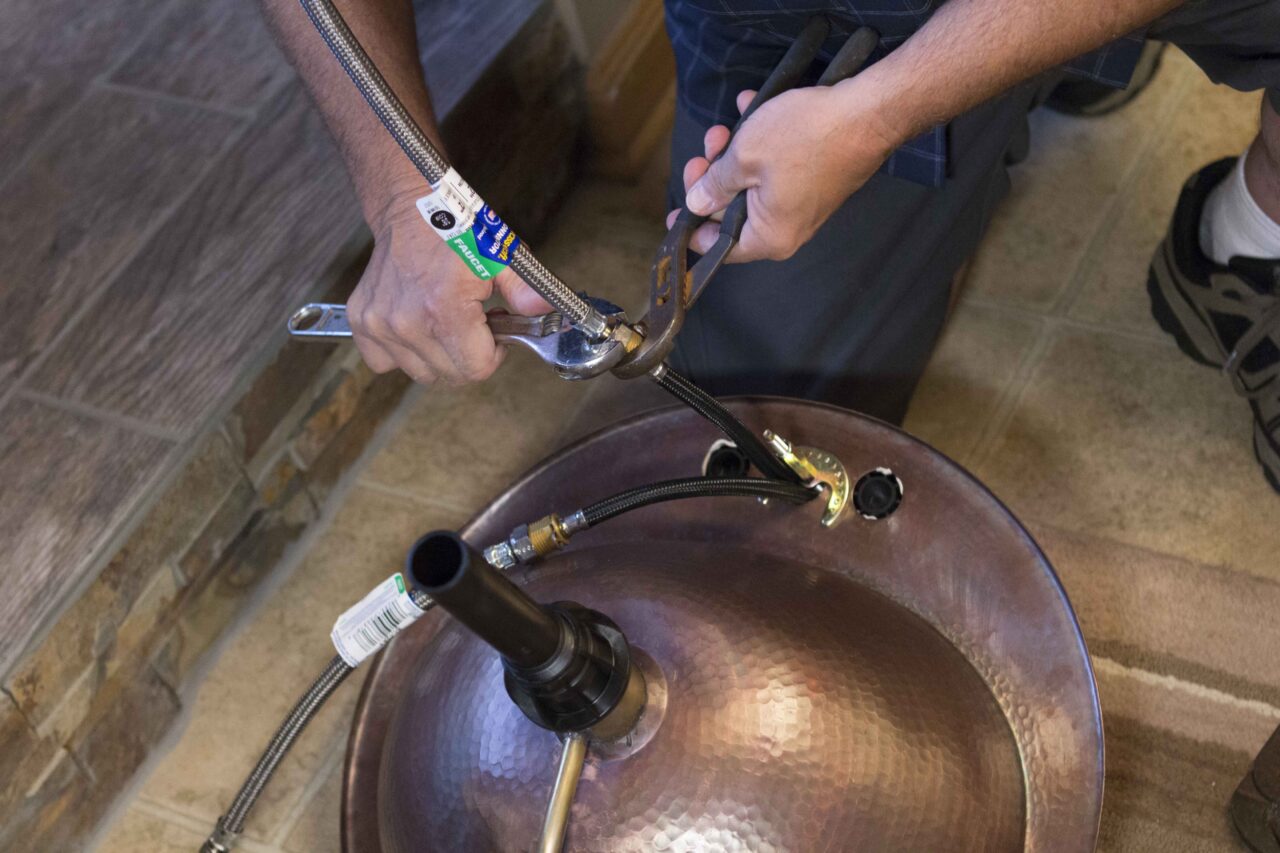
- 2. Turn off the water to the sink and detach water lines.
- 3. Detach the drainpipes from the sink.

Pro-tip: Use a bucket or old coffee container to catch any leftover water in the lines or drainpipes.

- 4. Cut the existing caulking around the sink – taking care not to scratch the countertops.
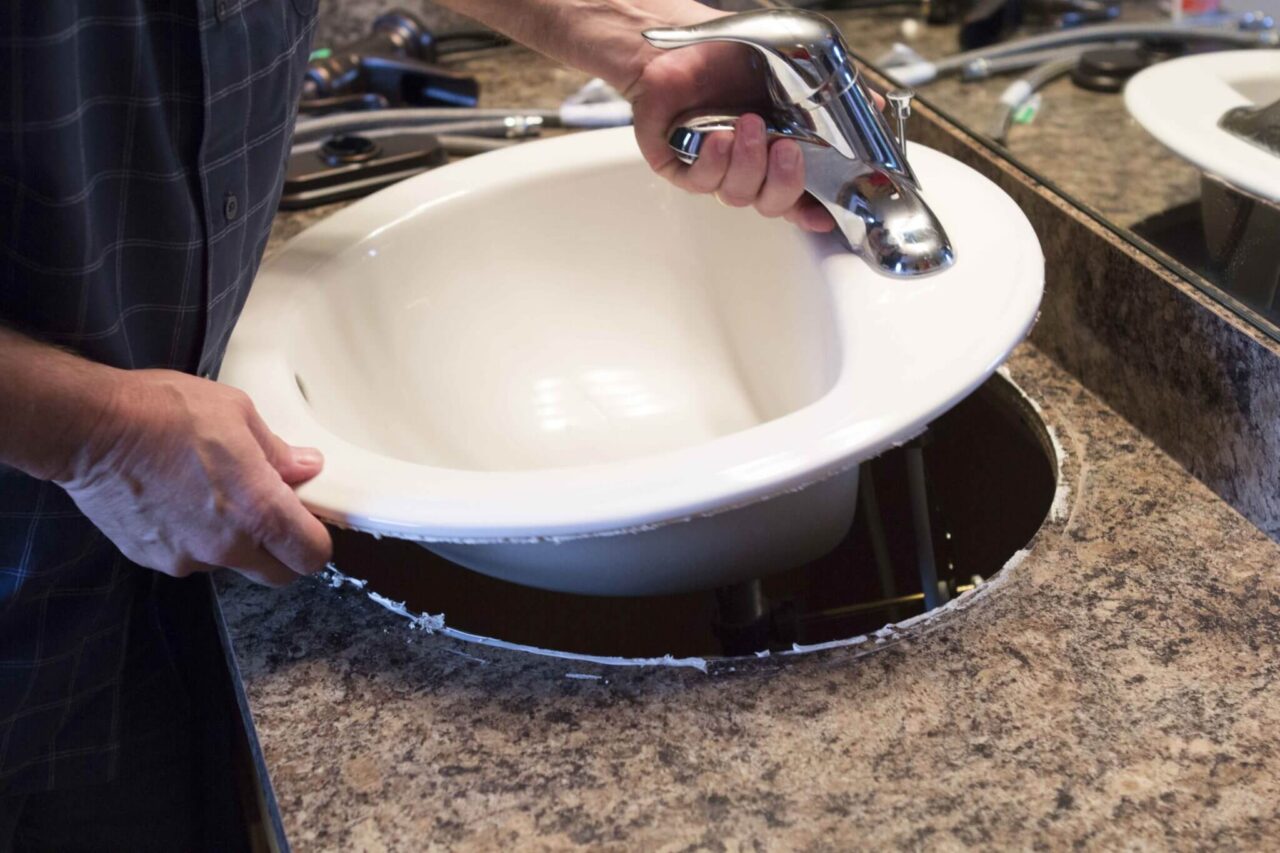
- 5. Remove the old sink and faucet from the counter.
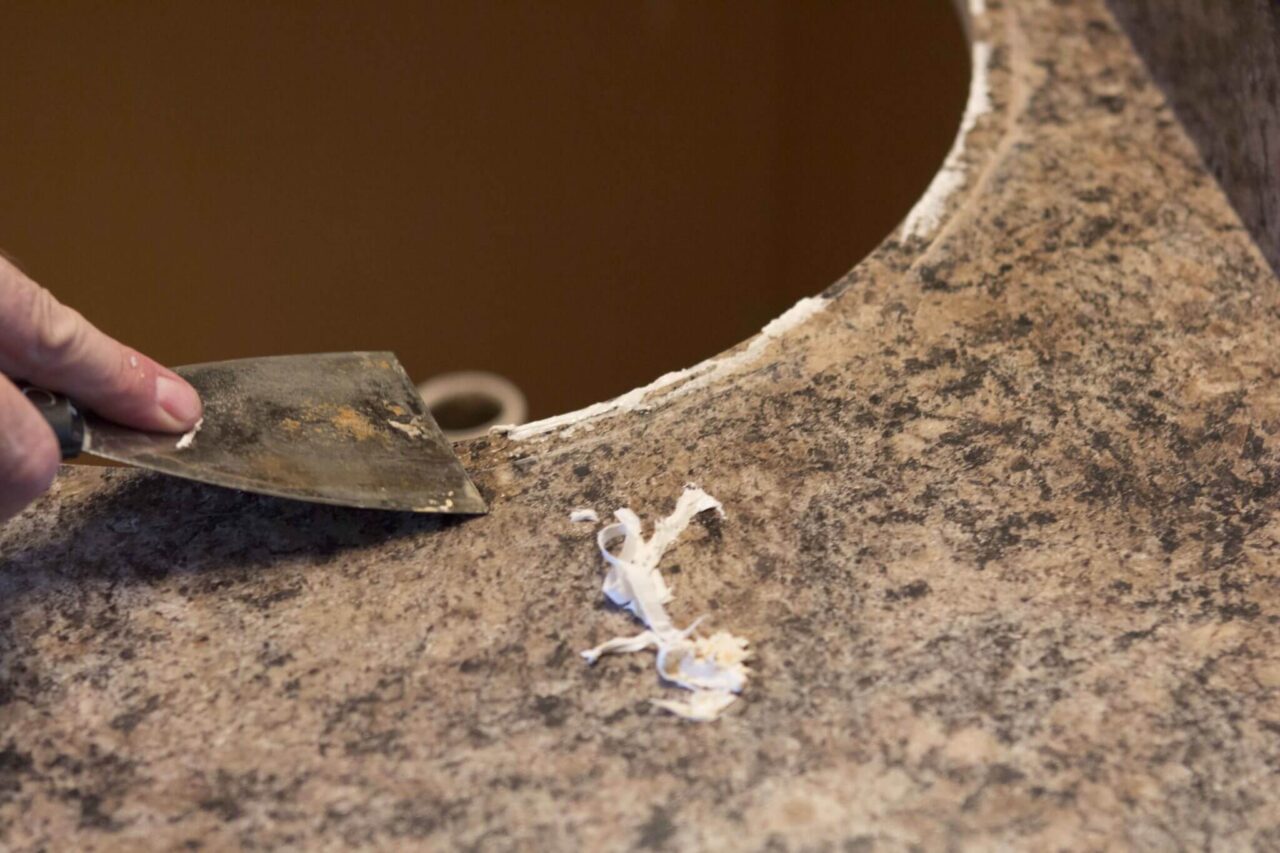
- 6. Scrape the remaining caulk from the countertop surface. Take care not to scratch your countertops. Clean thoroughly. Let the countertop dry.
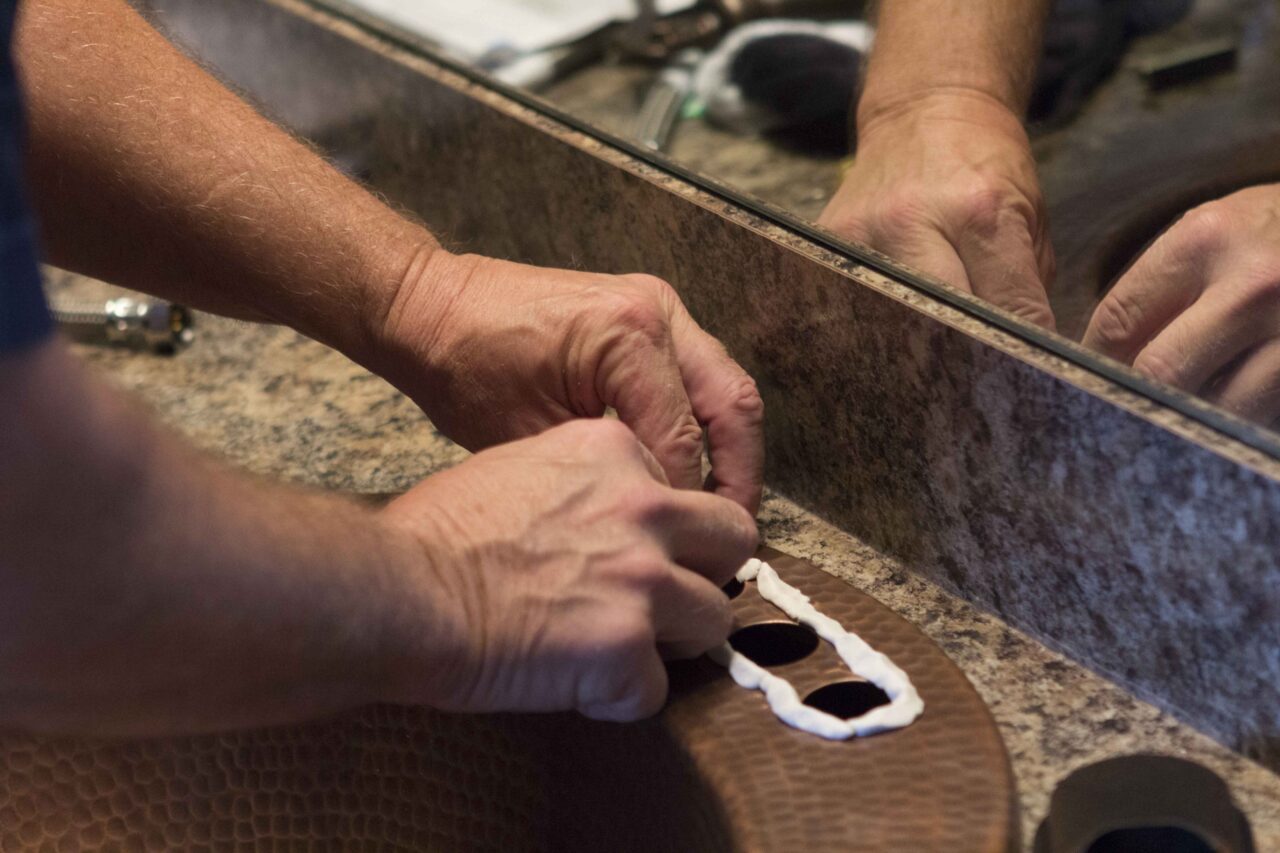
- 7. Install the overflow drain into the copper sink. It’s typically easier to complete this step by attaching the drain before the copper sink is installed into the countertop.
- 8. Place plumber’s putty around the faucet holes, then install the faucet to the copper sink’s faucet deck. Remove excess plumber’s putty. I may be easier to complete this step by temporarily dropping the sink into the countertop until the putty sets.
- 9. Add new water lines to the faucet. Again, this step is typically easier if the faucet is attached to the sink before it is installed into the countertop.
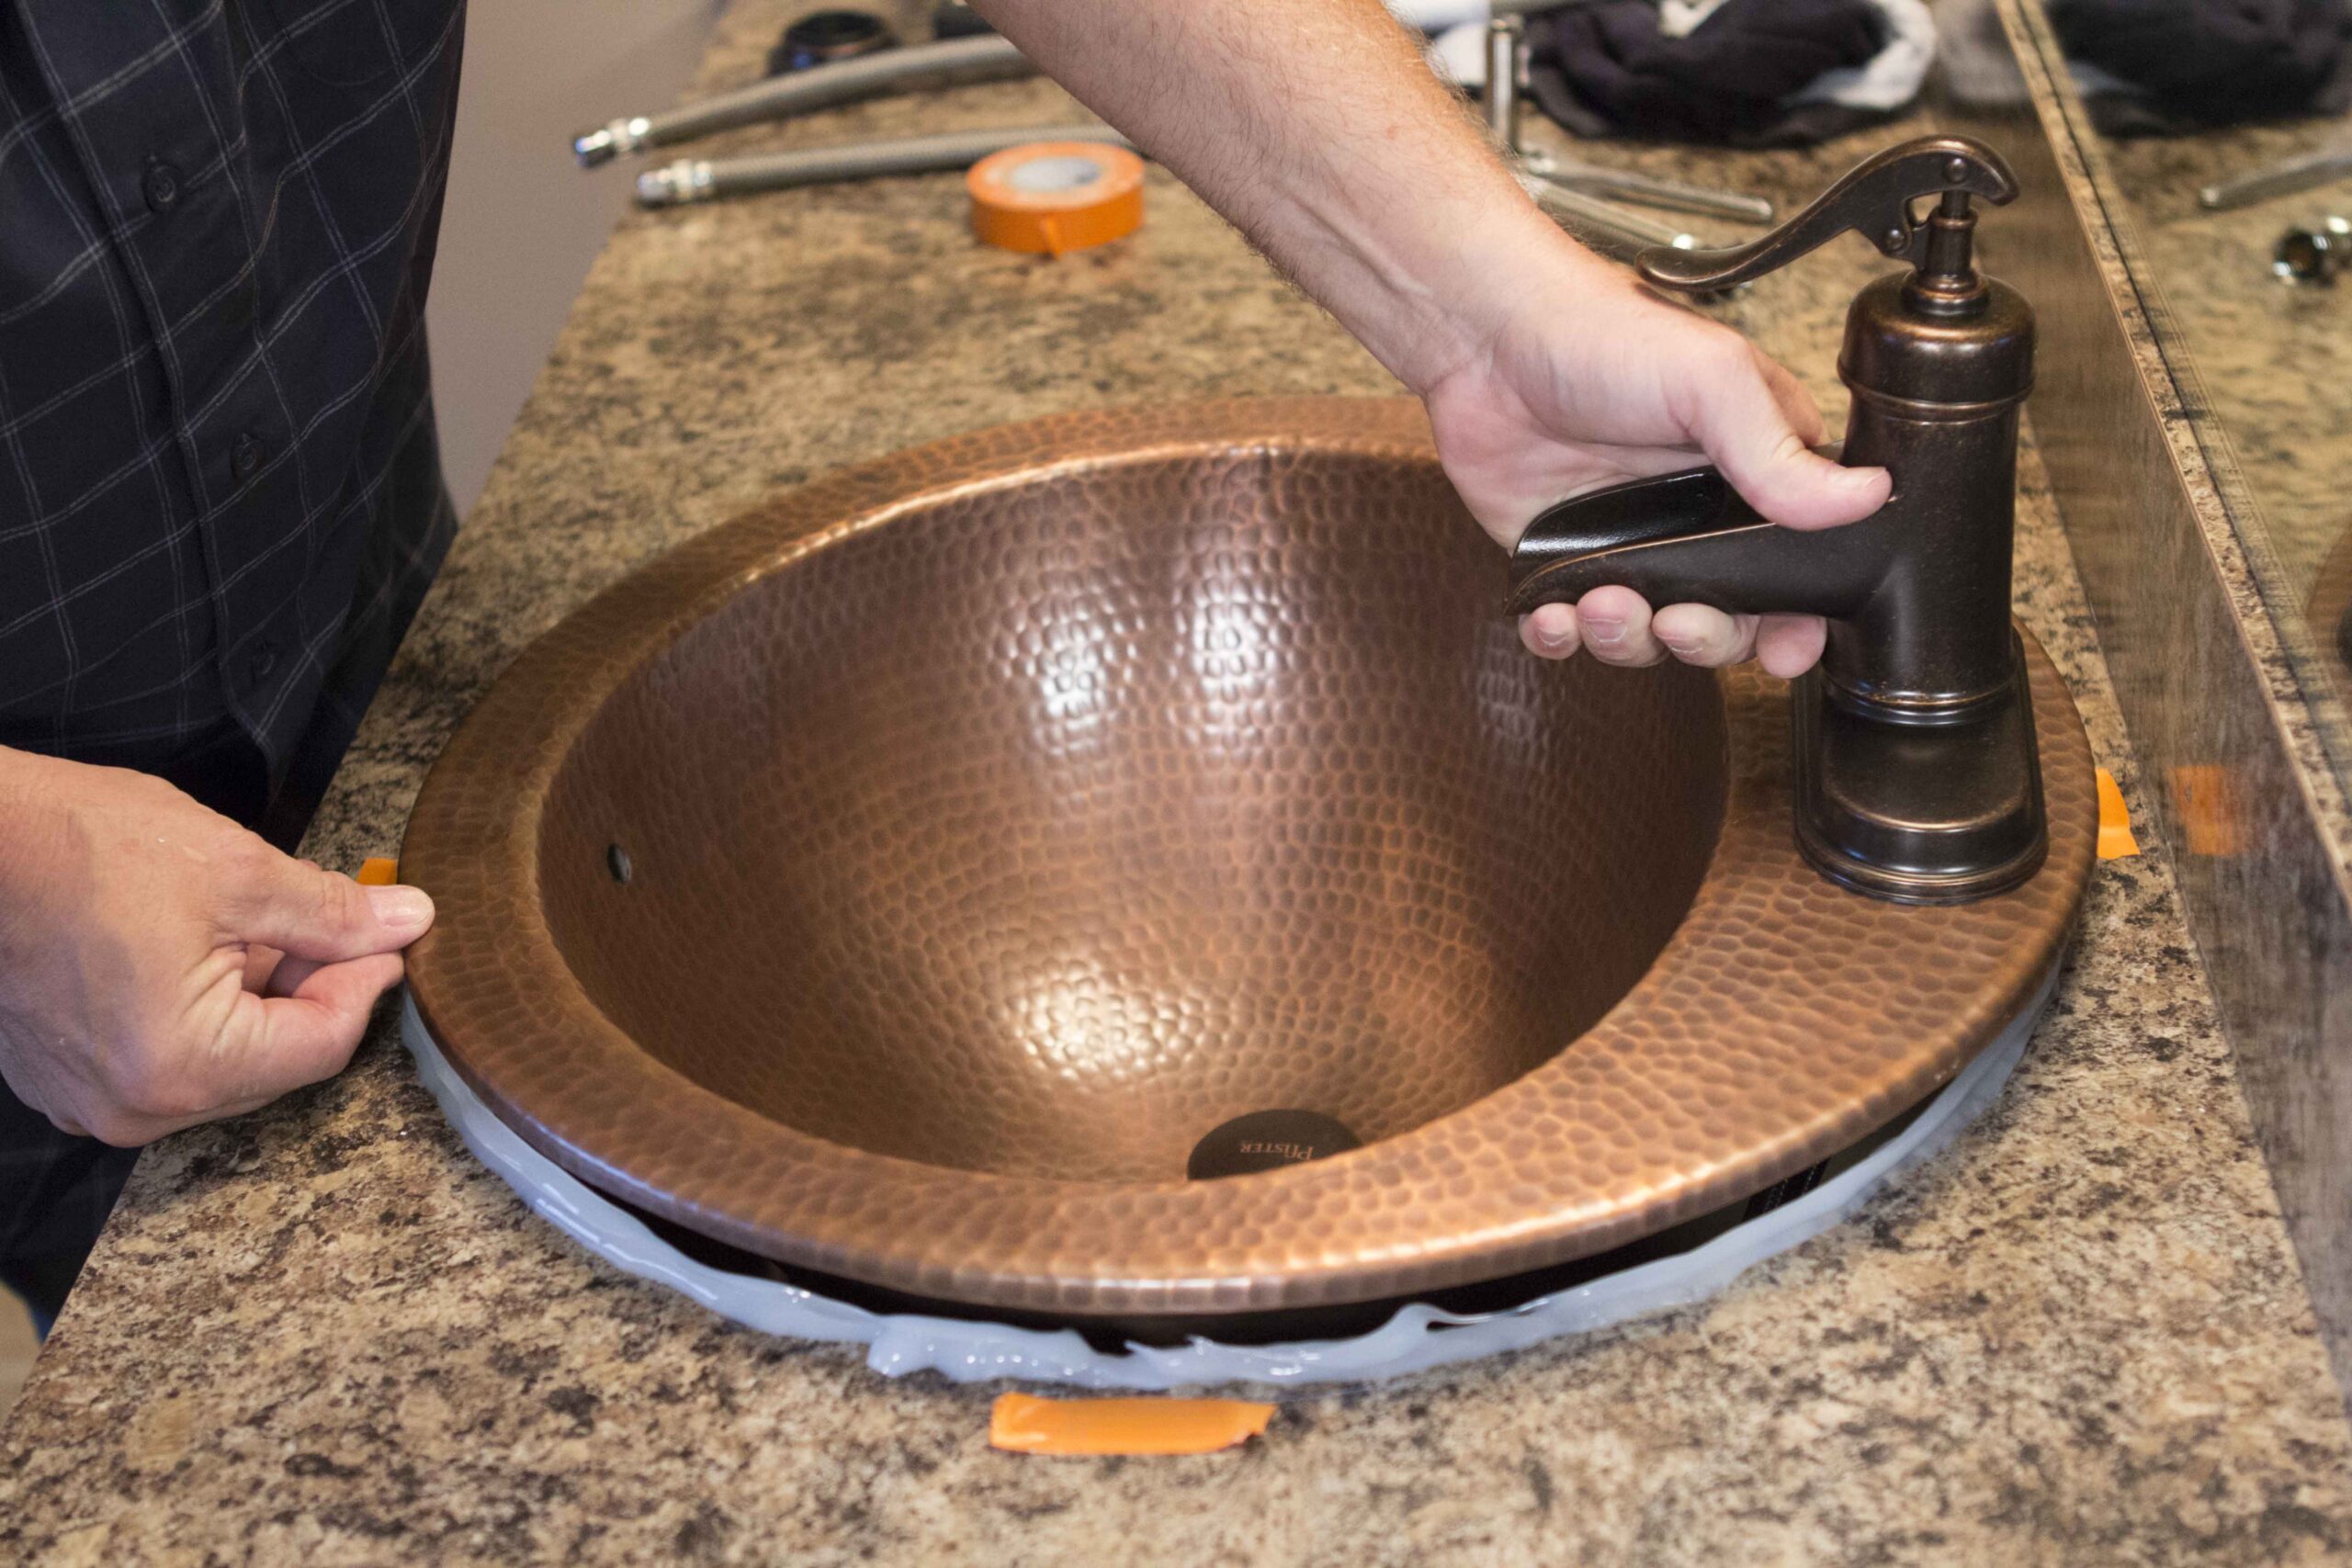
- 10. Center the sink in the countertop hole and mark the edges of drop-in rim. Once marked, remove the sink from the countertop.
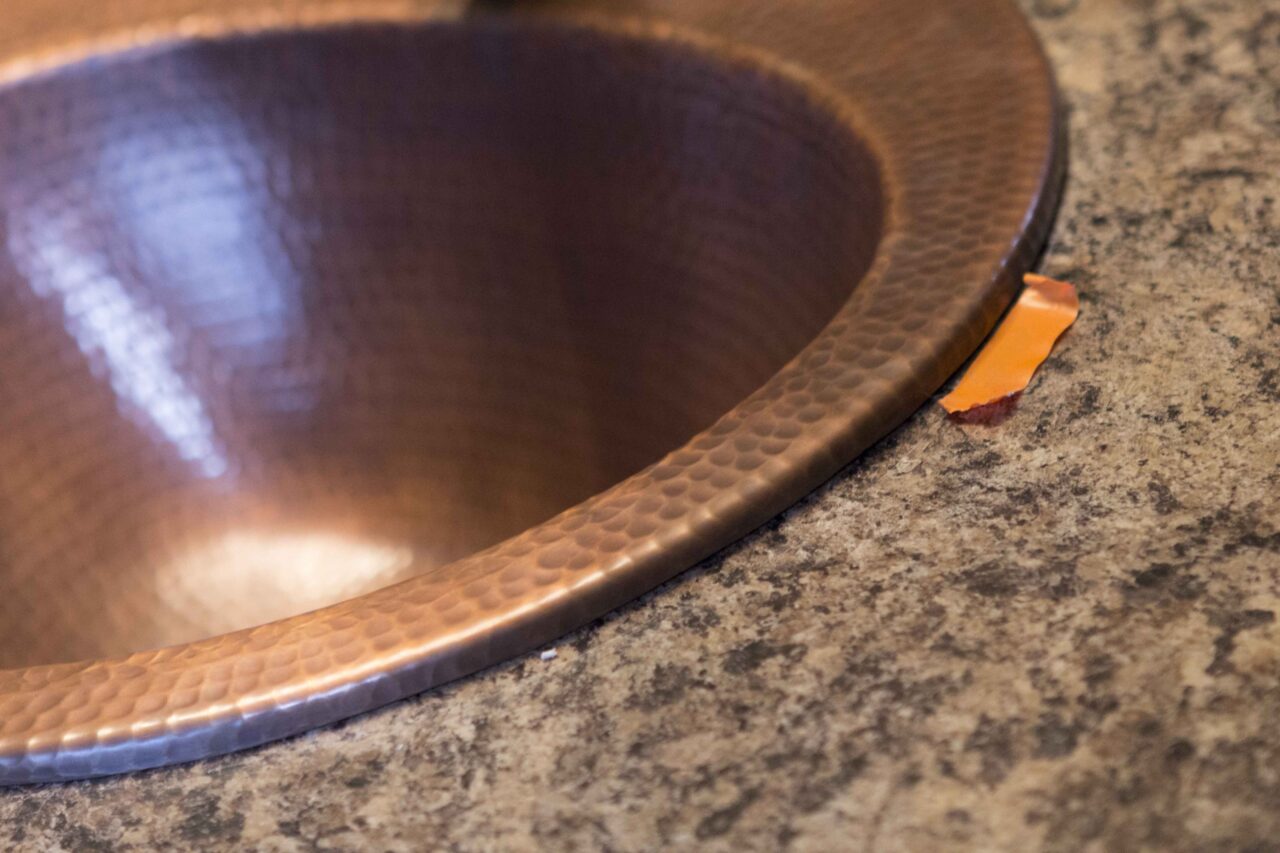
Pro-tip: Painter’s tape is a great no-mess way to mark your sink edges.
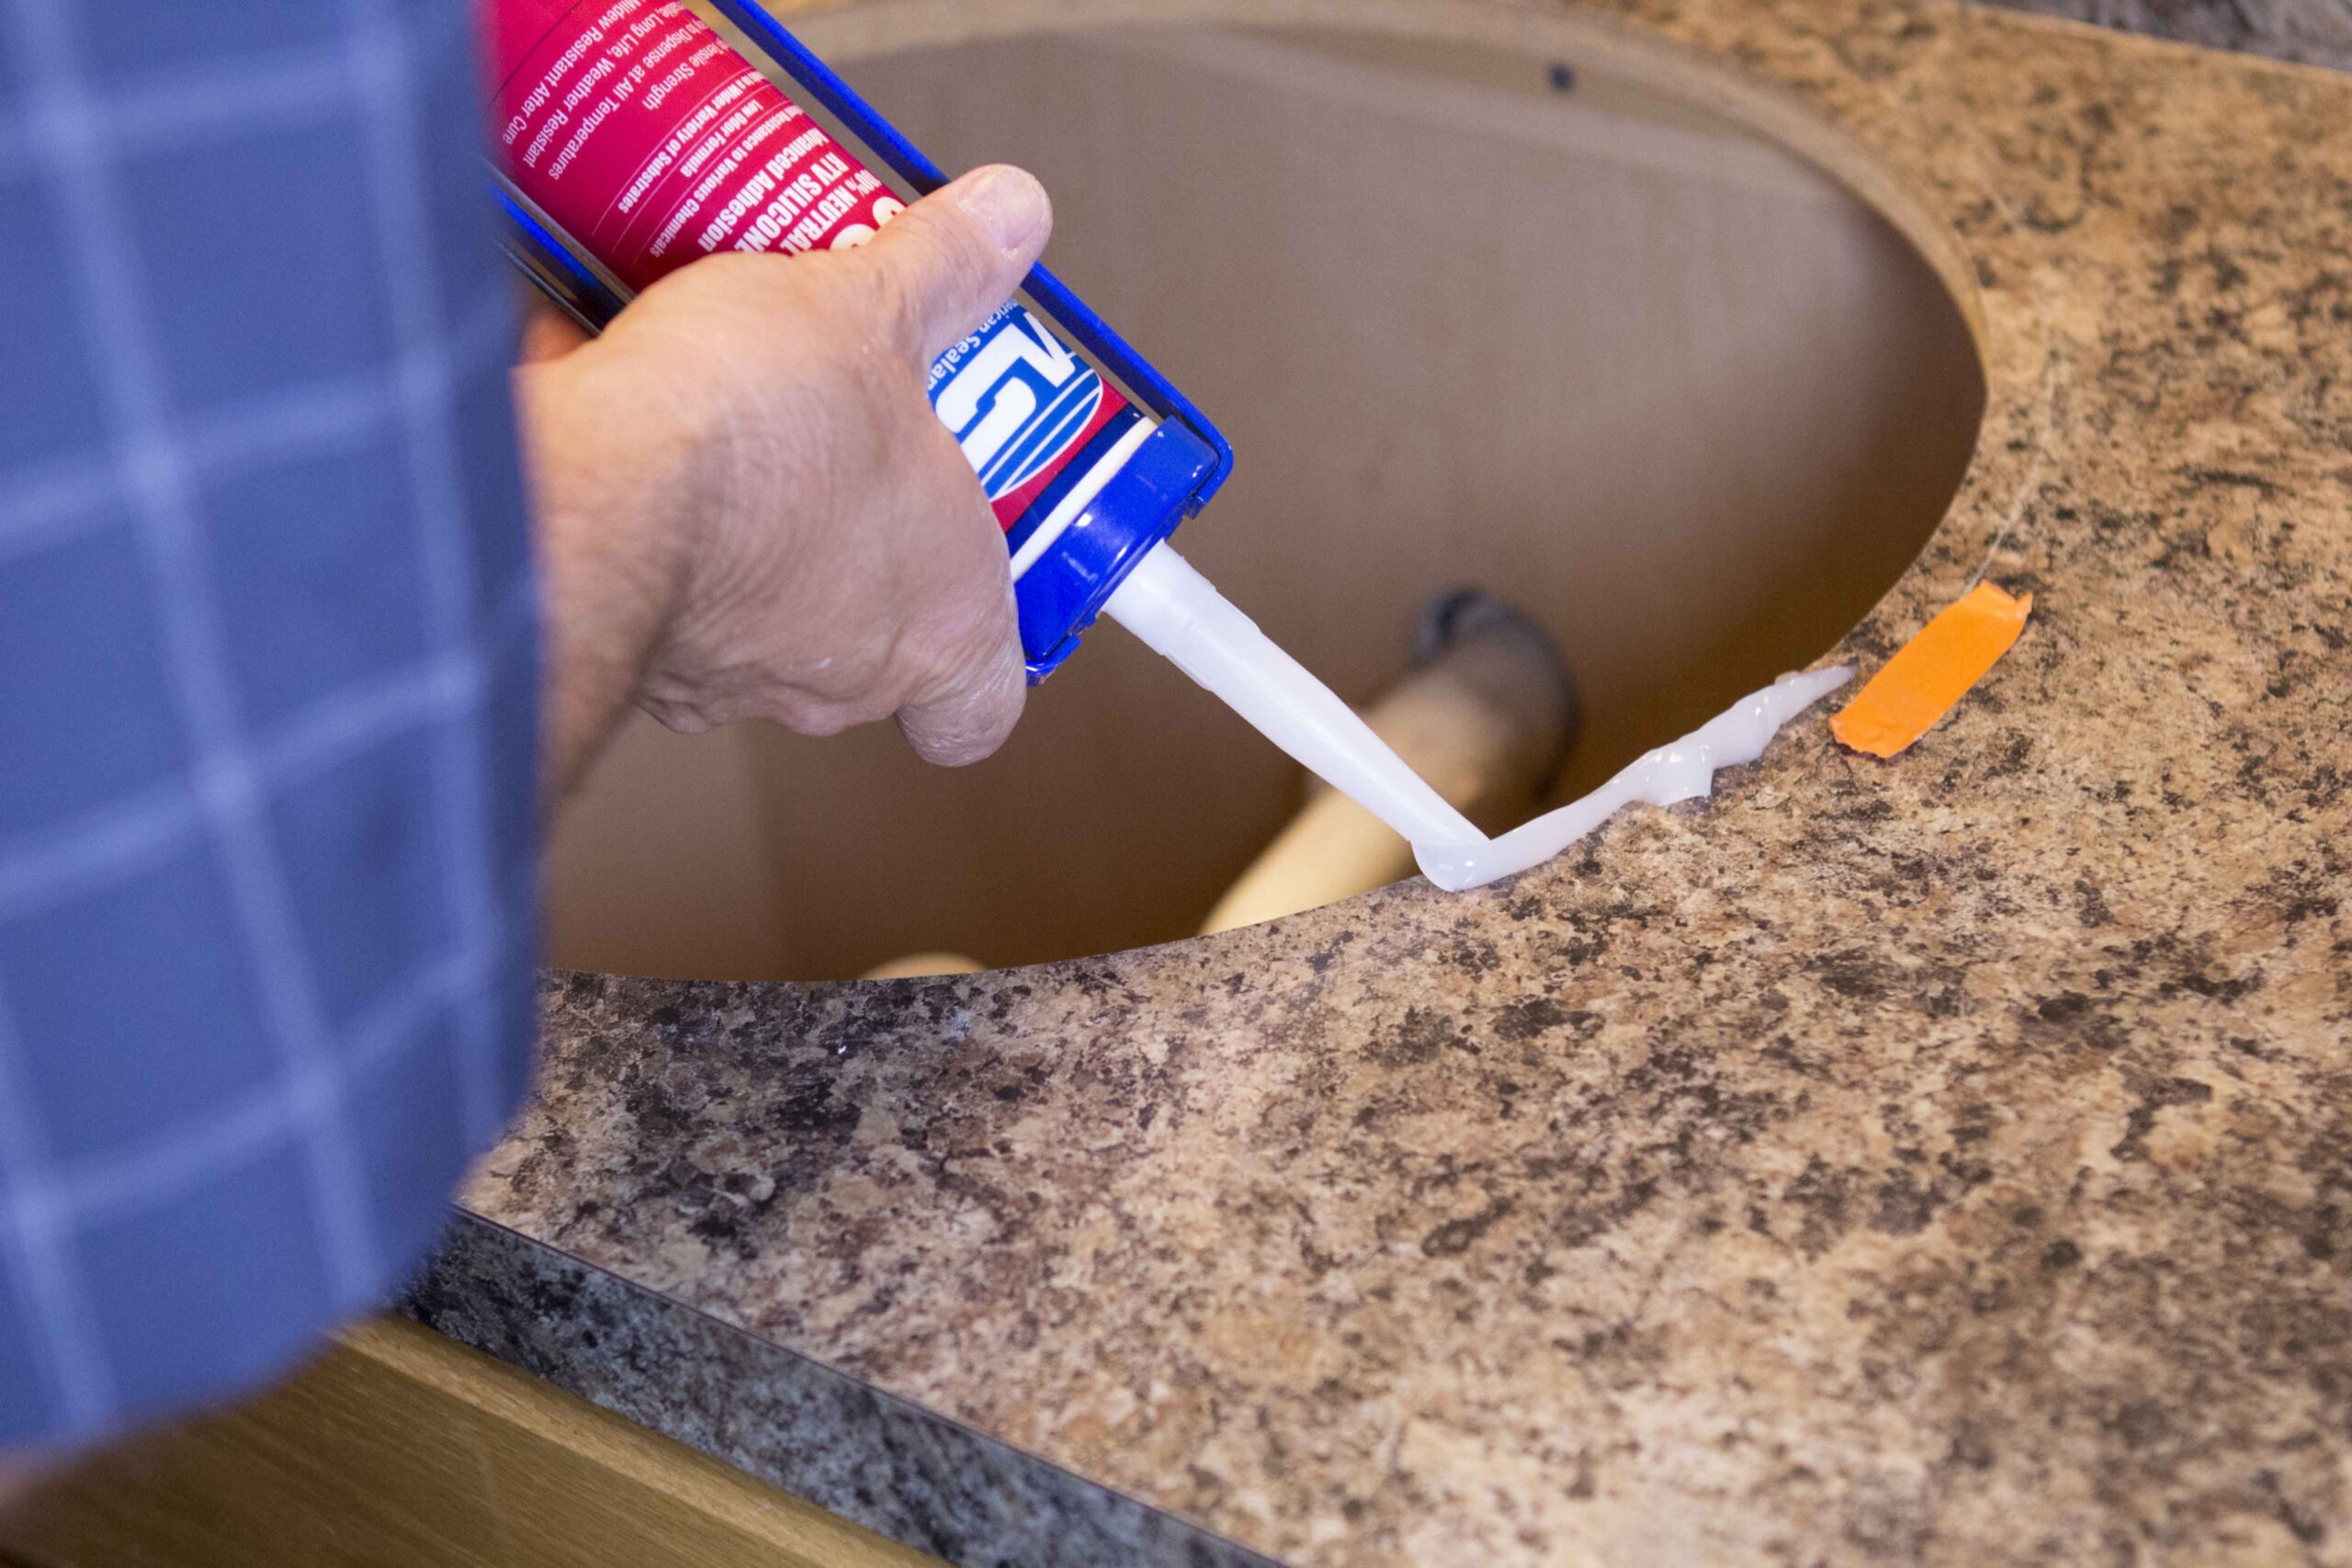
- 11. Caulk the circumference of the copper sink on the inside of the marked edges.
- 12. Carefully drop the copper sink into the hole in the countertop taking care to align the inside of the rim edge with your caulking. Allow the caulking time to set.
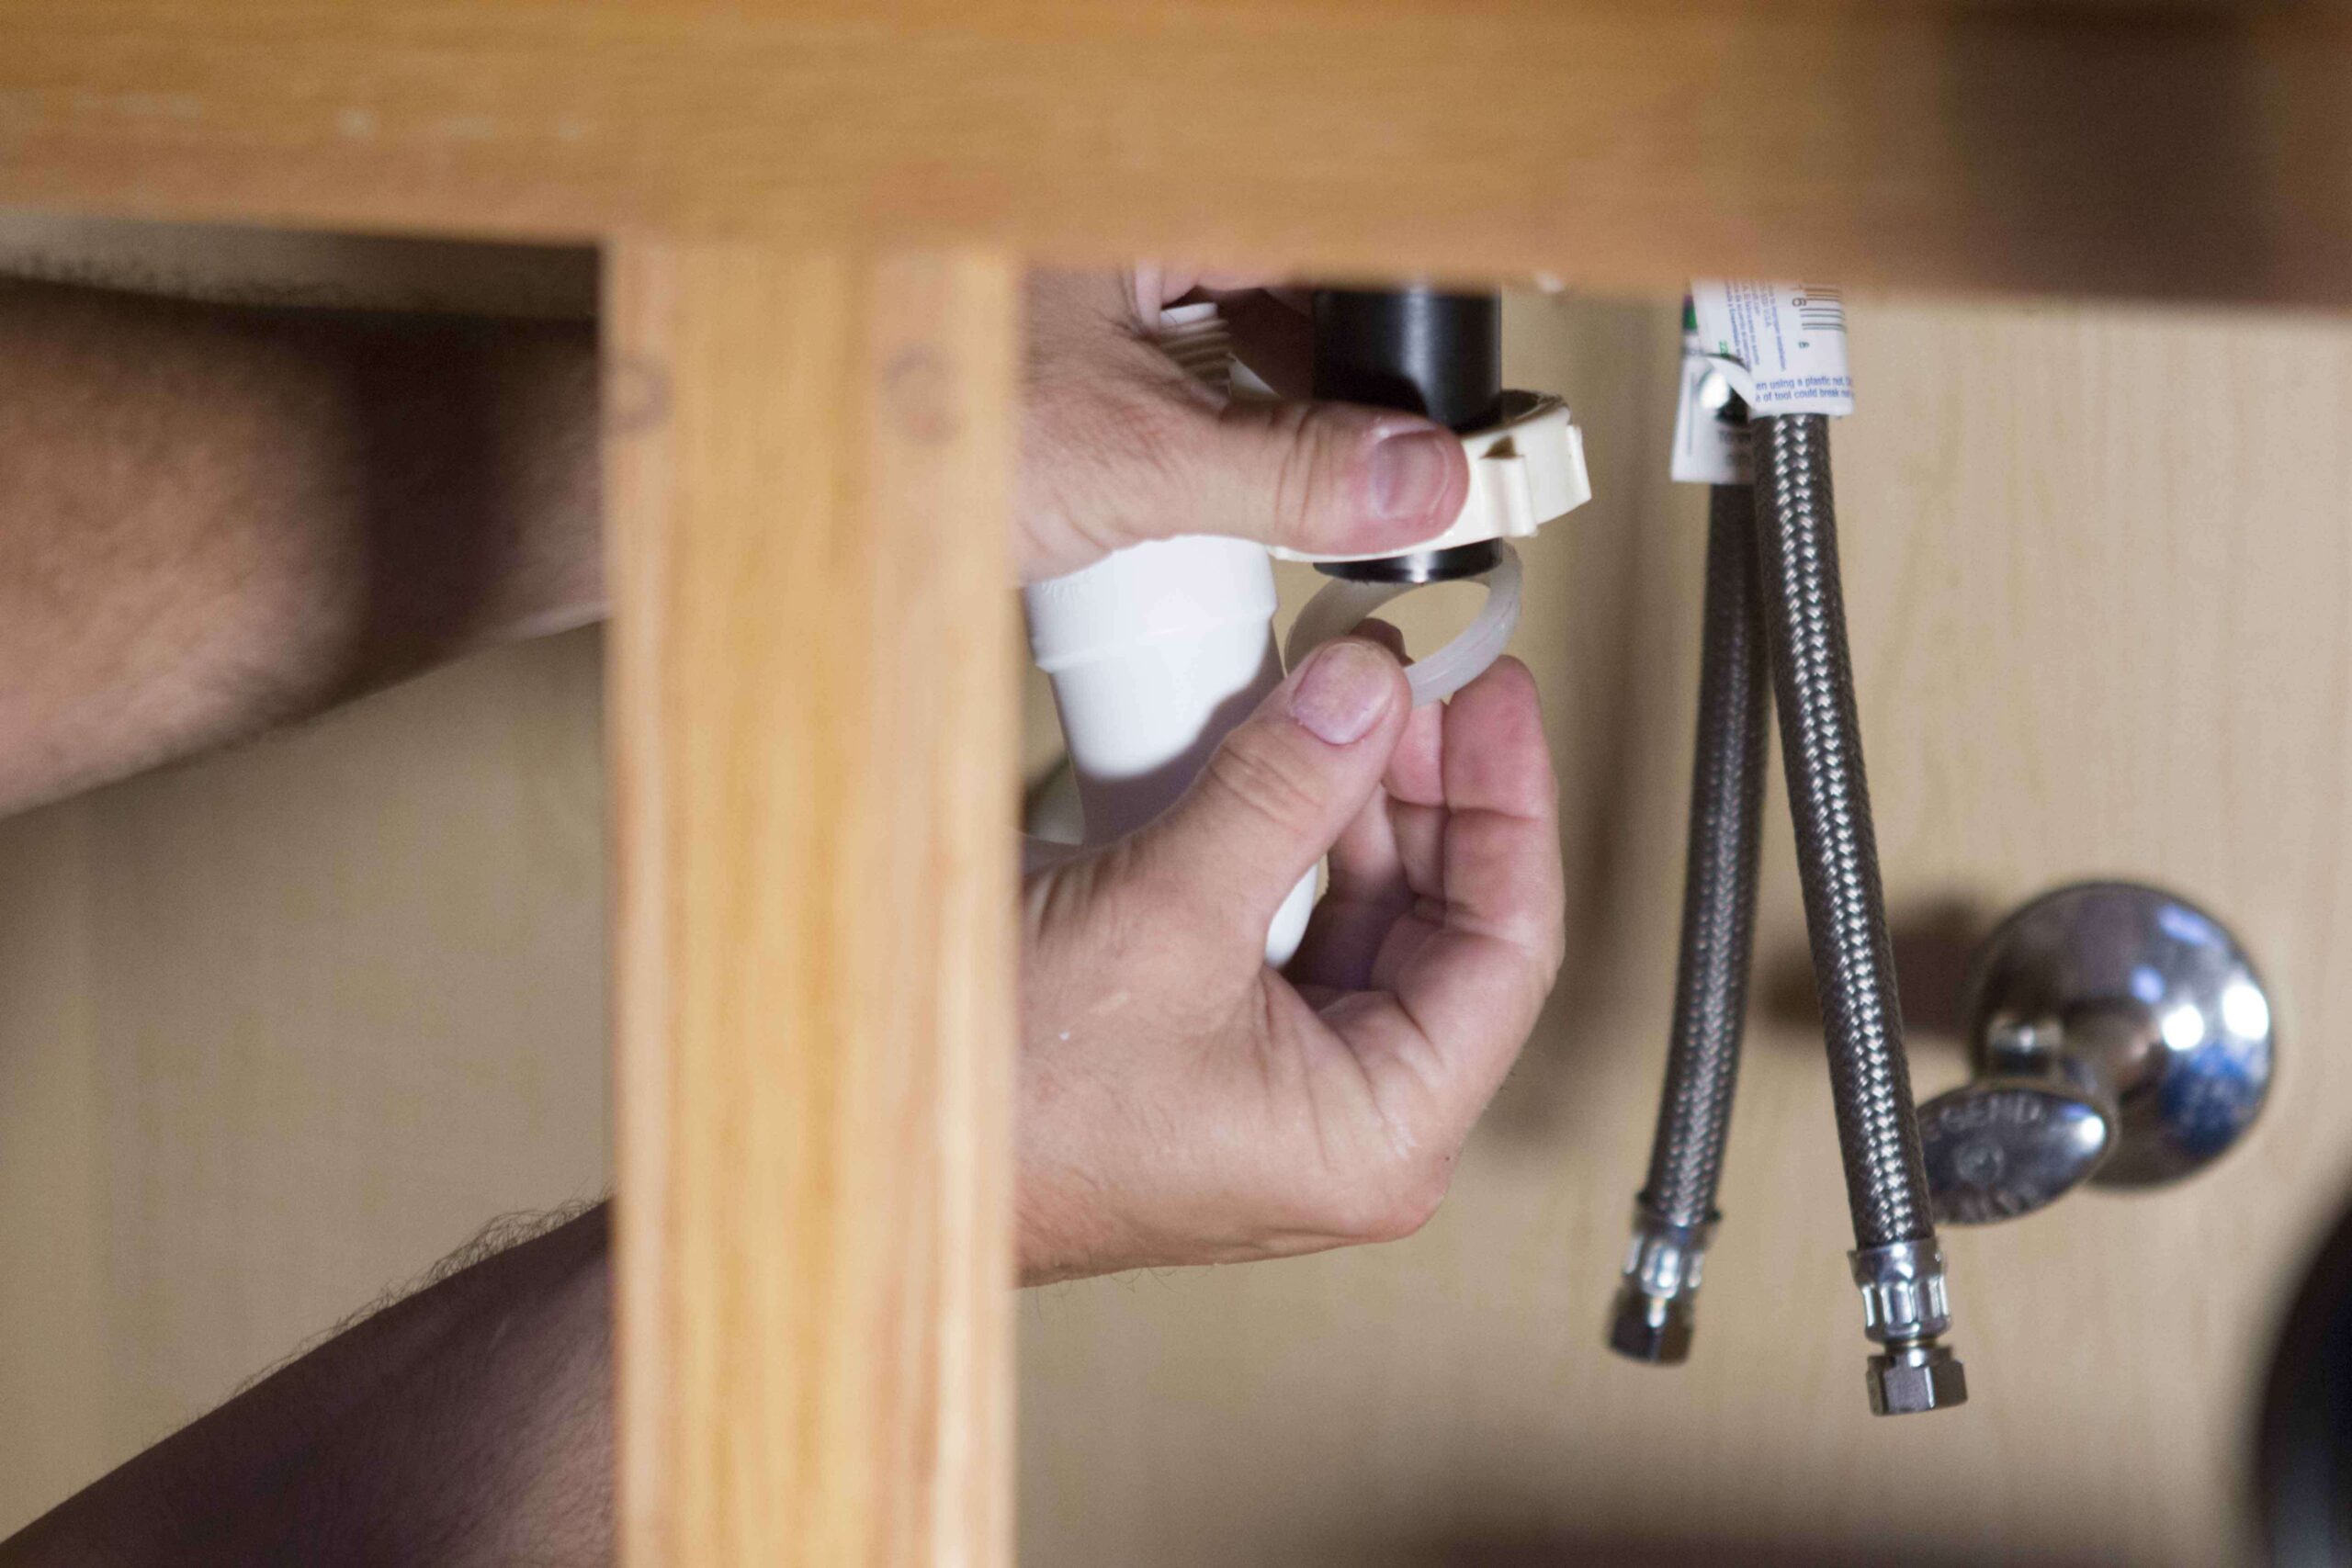
- 13. Attach the sink drain to the drainpipe under the sink.
- 14. Attach the water lines.
- 15. Turn on the sink and check the drain and water lines for leakage.
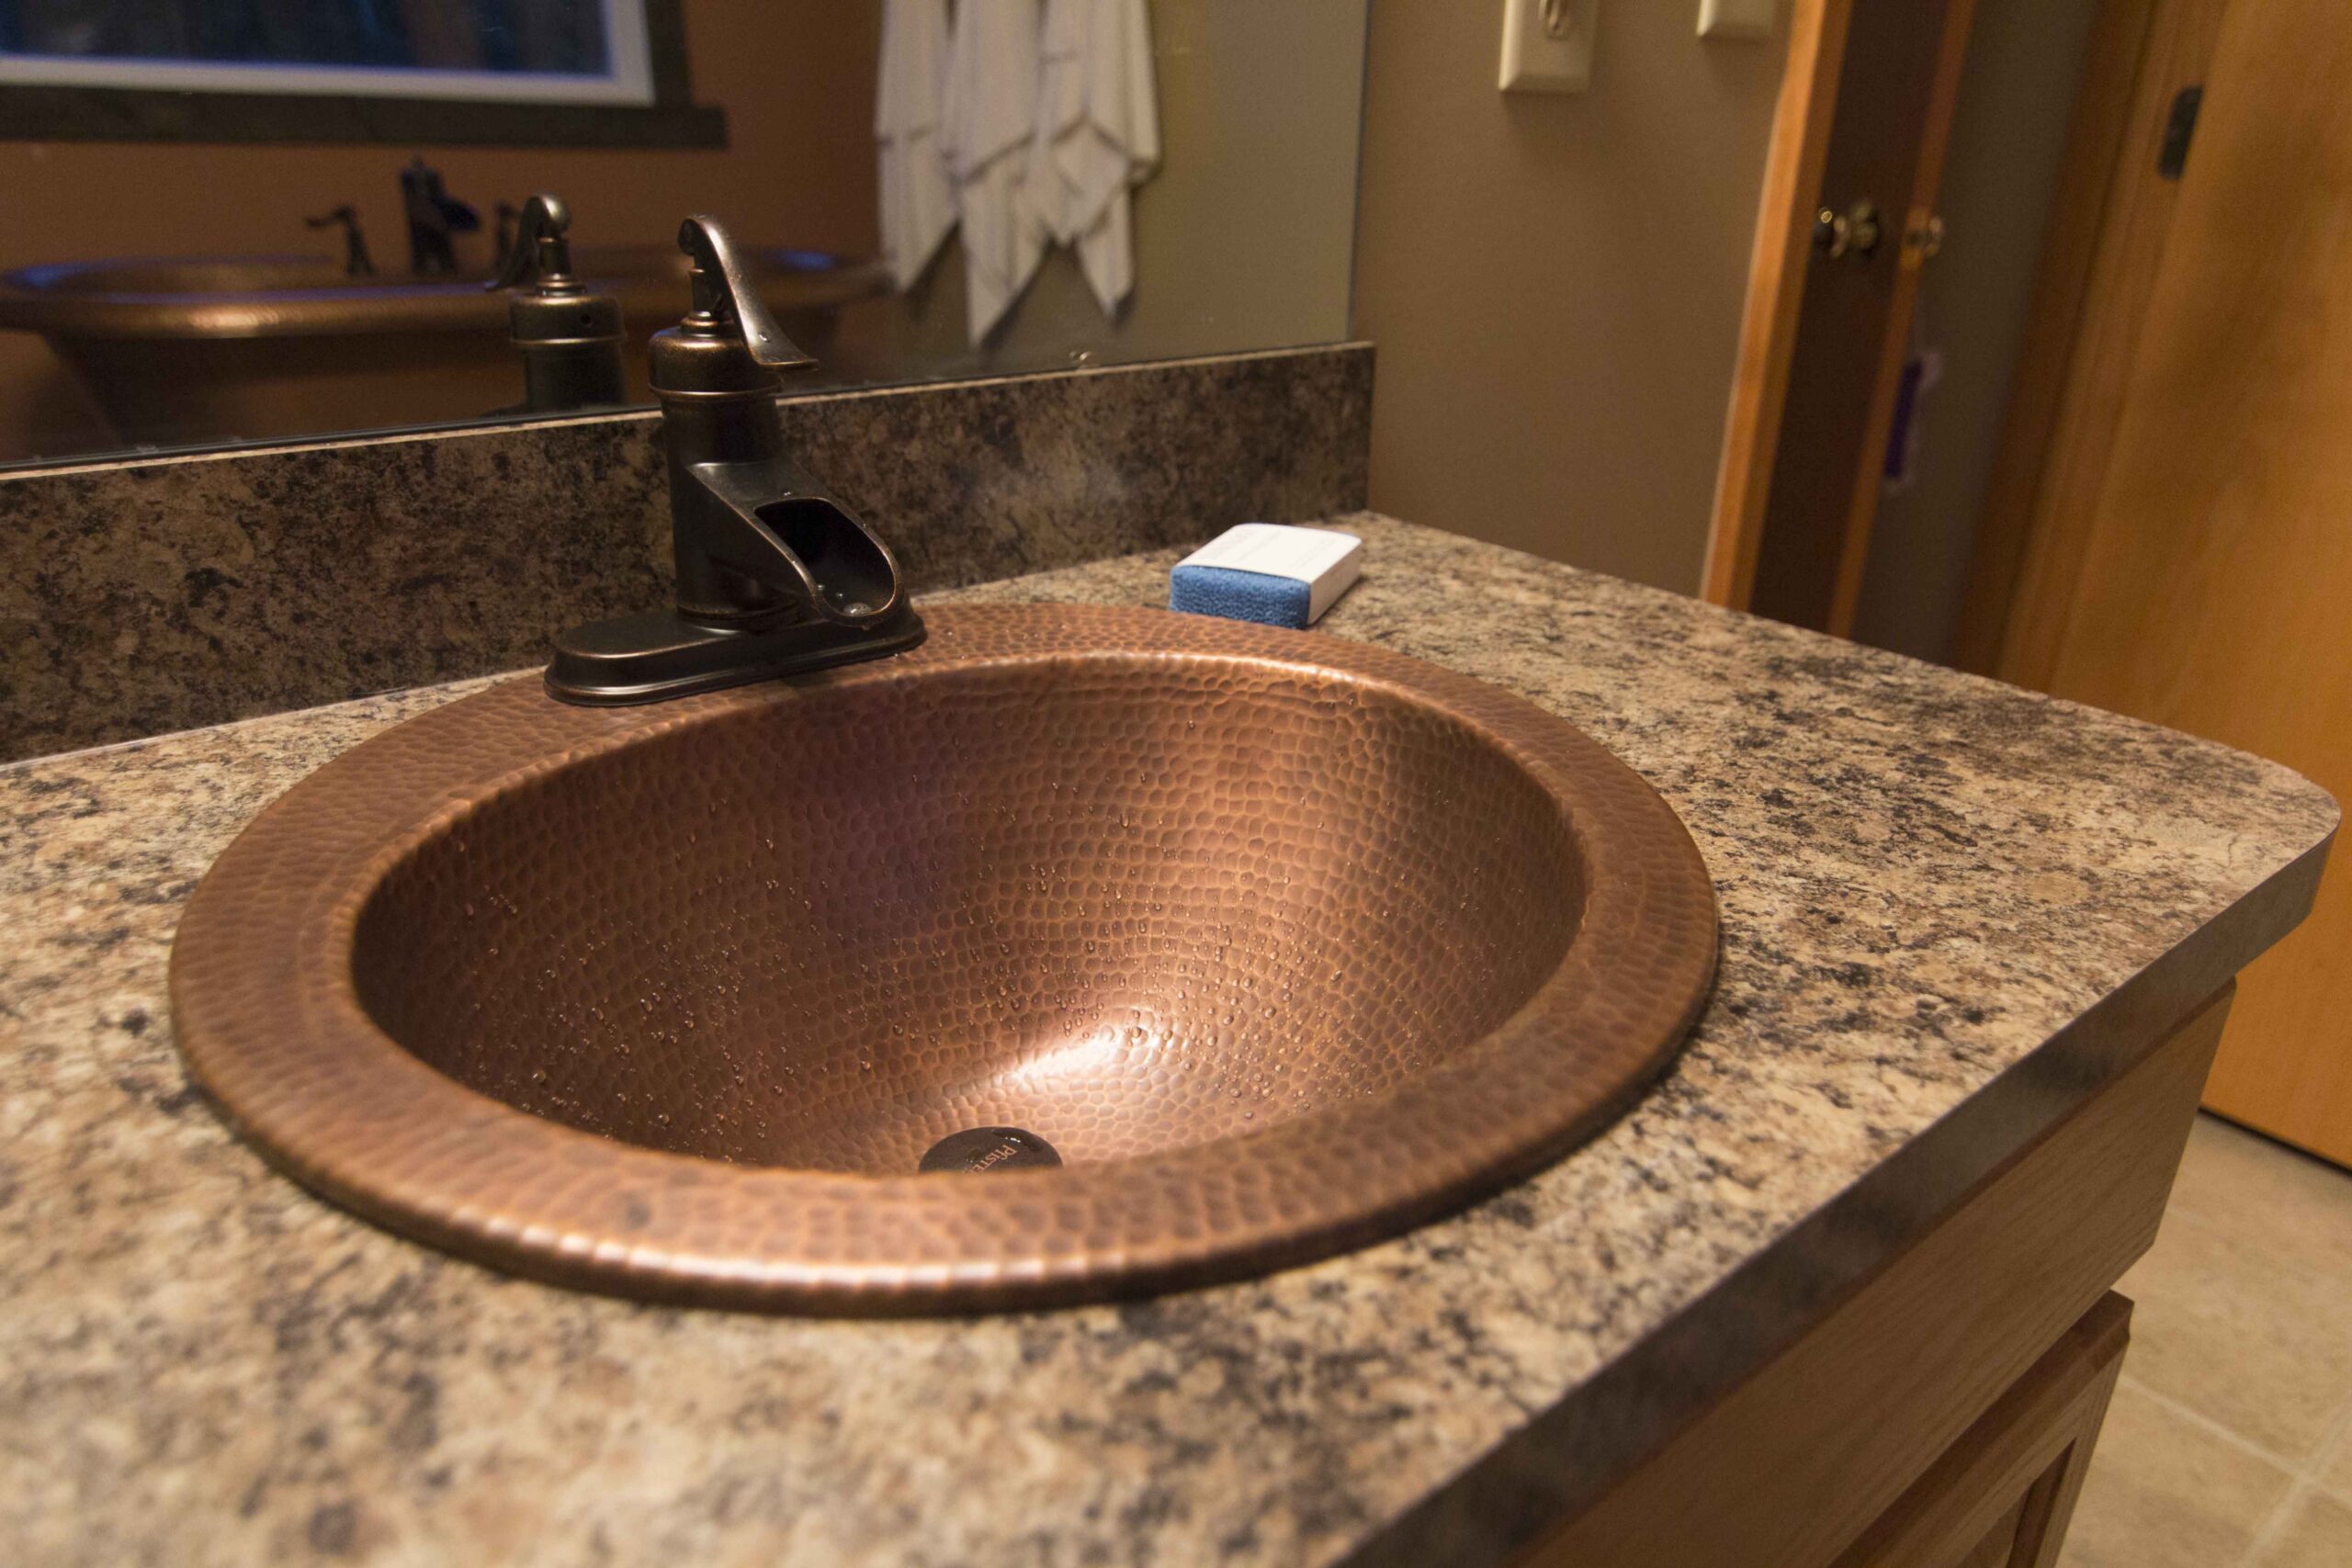
- 16. Enjoy your new bathroom copper sink!

You Might Also Like:
How to Install a Freestanding Bathtub: The Thales Copper Bathtub
How to Install a Fireclay Farmhouse Kitchen Sink: The Wheatley Fireclay Sink
If you have any additional questions during your search for the perfect copper, fireclay farmhouse sink or crafted stainless steel sink, our Sinkologists™ are here to help. Contact us or follow us on Facebook, Houzz, Pinterest, Instagram, or TikTok for more helpful tips and design ideas.