How to Install a Fireclay Farmhouse Kitchen Sink: The Wheatley Fireclay Sink
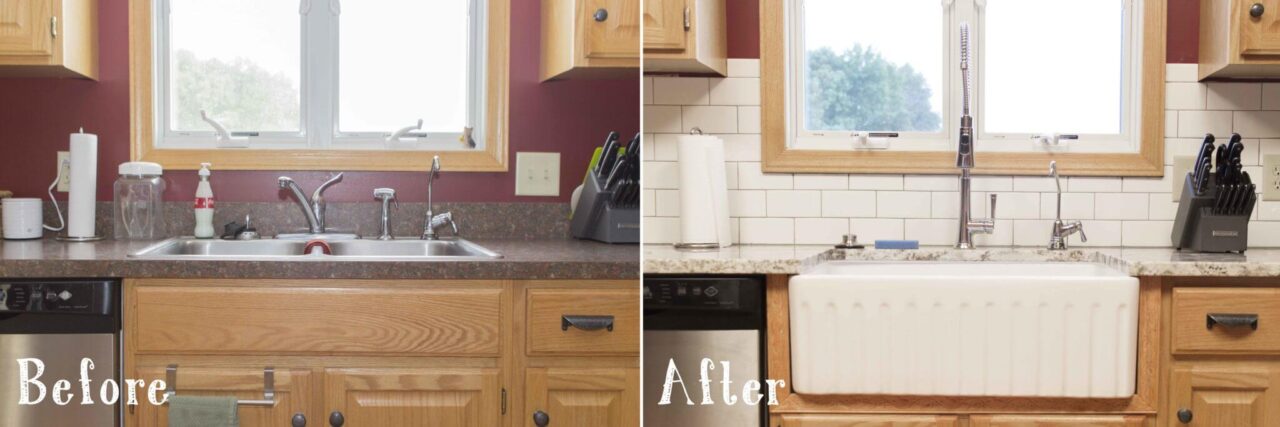
Installing a fireclay farmhouse sink can really add some spark to your kitchen. Not only will the vibrant crisp white color of the fireclay brighten your space, but the quality and features of this sink from Sinkology will make your meal prep and clean-up much easier and rewarding.
We recently had one of our Sinkology professional plumbers install a fireclay farmhouse sink in this kitchen during a renovation. We documented the installation along the way to help describe the proper steps and provide tips that make installation a snap.
Sinkology provides 3D interactive instructions on the BILT app. It’s a FREE download in the App Store or Google Play. BILT guides you step by step through the assembly with voice, text & interactive animated images. Tap on a part for more details. Pinch to zoom in & out for a better view. Drag to rotate the image 360°. BILT eliminates the frustration & guesswork of paper instructions. Download the BILT app on any mobile device to assist you in your install!
For a sink like this, we recommend hiring a professional since there are so many things to consider: cutting your cabinets, fabricating and installing a new countertop, and building a support structure for this solid, heavy sink.
This short video provides you with an overview of the step-by-step guided installation via the BILT app. Take a look, then download the BILT app to get started on your project!
We installed:
- Undermount Fireclay Farmhouse Sink
- The Zuri Pull-Down Faucet from Pfister
- A Nickel Disposal Flange
- Other Accessories in our Fireclay All-In-One Kits
The tools you will need include:
- Plumber’s putty
- Plumber’s tape
- A putty knife or razor blade (to cut old caulk)
- Adjustable wrench
- Silicone tube (clear or copper colored)
- Caulk gun
- Drain install wrench
- Bucket or water receptacle
Before getting started, turn off the power, shut off the water, and unplug any nearby electronics. Sinkology fireclay sinks require a solid support built into the cabinet. Sinkology recommends hiring a professional for this installation.
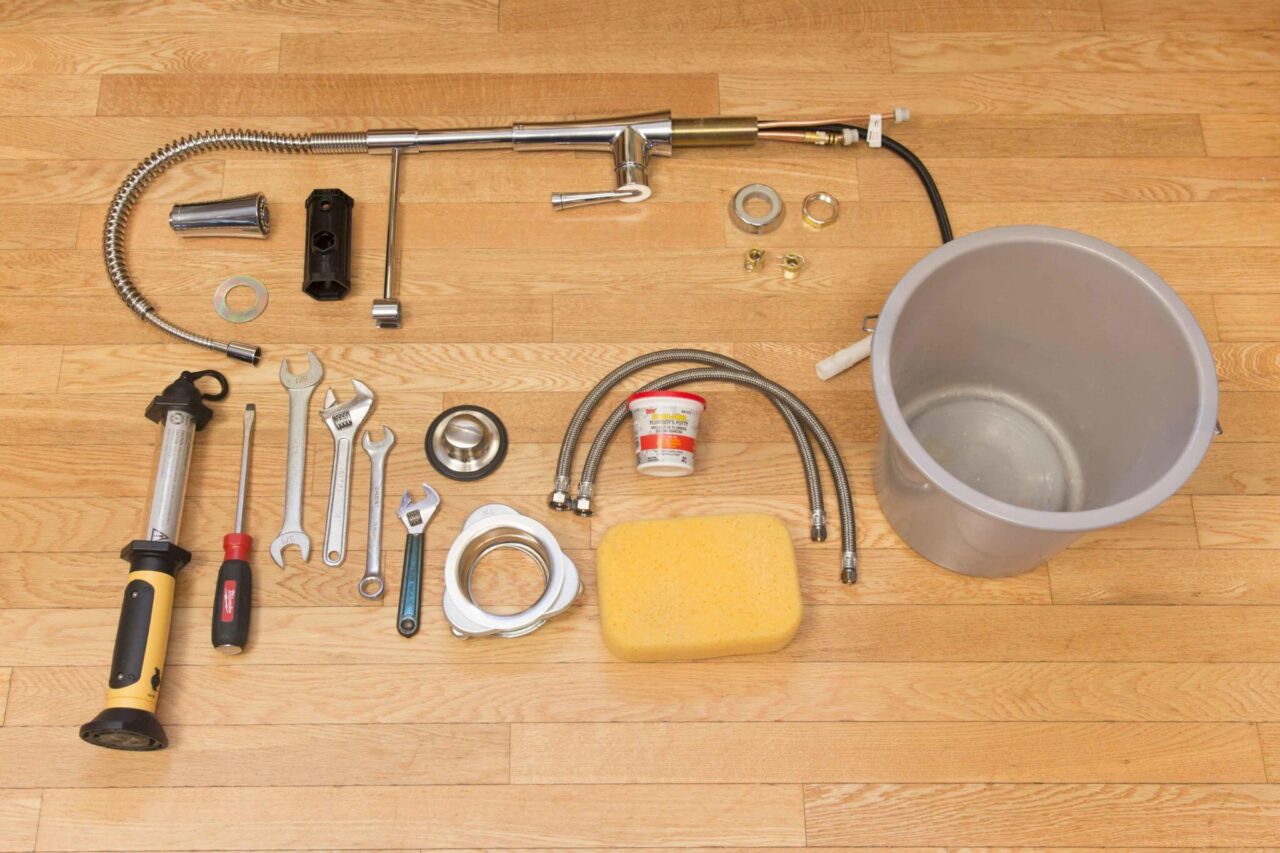
1. Gather the products being installed and the tools you will need.
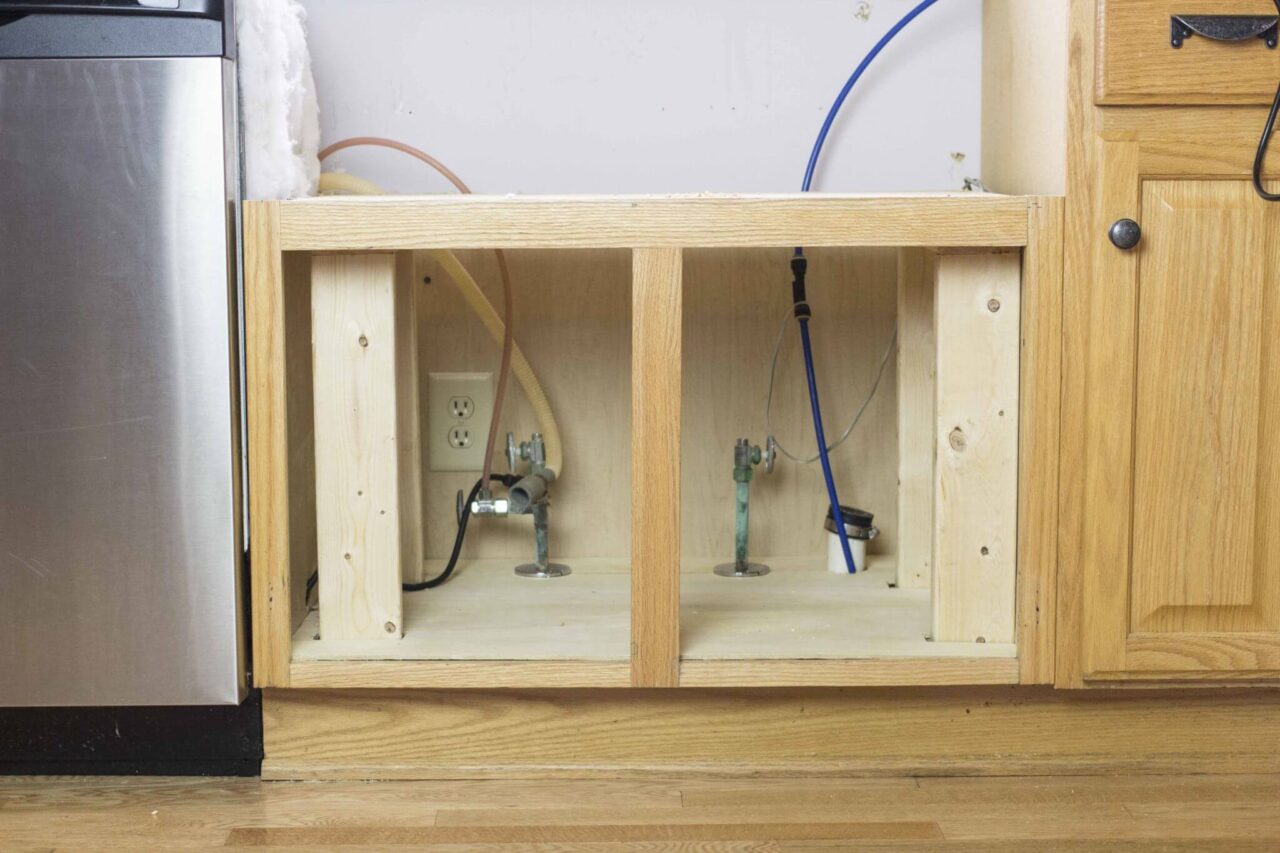
2. Construct and install the support. See our detailed installation guide for steps on building your support.
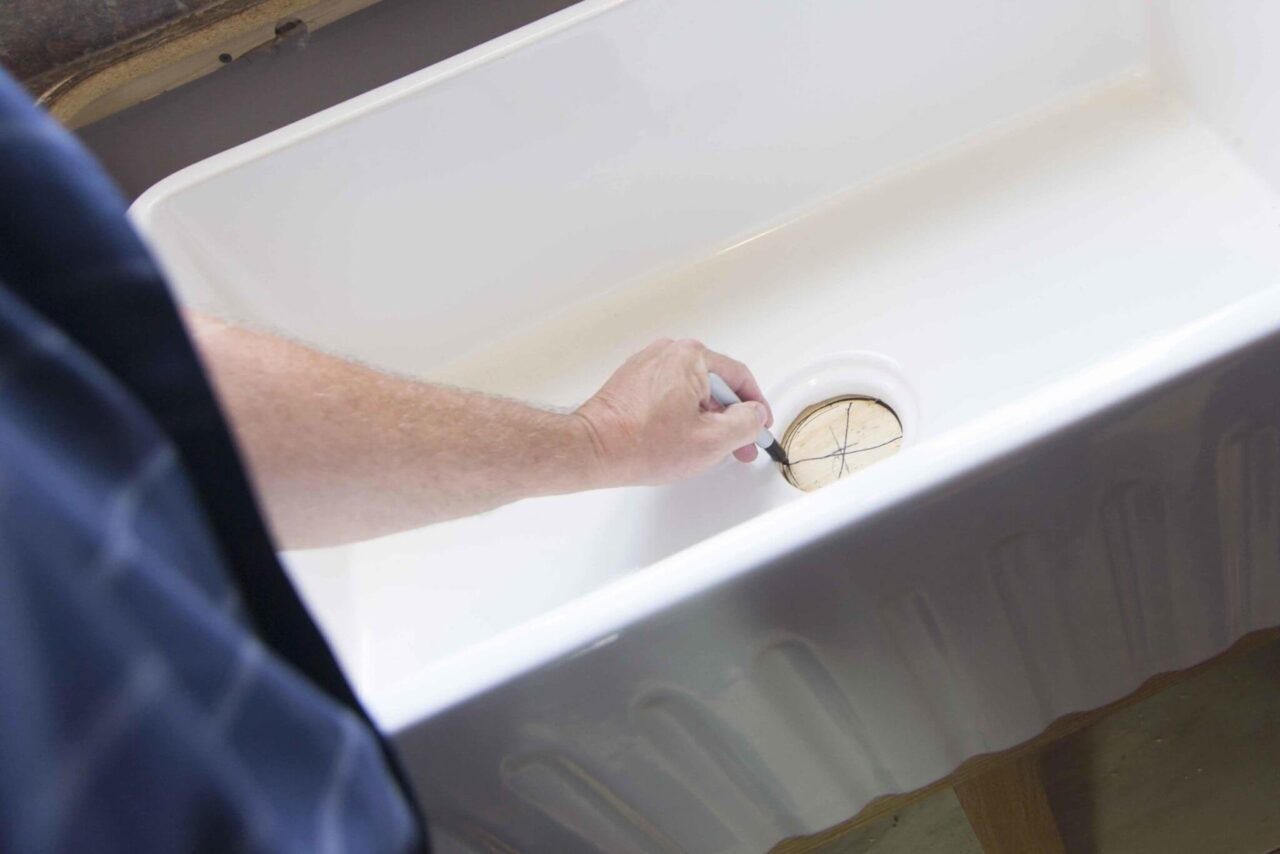
Pro-tip: After you build the support, place the sink in the final desired position and trace the drain hole. Then, cut the final drain hole before installing the sink.
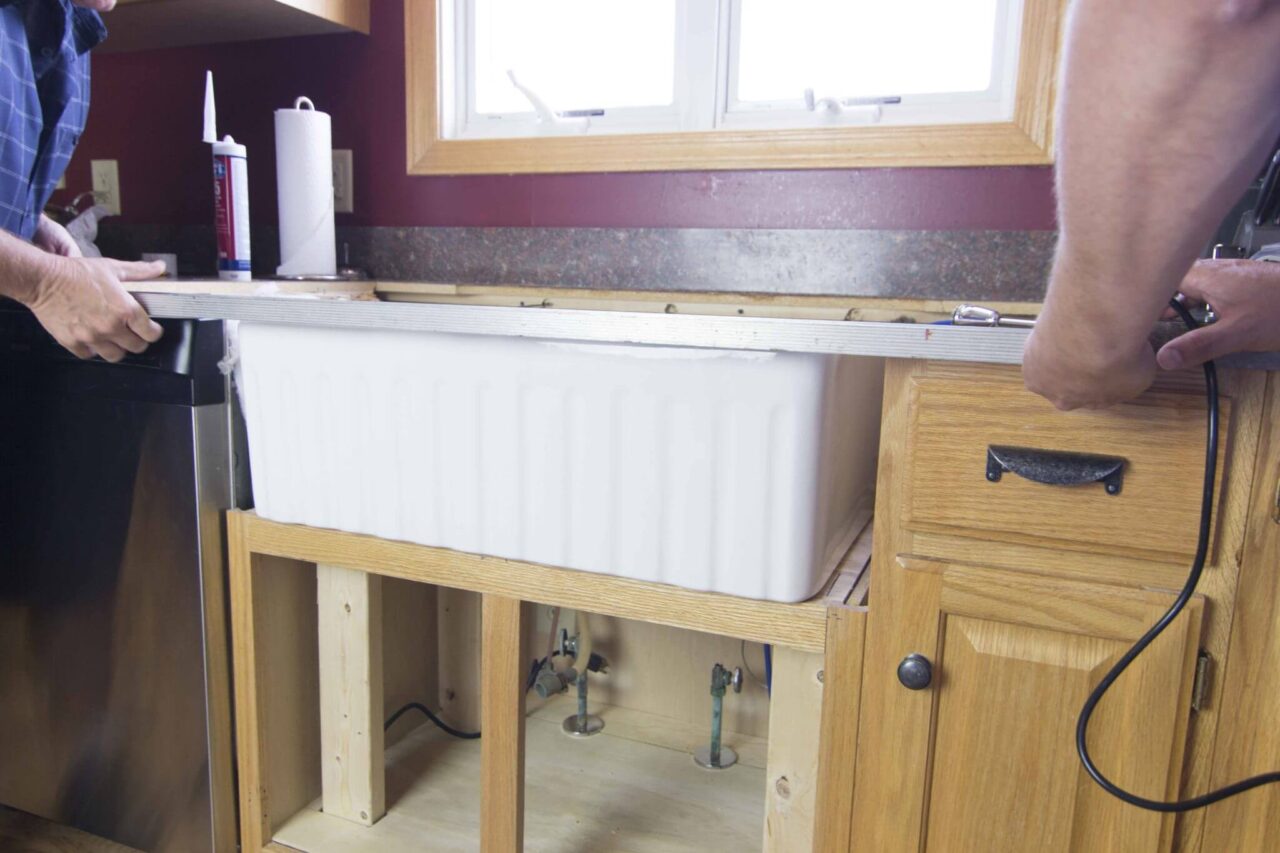
3. The sink should rest 1/8″ inch below your cabinets, ensuring clearance for countertop install. Use a level to make sure the sink is even and will drain correctly.
4. Caulk the sink in place prior to countertop templating and professional installation. We recommend an undermount installation, where the countertop will lay on the cabinets for a seamless look.
5. Attached your disposal flange or basket strainer to the sink using plumber’s putty.
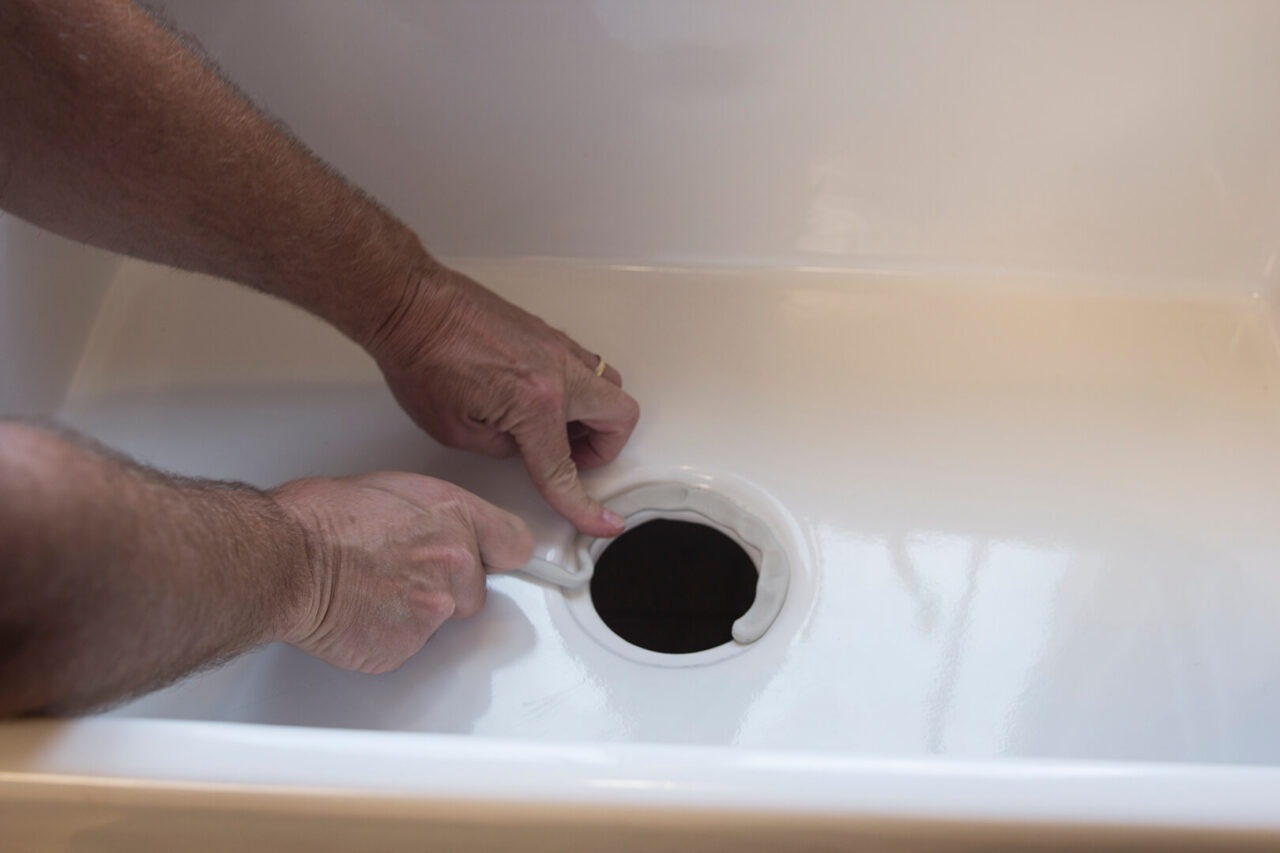
Pro-tip: Over-tightening your disposal drain could damage your kitchen sink. Use plumbers’ putty to make a watertight seal between the drain and the sink.
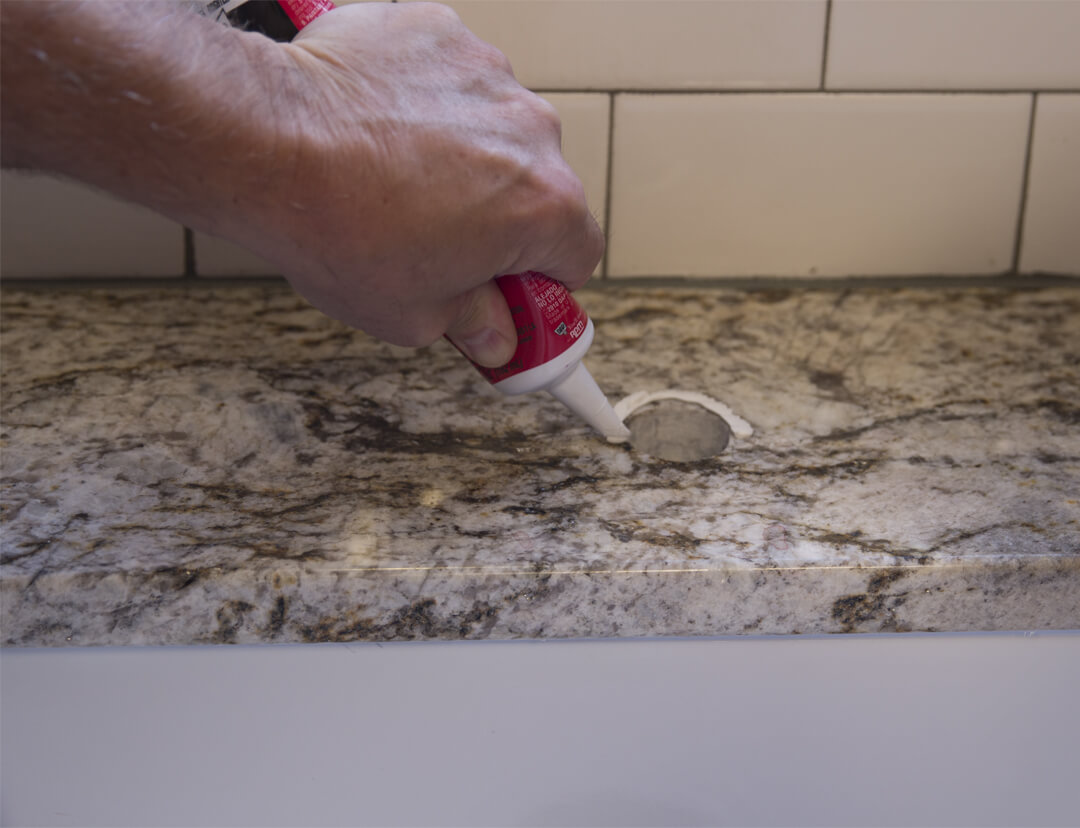
6. Install your faucet in the countertop with caulk and attach the waterlines beneath the sink.
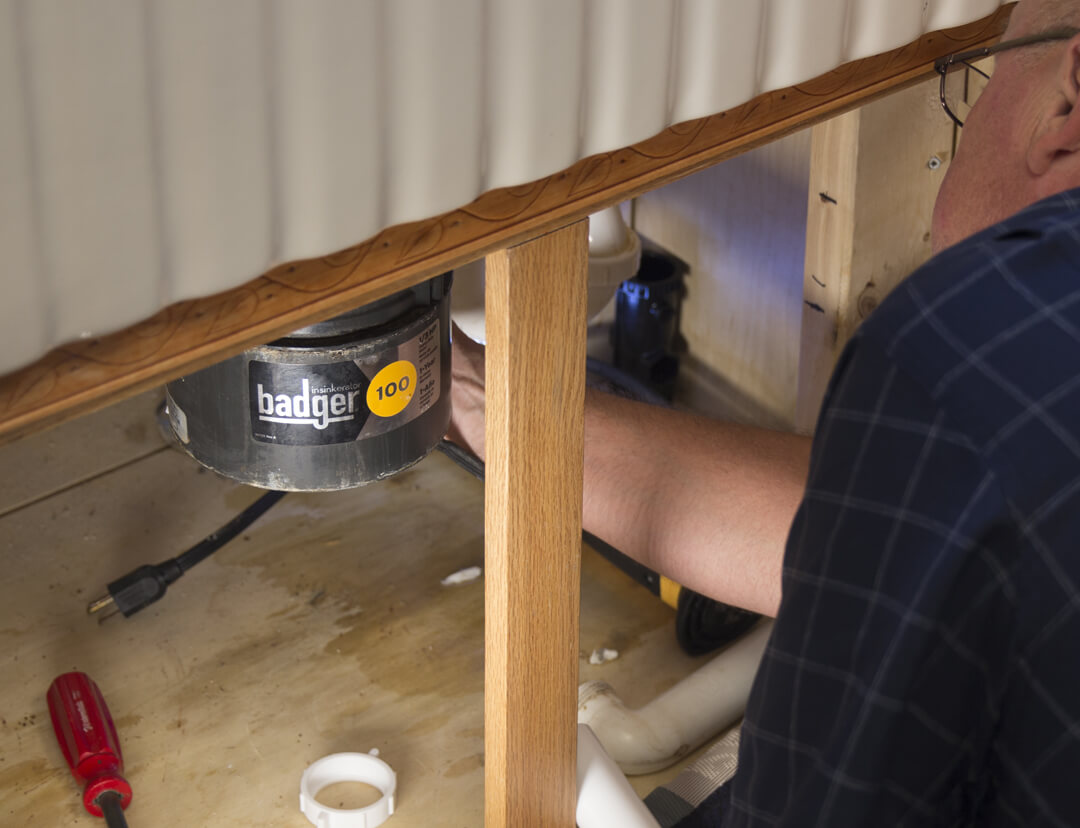
7. Install the garbage disposal and connect the drainpipes.
8. Turn on the faucet and check the drain, disposal, and waterlines for leaks.
9. Enjoy your new fireclay farmhouse sink from Sinkology!
If you are searching for a new fireclay farmhouse kitchen sink, or need additional information on Fireclay Installation or Fireclay Sink Care, check out our Fireclay page.If you have any additional questions, our Sinkologists are here to help. Contact us or follow us on Facebook, Pinterest, or Instagram for helpful tips and design ideas.
You Might Also Like:
Fireclay Farmhouse Kitchen Sink Step-By-Step Installation
If you have any additional questions during your search for the perfect copper, fireclay farmhouse sink or crafted stainless steel sink, our Sinkologists™ are here to help. Contact us or follow us on Facebook, Houzz, Pinterest, Instagram, or TikTok for more helpful tips and design ideas.