How To Replace A Drop-In Kitchen Sink
Installing a new sink in your kitchen could seem like an intimidating task, but it can be quite simple. If you have the right tools and the right instructions, anyone can install a new drop-in sink.
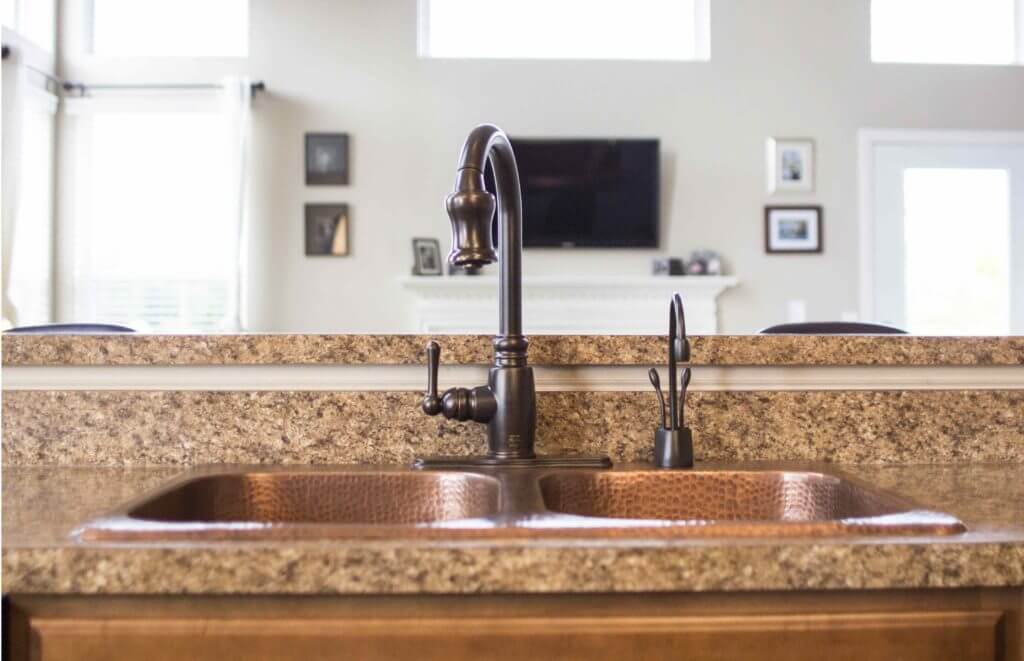
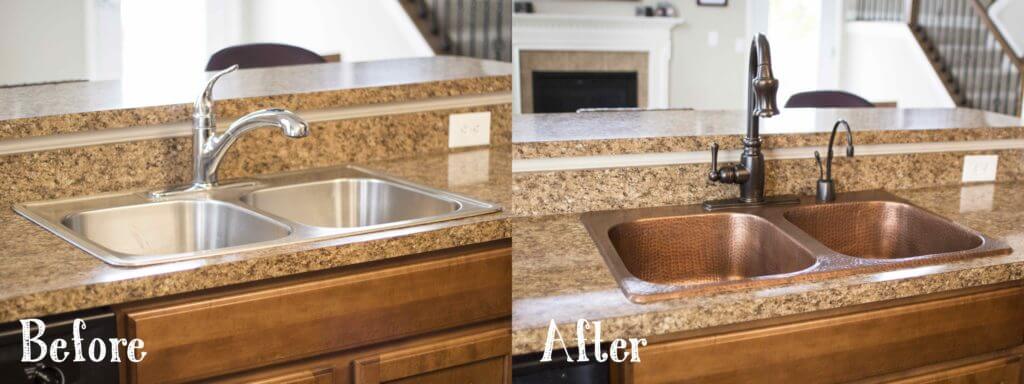
We recently had one of our Sinkology professional plumbers replace an old stainless-steel sink with a copper drop-in sink. We documented the installation through video along the way to help demonstrate the proper steps and provide tips that make installation a snap.
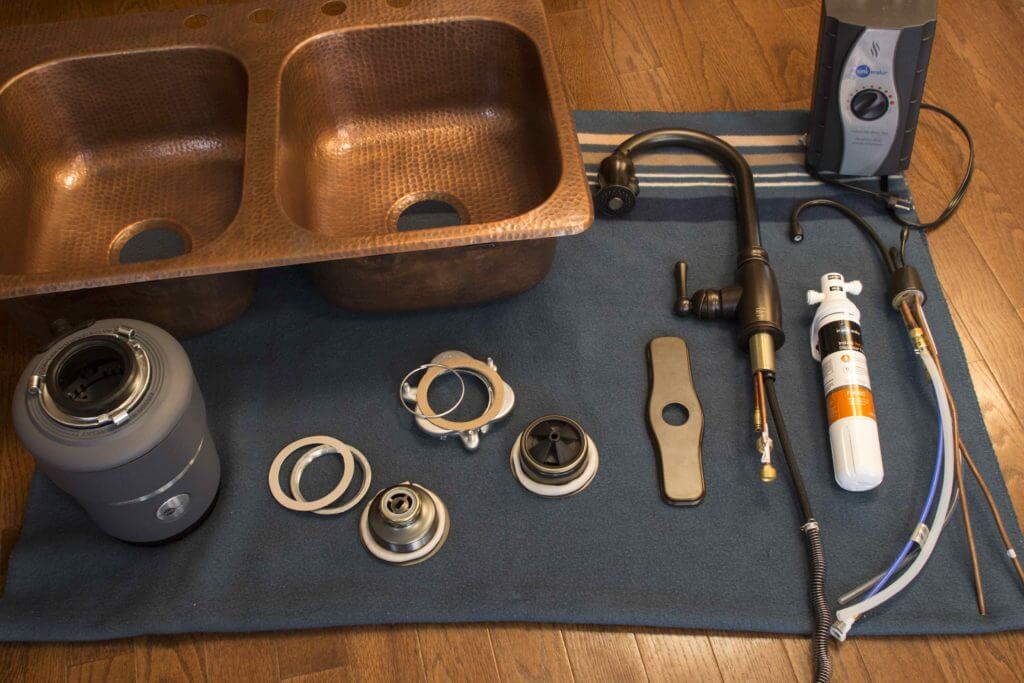
In this video, we installed:
- A Sinkology Santi double-bowl drop-in kitchen copper sink
- A Sinkology basket strainer
- A Sinkology disposal flange (designed specifically for InSinkErator disposals)
- A pull-down tumbled bronze faucet
- An InSinkErator Evolution Compact garbage disposal
- An InSinkErator Hot Water Tank and Filtration System
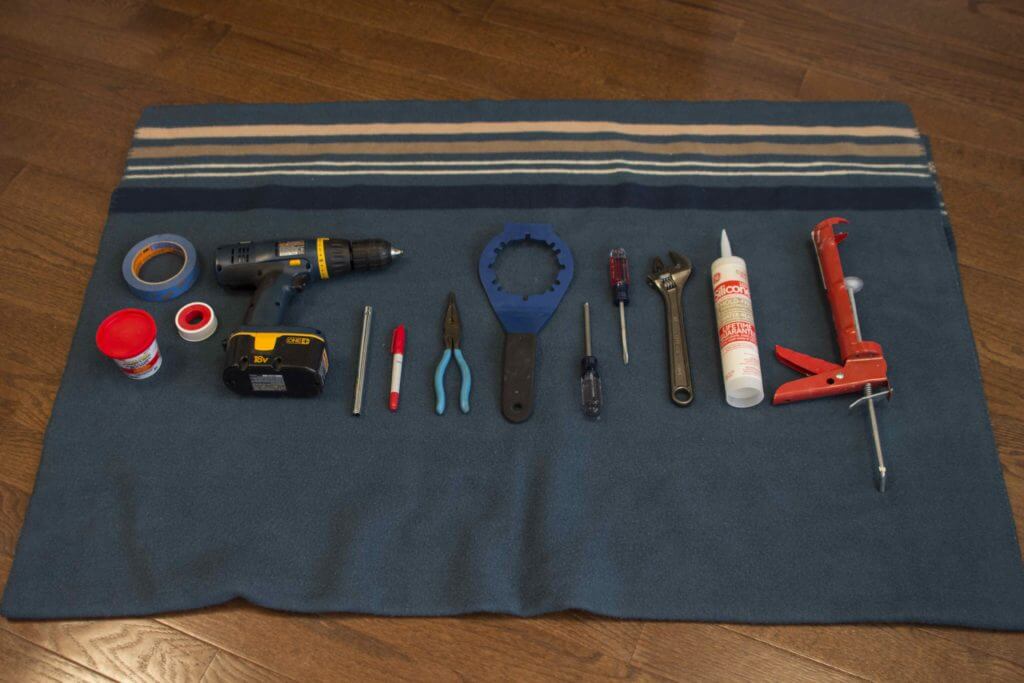
The tools you will need include:
- Painter’s tape
- Plumber’s putty
- Plumber’s tape
- A drill
- An InSinkErator hex tool (comes with the hot water dispenser)
- A marker
- Needle-nose pliers
- Plumber’s wrench
- Screwdrivers (flat, Phillips)
- Adjustable wrench
- Clear silicone
- Caulk gun
Before getting started, turn off the power, shut off the water, and unplug any nearby appliances (especially any old disposals or items you will be removing).
Pro tip: Because your new copper sink is metal, it can have fine edges. If you plan on placing the sink on the floor during the transition, make sure to protect your flooring with an old blanket or towel.
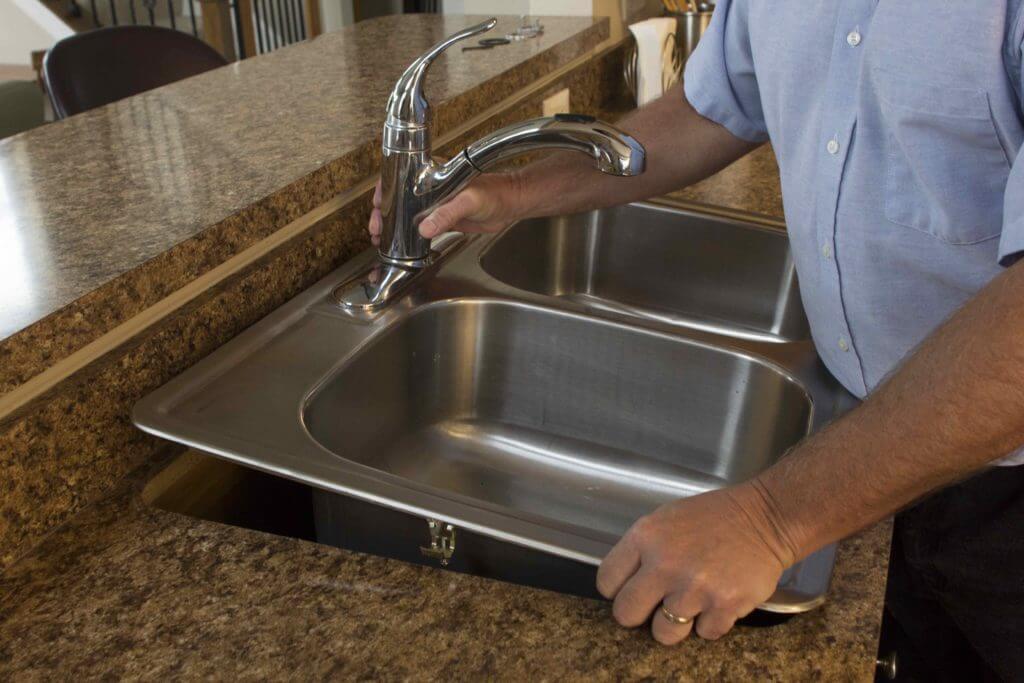
Step 1: Detach and remove the old sink.
First, unhook the water lines from the faucet and detach the garbage disposal. Next, remove the drainpipes from the drains and loosen any clips from beneath the sink with a screwdriver. Lift the old sink from the countertop and set it aside. Ensure that you clean any excess silicone from the countertop.
Pro tip: Make sure you have a bucket handy to catch any water that may run out of the drainpipes.

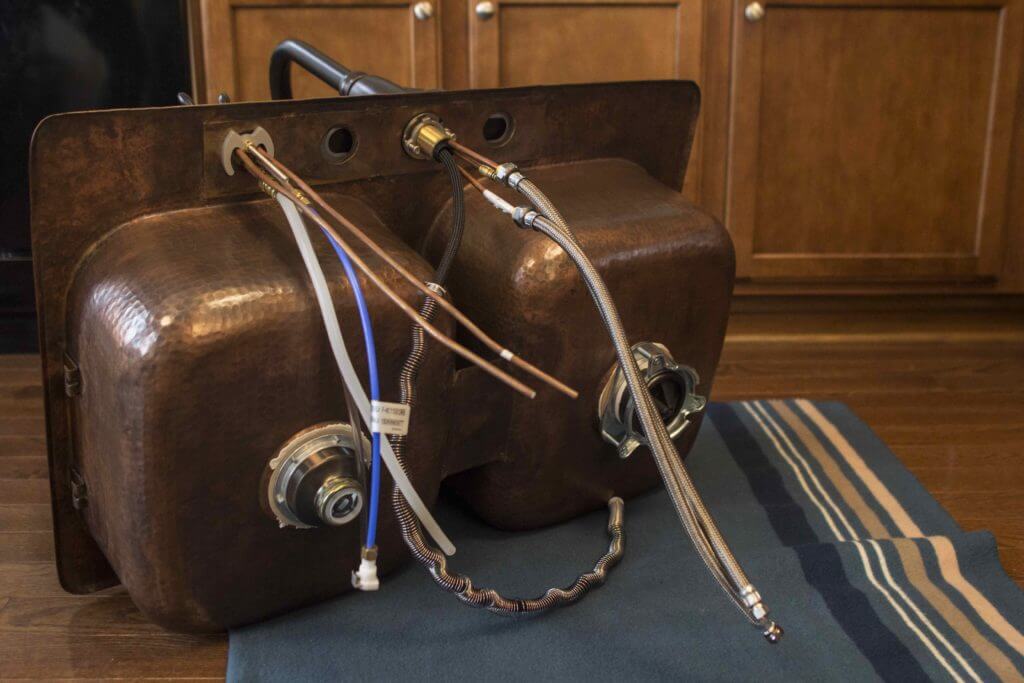
Step 2: Attach drains and faucets to the new sink.
Before you drop your new copper sink into the countertop, try attaching as much as you can to the sink while it’s in an open, accessible, and well-lit space. It’s difficult to attach everything when you are cramped in the cabinet under the sink.
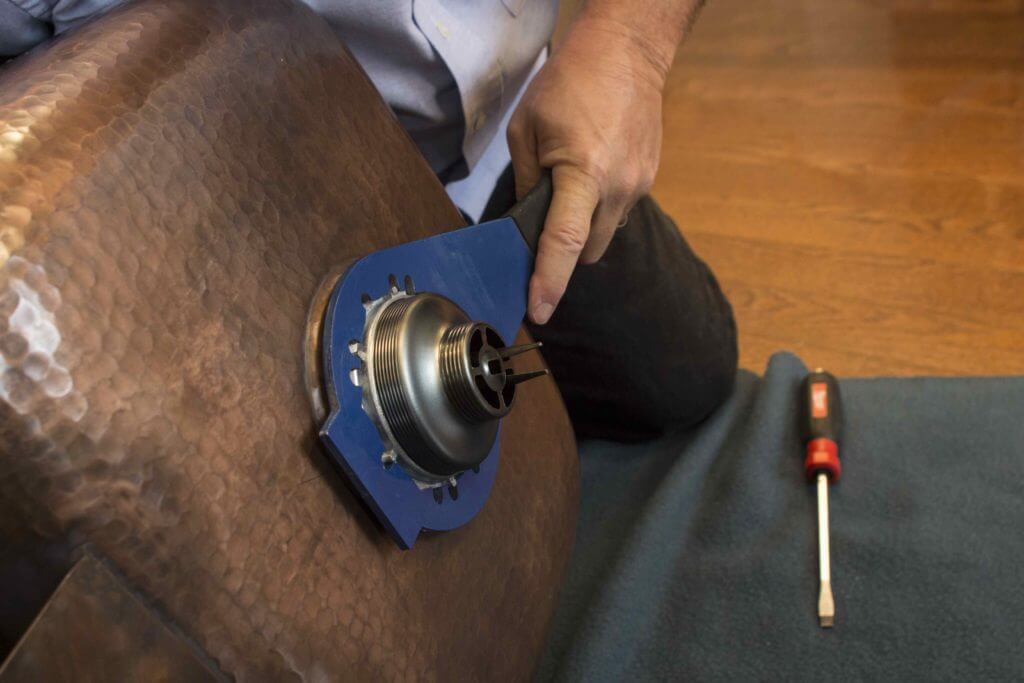
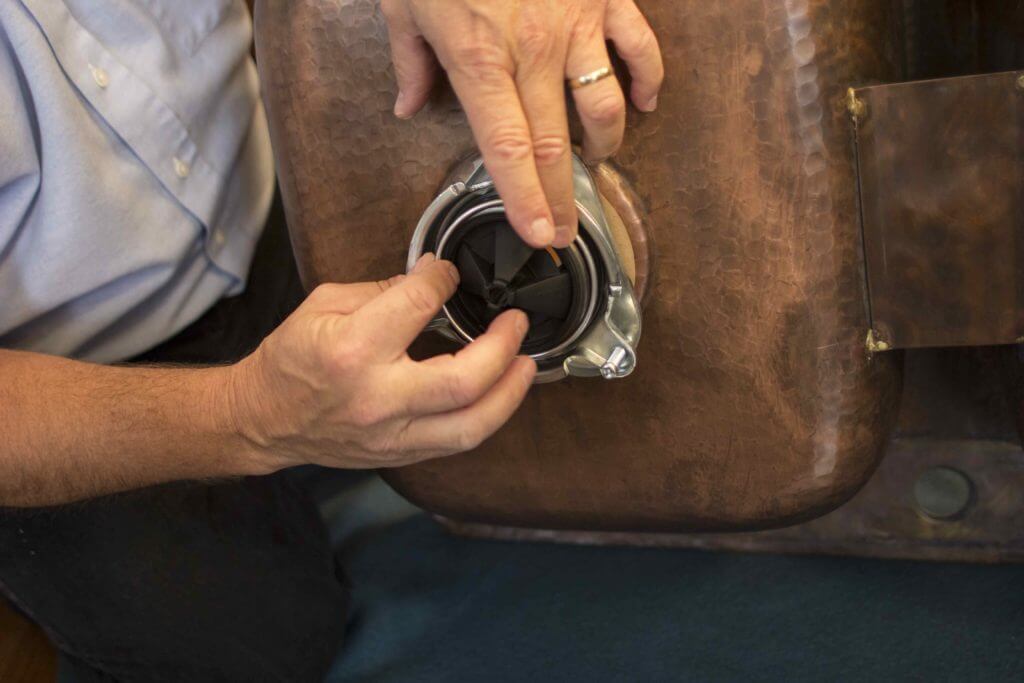
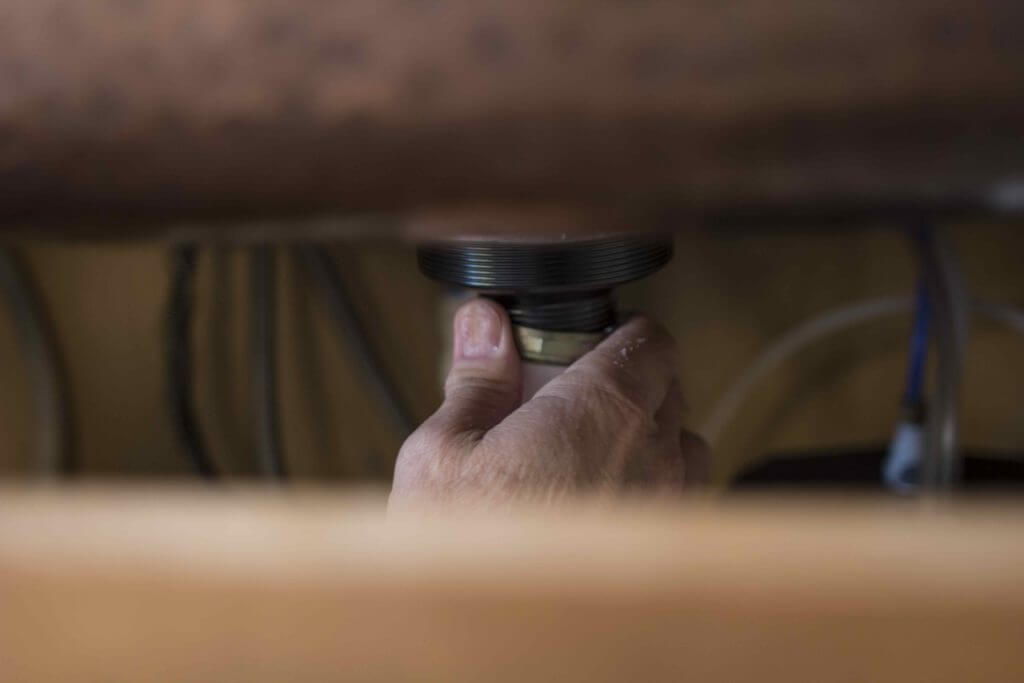
For the drains, ensure you use liberal amounts plumber’s putty around the two drains. Attach drains by hand and then tighten with a plumber’s wrench. Use needle-nose pliers to hold the basket strainer in place as you tighten with the plumber’s wrench. The disposal will come with the support bracket and a metal ring that attaches to the disposal flange. Remove excess plumber’s putty. Attach the faucet per the manufacturer’s instructions.
If you are installing a water filtration system, attach that faucet per the manufacturer’s instructions as well.
For more information on the InSinkErator Hot Water Tank and Filtration System, visit their website and search for Installation Guides.
Pro tip: Ensure you install the disposal flange on the side where you are going to place the garbage disposal. Nothing is worse than dropping your sink in to discover you need to reinstall the drains.
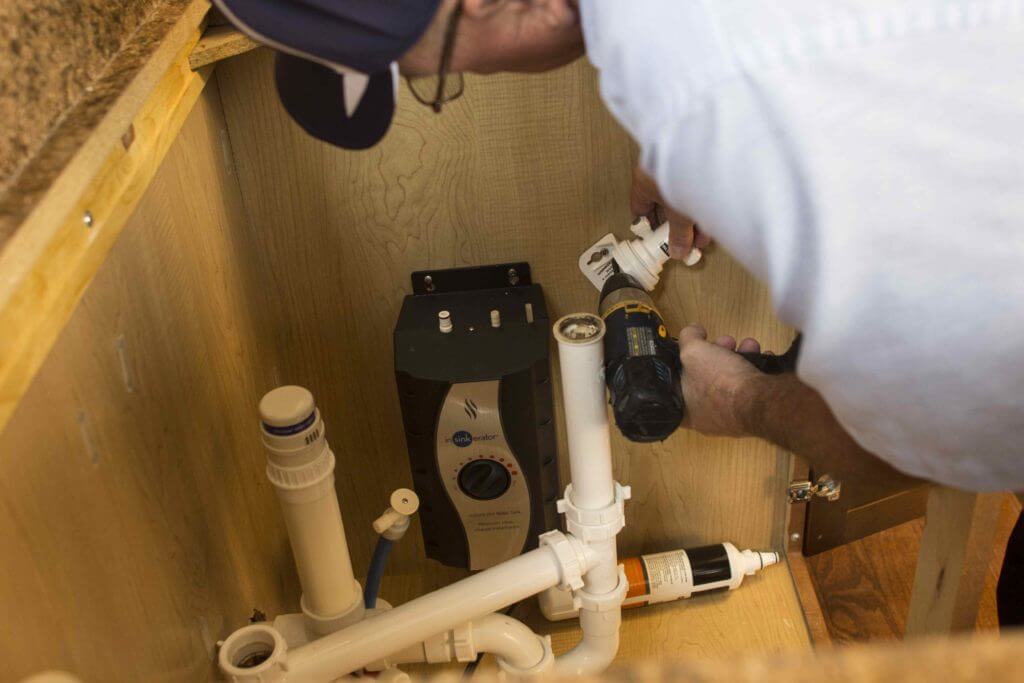
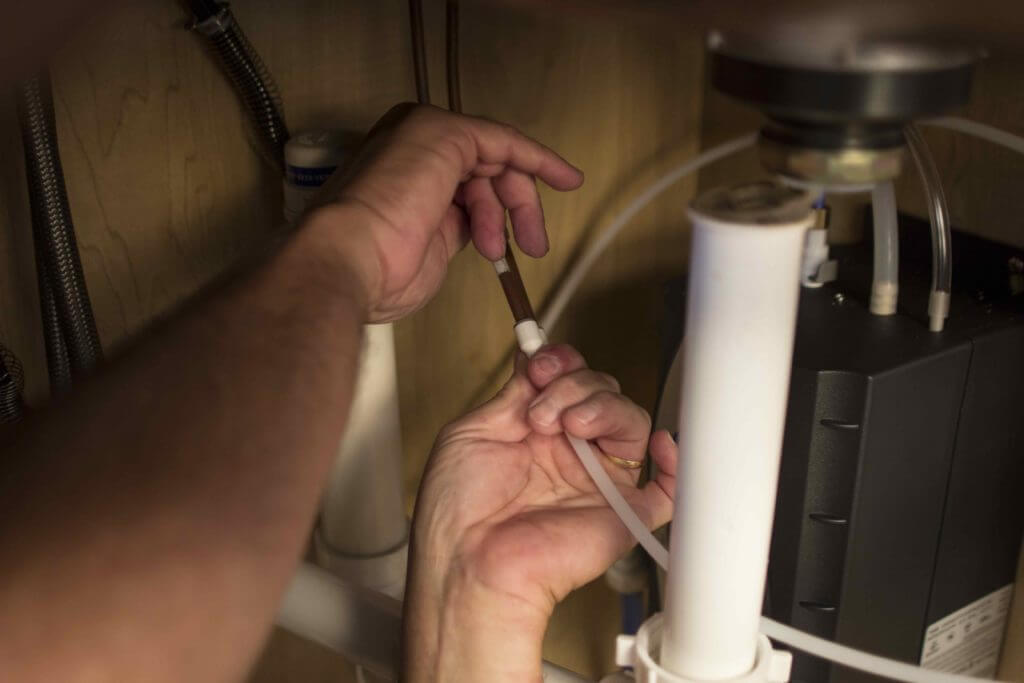
Step 3: Measure the pipes and attach the water filtration system to the cabinet. Don’t attach any hoses yet.

Determine the proper placement of your water filtration system by marking it on the interior wall of the cabinet with a market. Attach the water filtration system to the cabinet with a drill.
Pro tip: To ensure that you have the proper lengths of hoses and drains, drop the sink into the countertop. Make sure everything measures up, but don’t attach the hoses or drains yet.
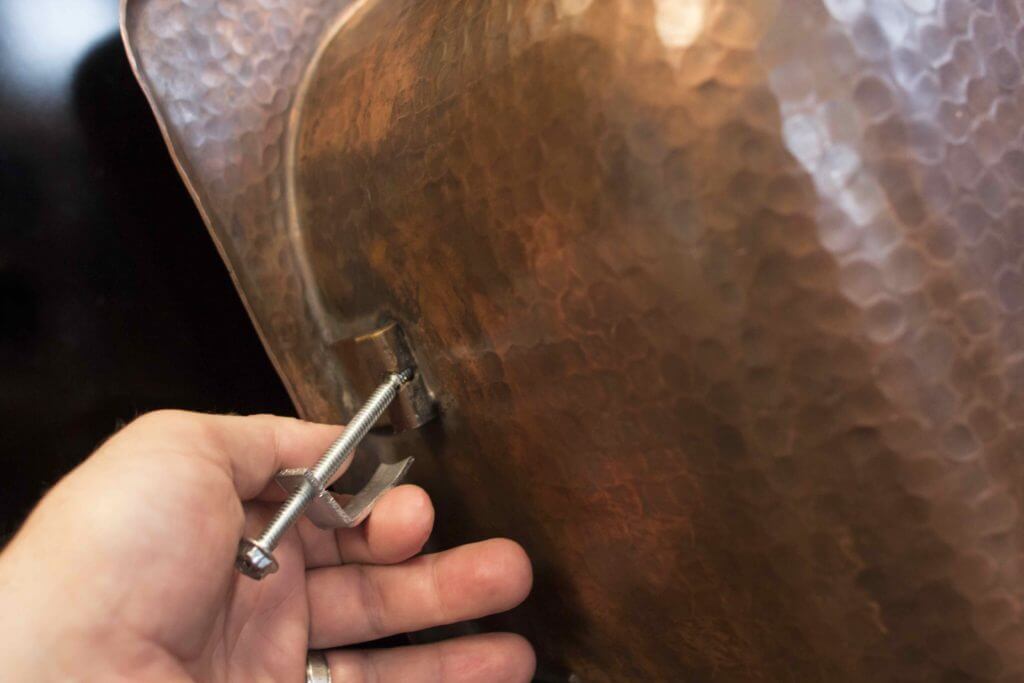
Step 4: Attach clips to the brackets on the copper sink.
Sinkology drop-in copper sinks come with clips that easily slide into brackets on the sides of the sink. These clips tightly draw the sink to the countertop and hold the sink in place.
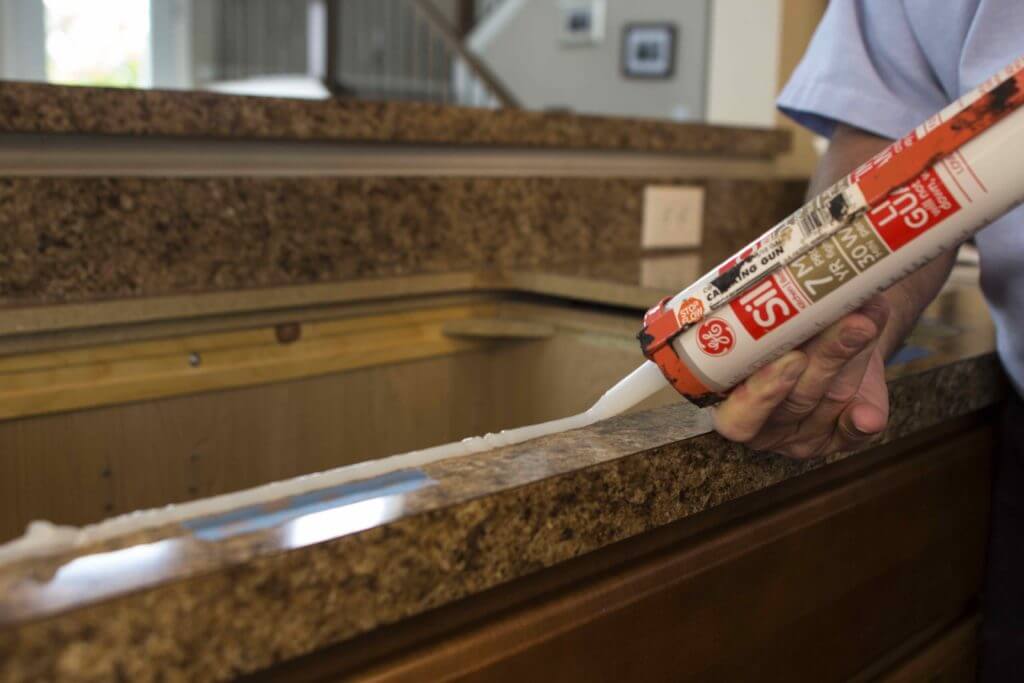
Step 5: Apply silicone to the countertop.
Using a caulk gun, apply silicone liberally around the edge of the countertop hole.

Pro tip: Before applying silicone to the countertop, drop the sink into the counter and mark where the edge of the sink sits with painter’s tape. This will help you more easily determine where to put the silicone line.
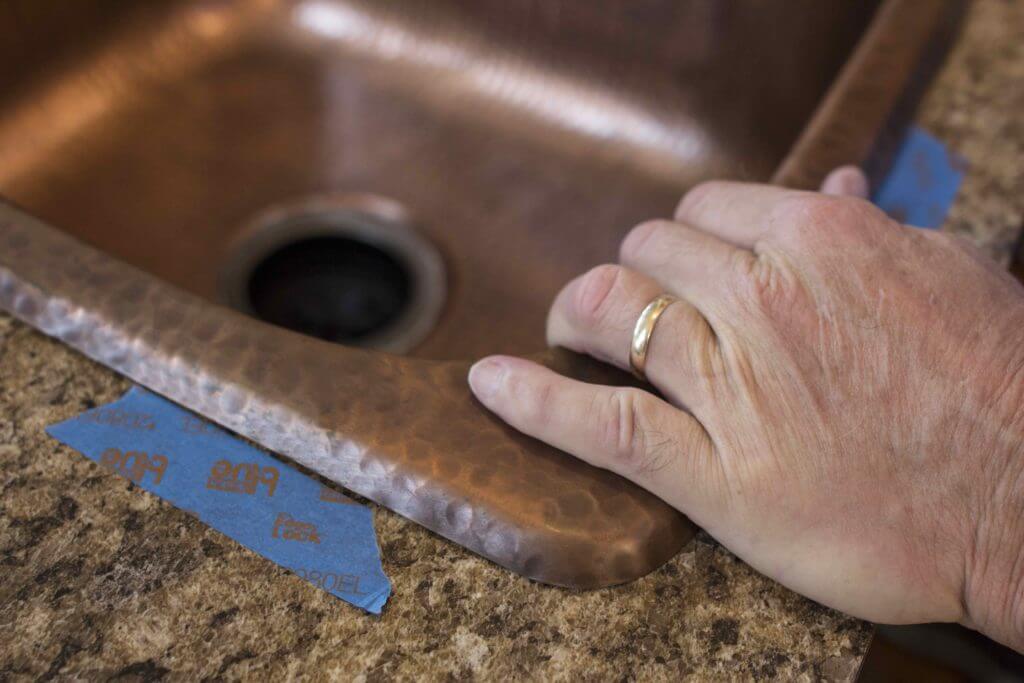
Step 6: Drop in the copper sink and wipe away any excess silicone.

Step 7: Align clips and attach them with a screwdriver.
Ensure that the clips are securely placed within the brackets and attached to the countertop as you tighten them.
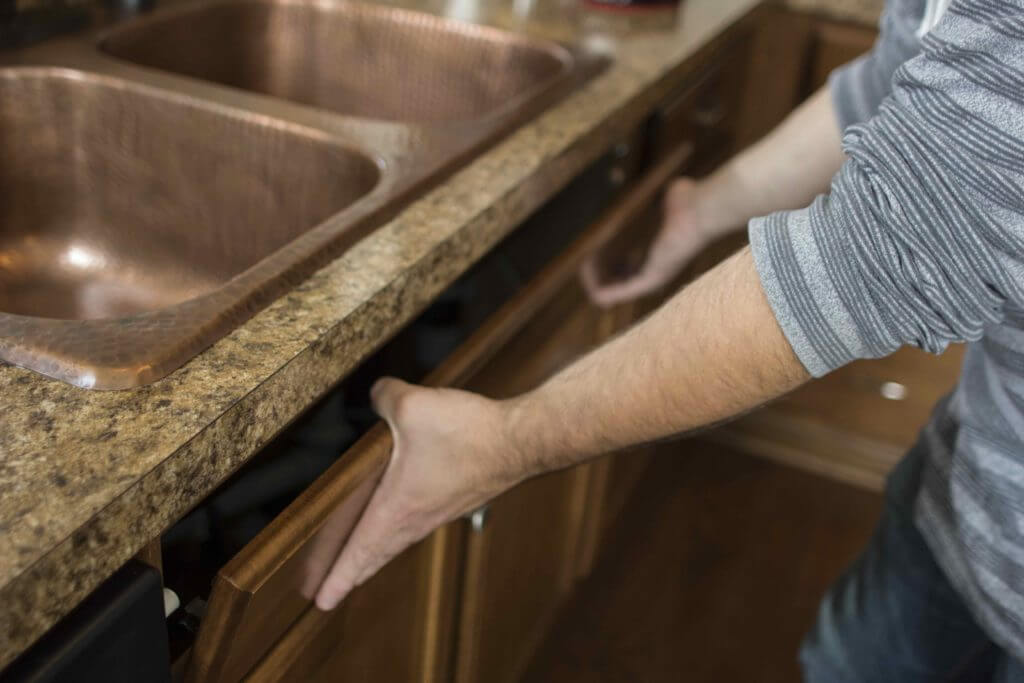
Pro tip: Some cabinets have a removable piece in front of the sink that will allow easier access and better visibility to the clips during installation.
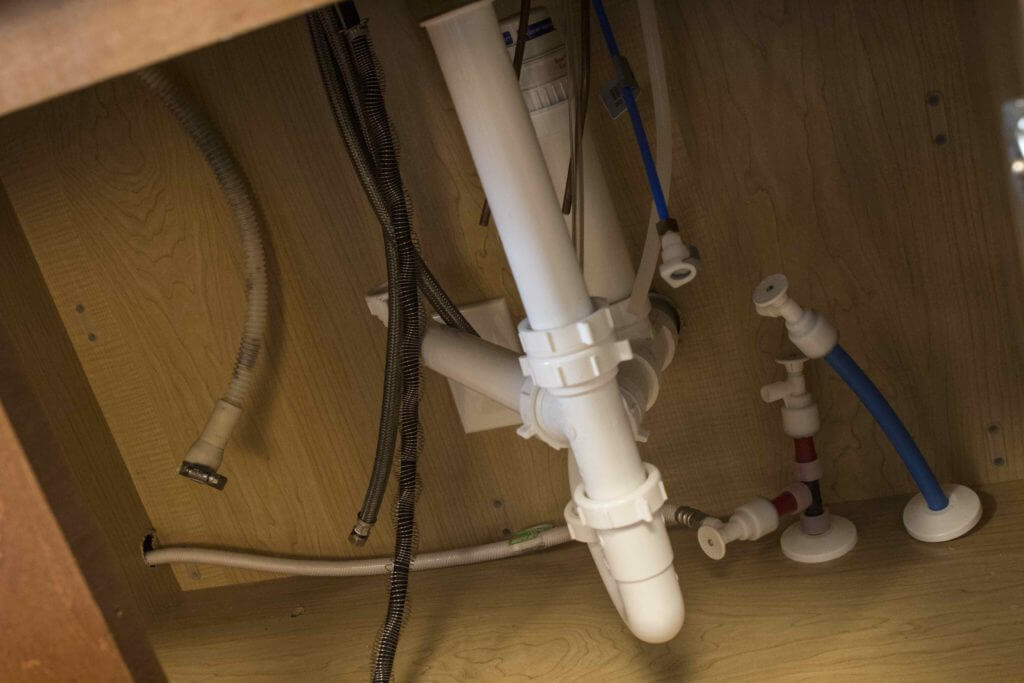
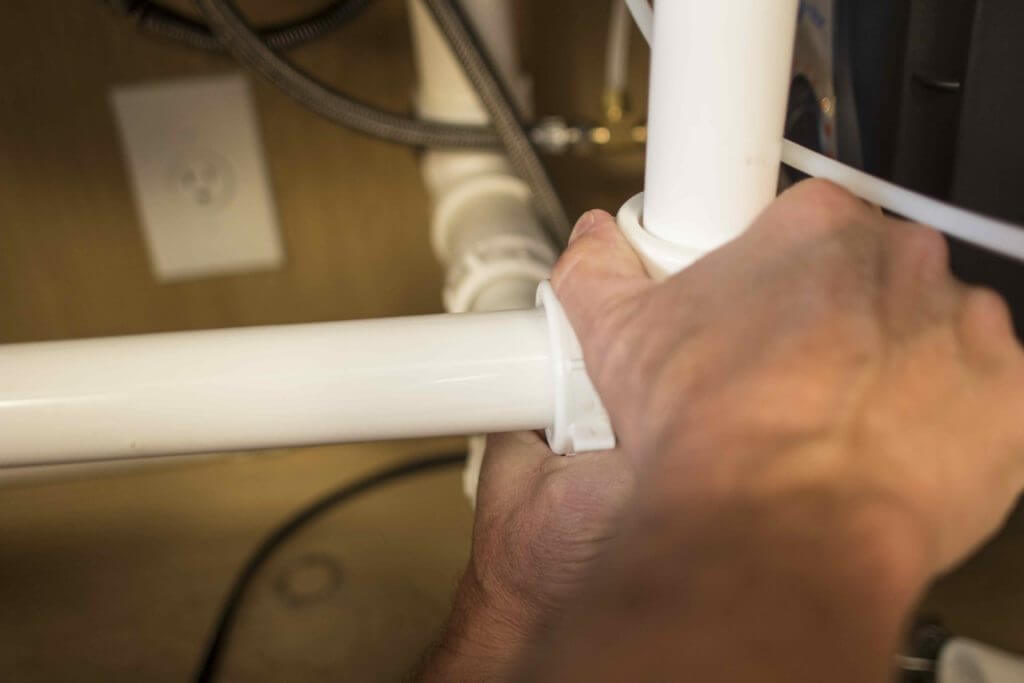
Step 8: Attach hoses and pipes to the water filtration system and drains.
Be sure to follow the manufacturer’s instructions on installation of the specific water filtration system you have chosen. Attach and tighten all water lines and firmly tighten the drainpipes to the basket strainer drain. Do not attach the drainpipe to the disposal drain yet.
Pro tip: Try placing a pad on the edge of the lower cabinet to protect your back and neck from the sharp edge. A kneepad from a garden store works great.
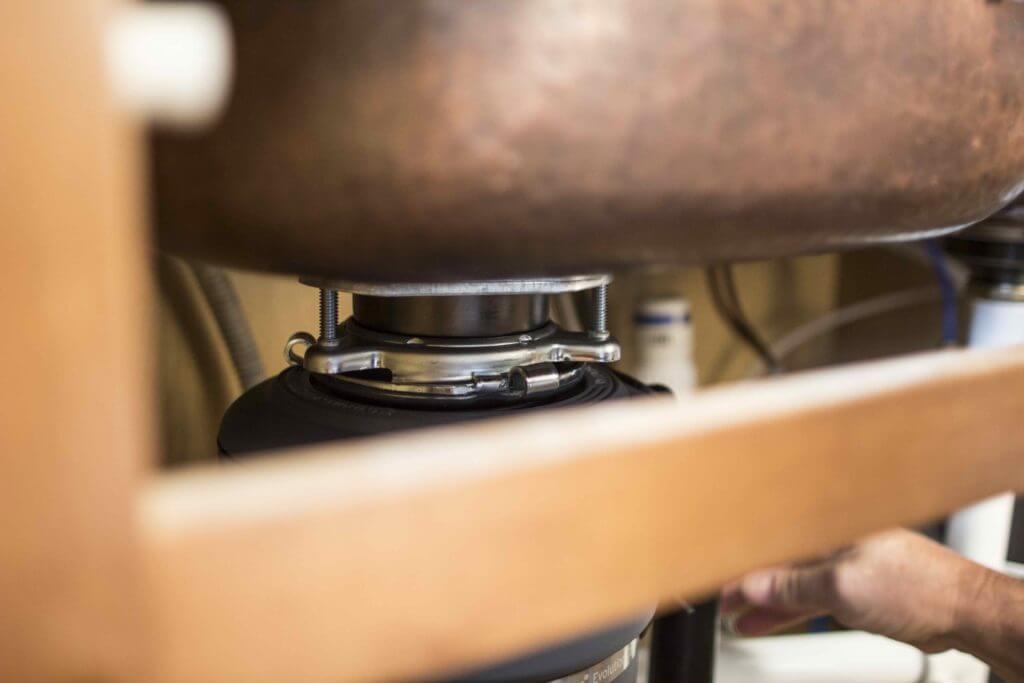
Step 9: Attach the garbage disposal to the disposal flange.
Reference the manufacturer’s installation instructions for proper installation of your garbage disposal. For the InSinkErator Evolution Compact on the InSinkErator website.

Pro tip: Many disposals will require you to attach the plug to the disposal. Be sure to follow the manufacturer’s instructions carefully or ask someone experienced with electric work to assist.
Step 10: Attach pipes to disposal, plug in to the wall, and turn on the water.
Ensure that there are no leaks after running the water for a few seconds. If you are leak-free, turn on the electric and test your disposal.
Finally, enjoy your new copper sink!
You Might Also Like:
How to Replace a Copper Bathroom Sink: The Bell Drop-In Copper Sink
How to Install a Fireclay Farmhouse Kitchen Sink: The Wheatley Fireclay Sink
New Fireclay Sink Changes Up The Vibe
If you have any additional questions during your search for the perfect copper, fireclay farmhouse sink or crafted stainless steel sink, our Sinkologists™ are here to help. Contact us or follow us on Facebook, Houzz, Pinterest, Instagram, or TikTok for more helpful tips and design ideas.