Simple Spicy Marinara with Herbed Halibut en Papillote Recipe
Sinkology is proud to present Emily Schuermann, our food-loving guest blogger who runs Food for a Year. Emily is here to share some recipes she has created exclusively for the Sinkology blog that reflect her view of a copper sink: simple, timeless, affordable and beautifully rustic.
Three years ago, I found myself up to my eyebrows in kitchen design. I was busy picking cabinets, colors, hardware, flooring, appliances (excepts for the double oven — I won that!) – even the floor plan for the kitchen was totally up to me. Another detail that was taking a lot of my attention was the kitchen sink – I wanted copper but the builder was hesitant. His hesitation made me, well — hesitant. That was exciting and quite stressful, so stressful in fact that my gall bladder was evicted in July.
You can read all about the process of picking a kitchen sink HERE. Why am I talking about the selection of a copper farmhouse sink again?? You may be wondering. Well, a couple of days ago, I was cleaning dishes (which I do three times a day!) and a thought flashed through my head.
I thought to myself, “I haven’t worried one second about this sink in the last 2½ years! I love this sink, I’m glad I stuck to my guns – it’s as pretty as ever & so easy to take care of!” I mentally patted myself on the back and continued the task of washing dishes. I will admit, the first two weeks of being a copper sink owner were a little stressful. Back in those early days, I didn’t realize how resilient copper is. That first time I splattered ketchup onto the sink basin – oh my. I thought my eyes may just fall out of my head and I literally HEARD my blood pressure. I thought for sure I had ruined my copper sink. Even worse – I thought maybe my builder was right.
“Relief” is an understatement, more like the oxygen started flowing through my blood again – when, a day later, I noticed that that bright copper penny-sized spot had returned back to it’s original patina. I love it when mess-ups don’t stay “mess-ups”. With that one little event, I realized just how great this beautiful, rustic, colossal copper sink really is. Not only is it a beautiful, eye-catching centerpiece in my kitchen, it rolls-with-the-punches that my bustling family of 6 regularly provide.
So you are probably wondering when I will start talking to you about marinara & halibut – and how does a sink relate to this recipe? Well, like my first thoughts of the copper sink, this recipe may sound a little complicated. Trust me – it is not.
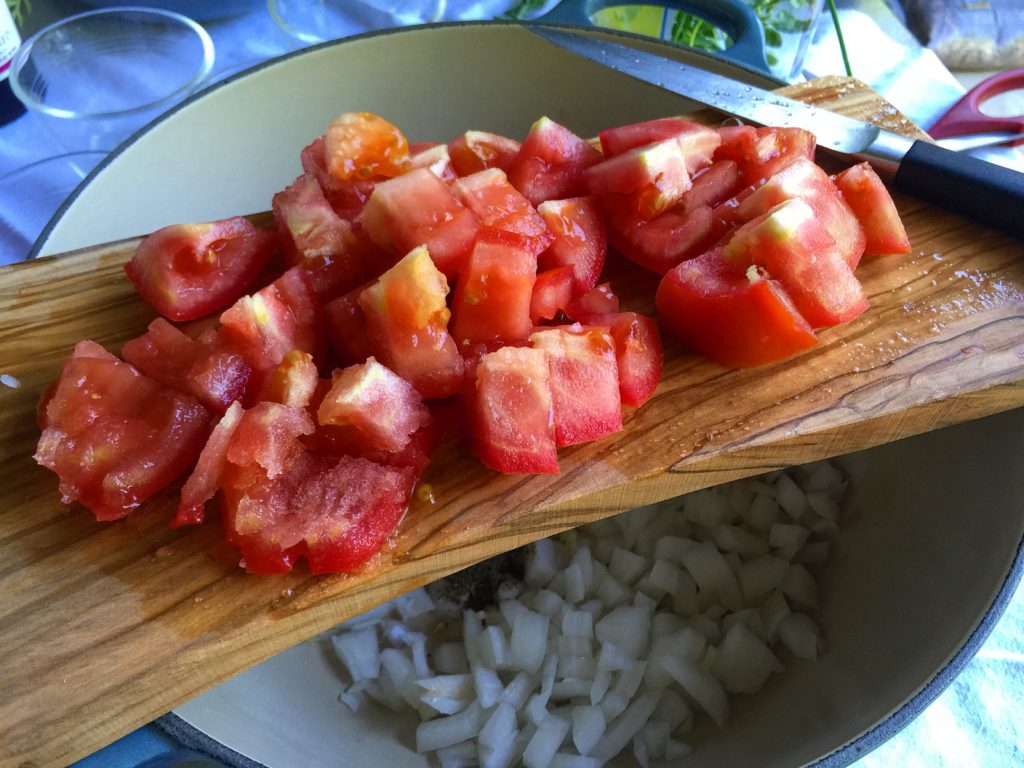
The marinara is a classic case of dump and stir, while the halibut needs only to be seasoned, placed in a parchment bag, sealed and baked.
Let’s start with the marinara. A really good marina is one of those items that lends itself to 100 + meals!
How about ::
- meatball subs
- parmesan chicken
- spaghetti pie
- cabbage rolls
- lasagna
- Italian veggie soup
- smothered Italian sausages

I could keep going, but I am sure you get the idea. For my marinara, I use long list of ingredients – all of which are staple ingredients in my kitchen ((meaning I always keep these items stocked)).
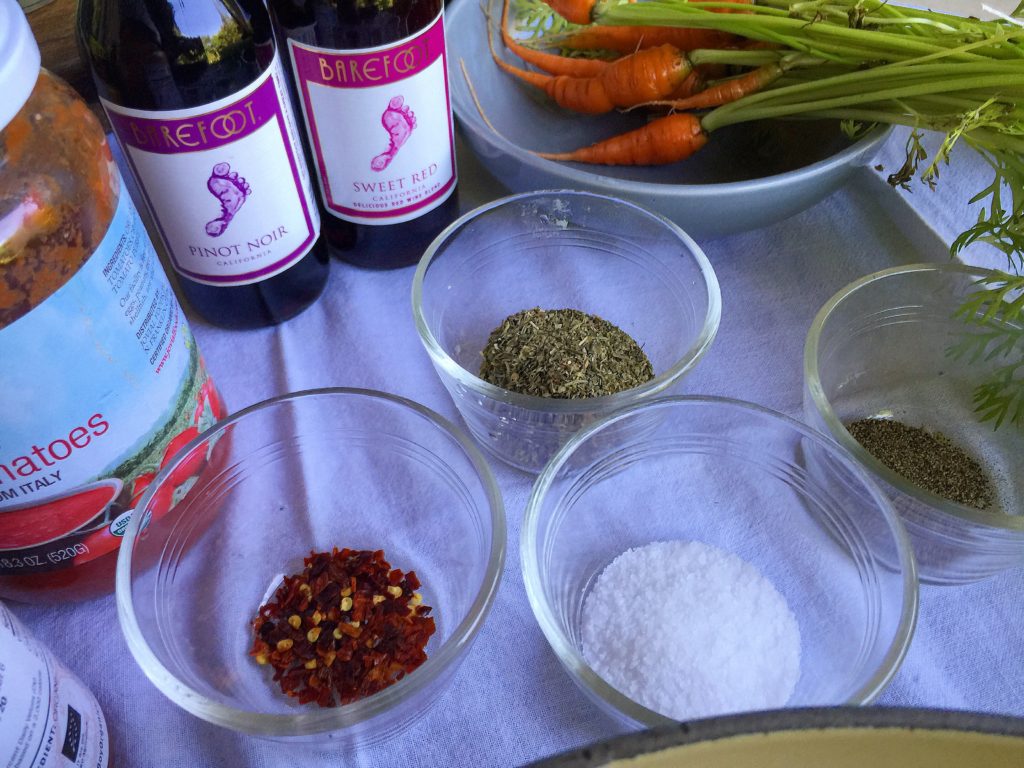
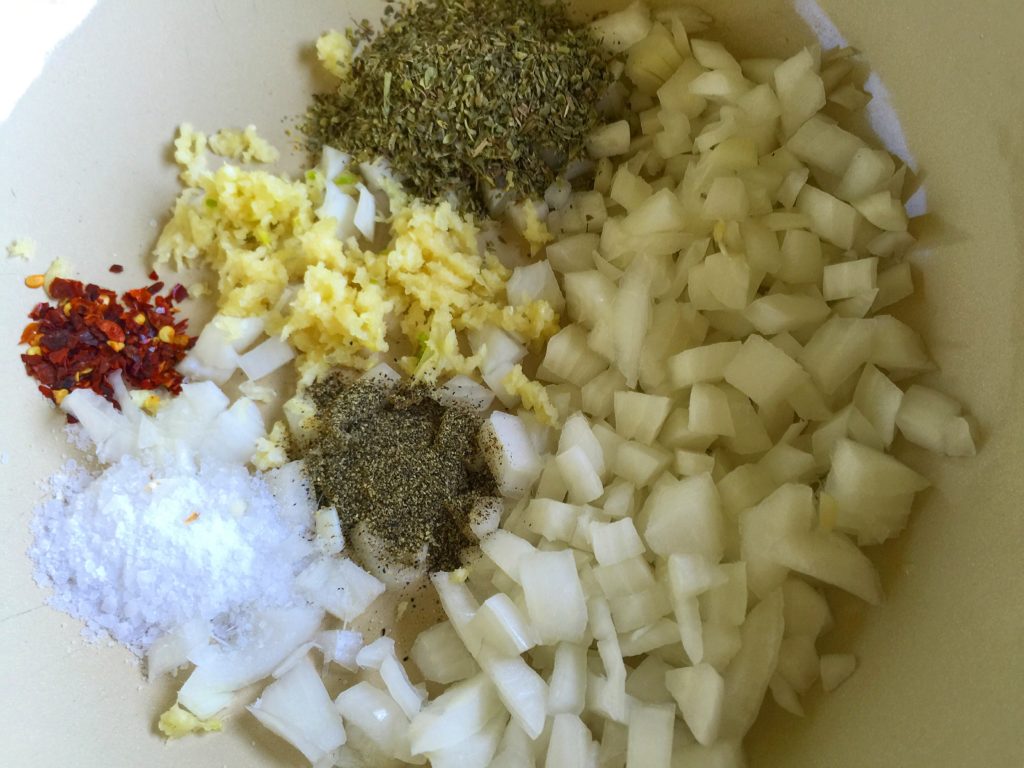
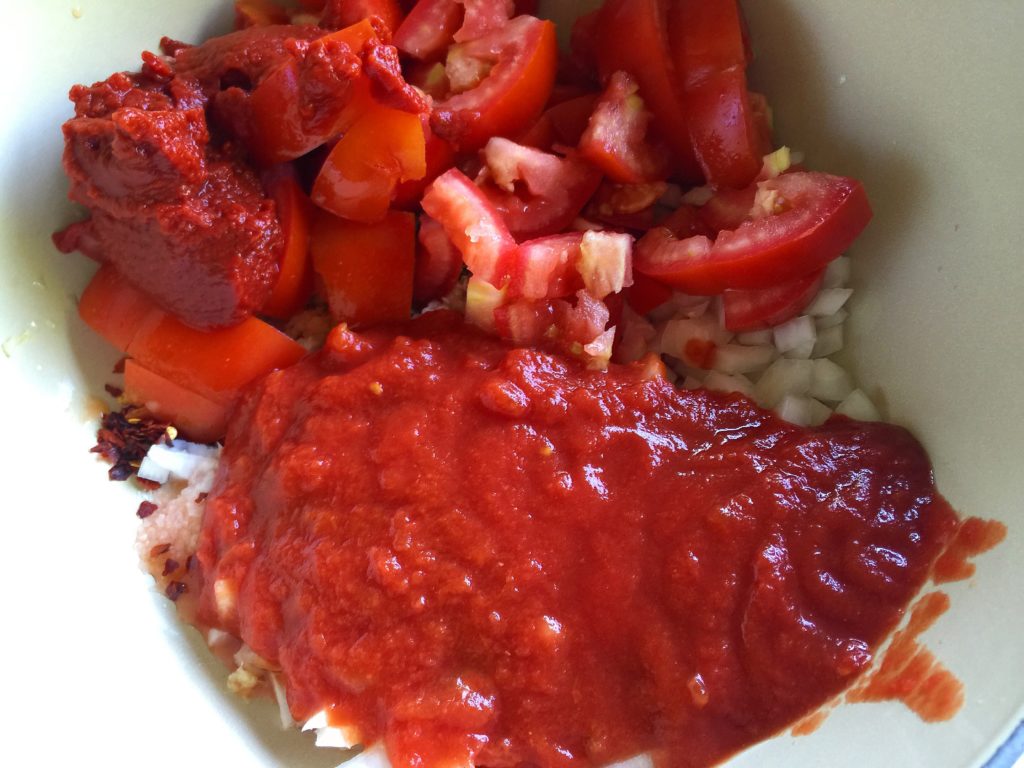
- fresh chopped garlic
- finely chopped onion ((For some reason my kids cry when they find any remnants of onion in their food. If you finely dice, they disappear as they cook.))
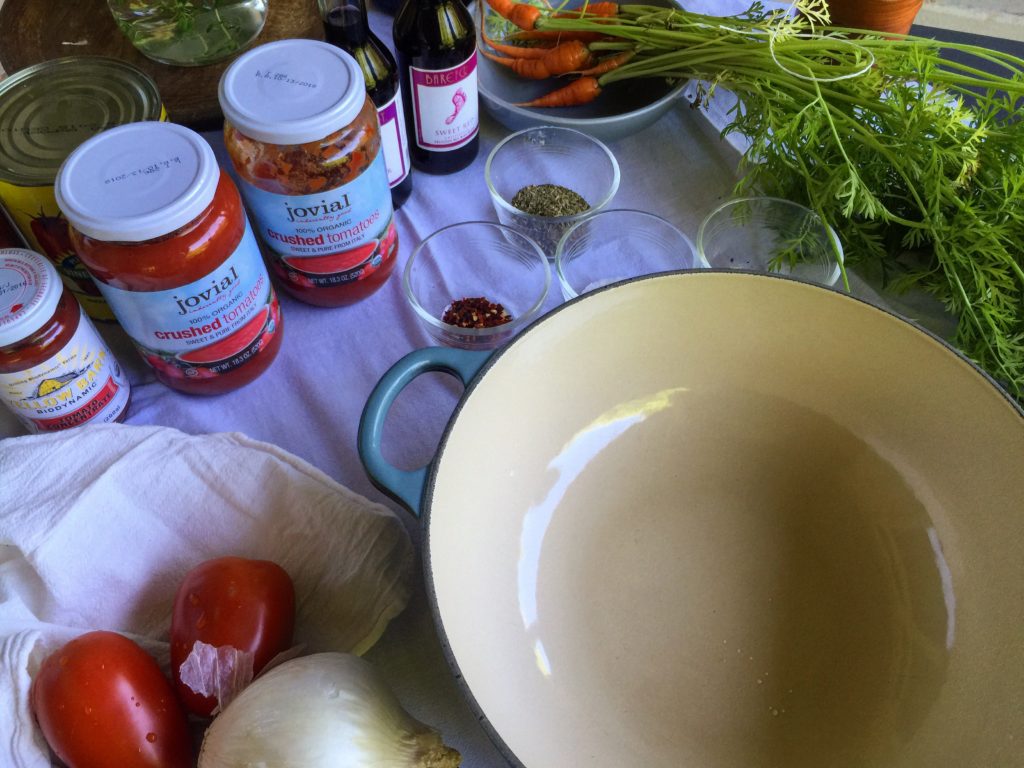
- canned whole tomatoes, fresh chopped tomatoes, tomato paste & crushed tomatoes
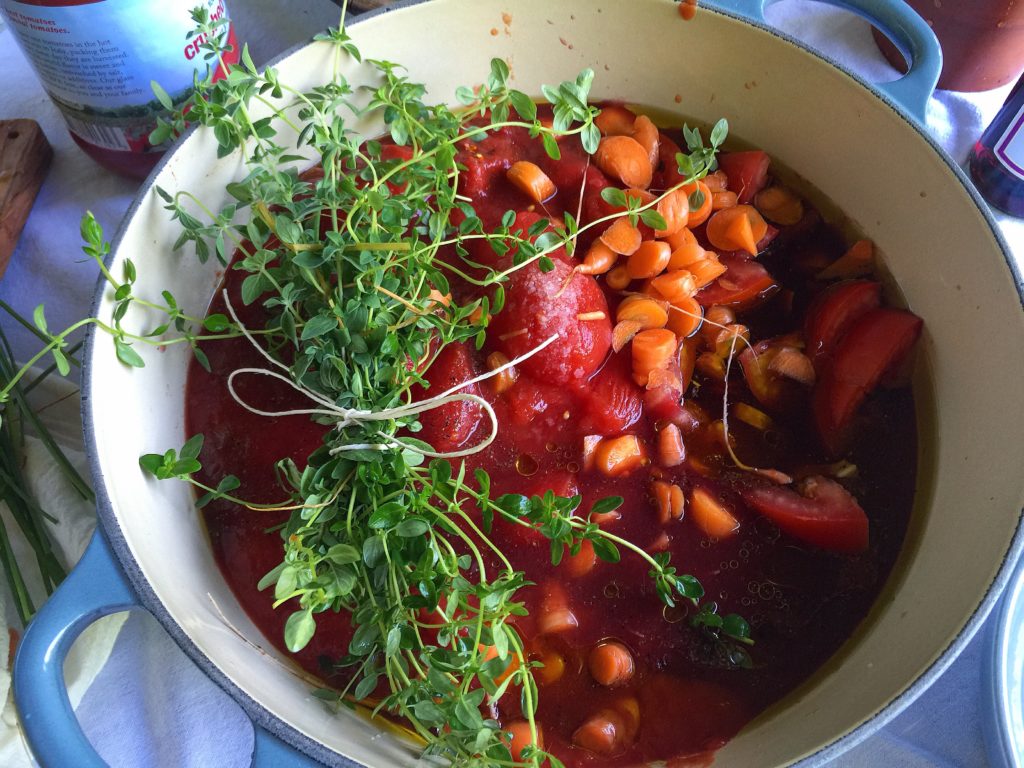
- dried & fresh herbs
- a mix of sweet & bold red wines
- olive oil
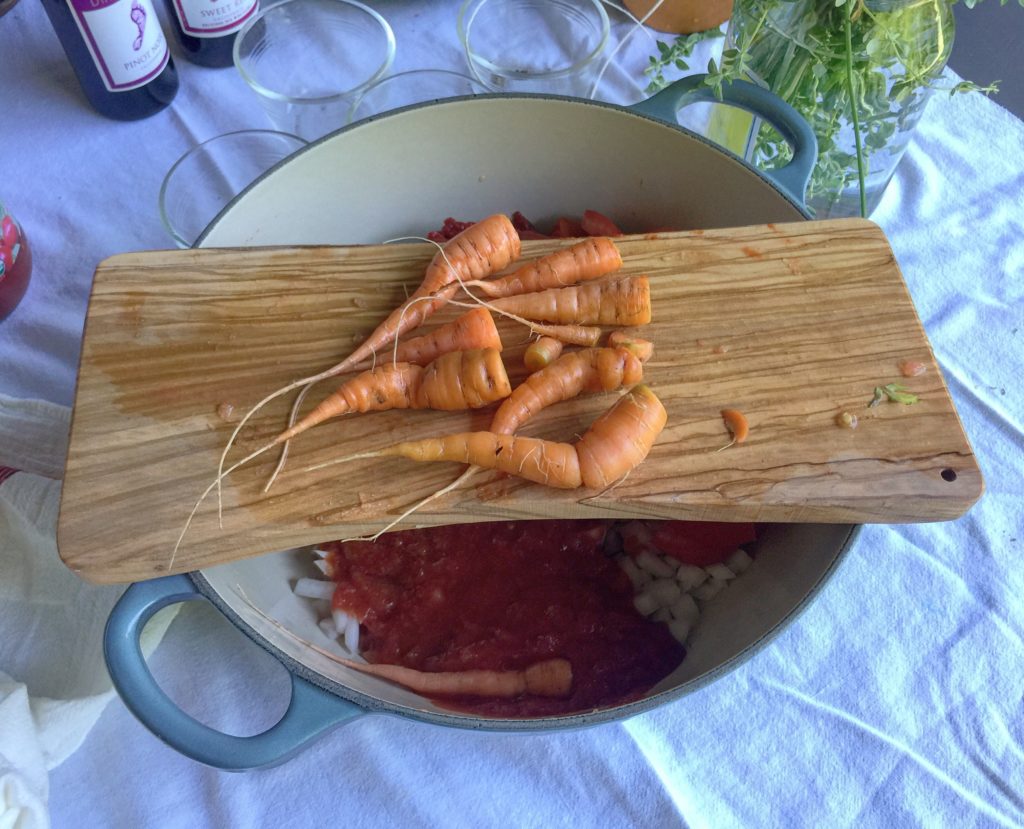
- chopped fresh carrots (since they are growing nicely in my garden, I can’t resist adding them)
- salt, pepper & red pepper flakes
- chicken broth to thin the sauce as it cooks
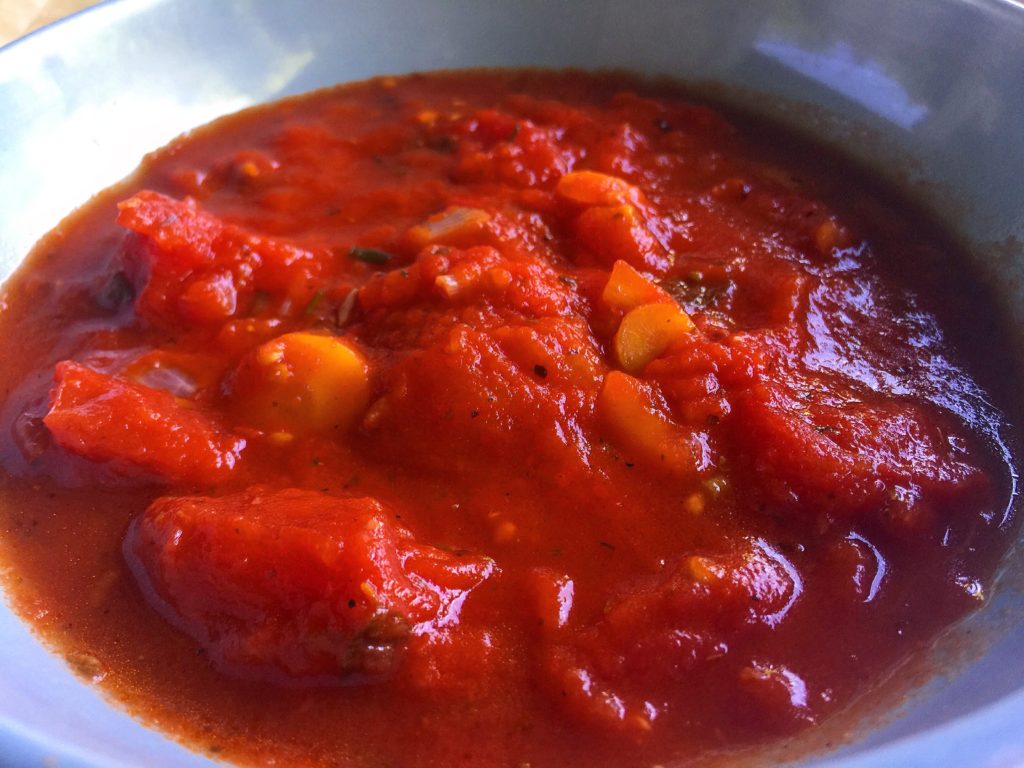
Simmer the sauce for 25 minutes if you are in a hurry or let it go for 2 to 3 hours stirring occasionally. The result – it is delicious enough to eat it all by itself ((which happens to be my favorite way to enjoy marinara).

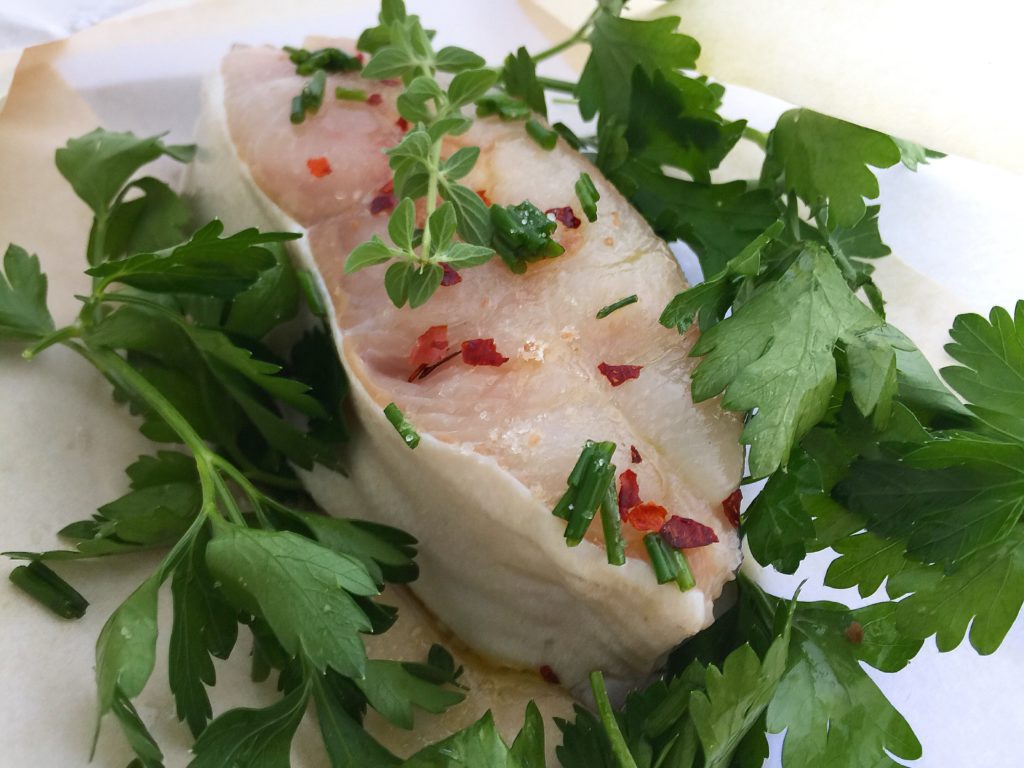
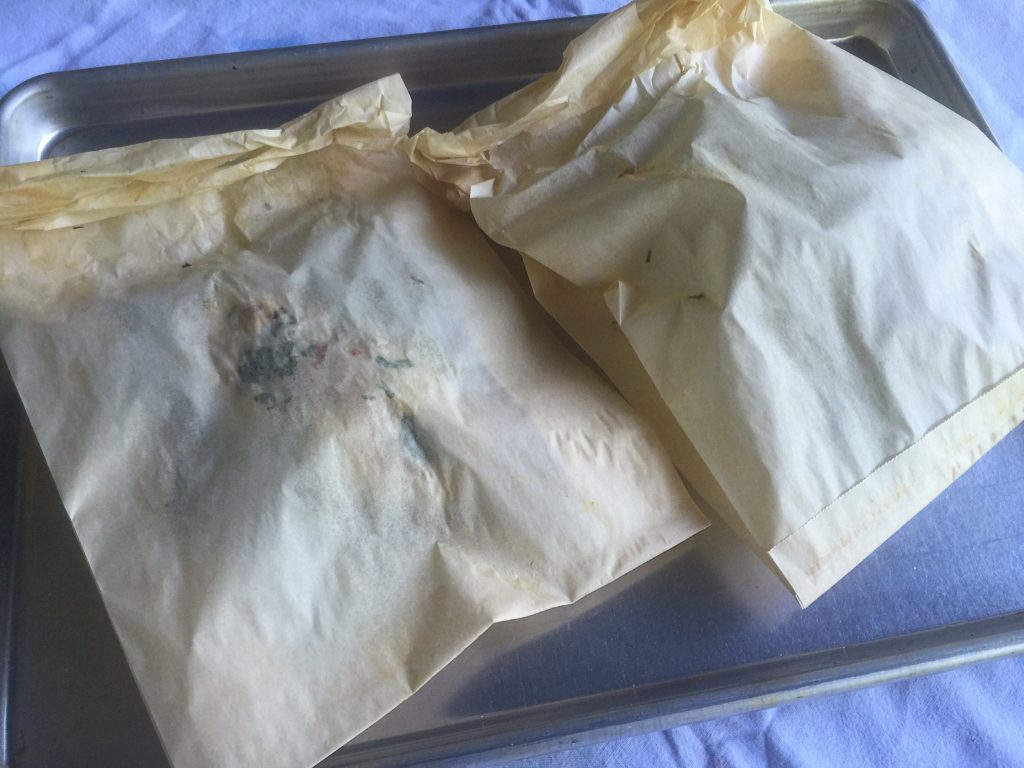
For the fish, make sure your oven is preheated to 400° and simply season each side of the halibut steak and seal in a parchment bag. Place the bags on a baking sheet and into the oven for 12-14 minutes depending on the thickness of your steak.
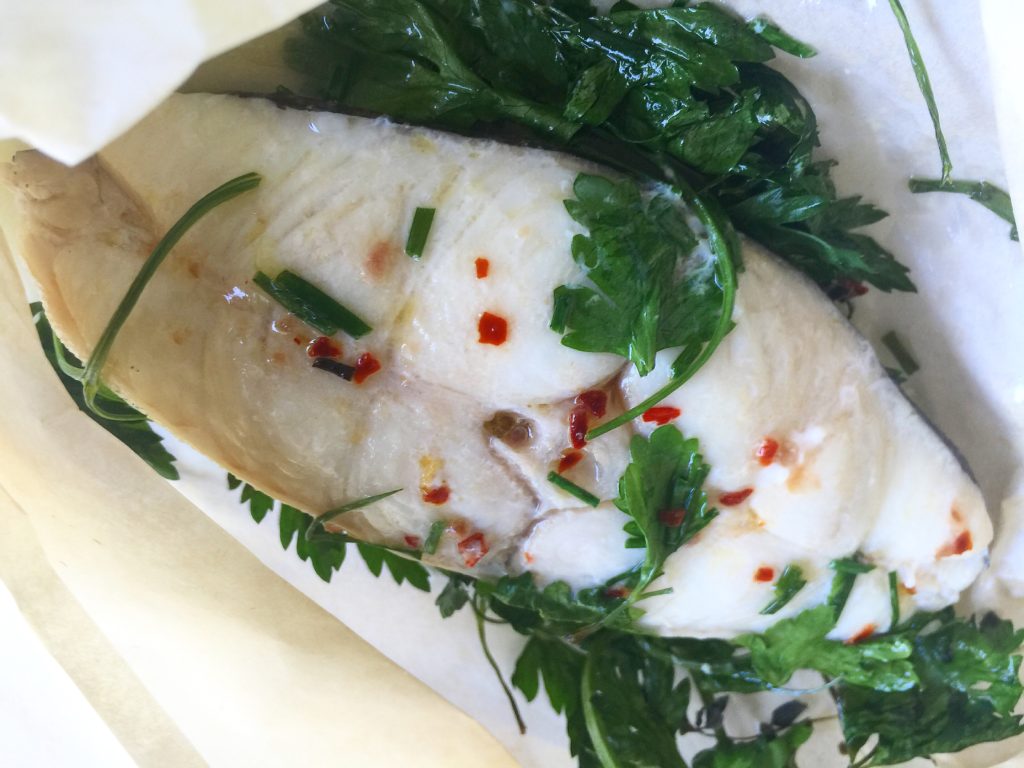
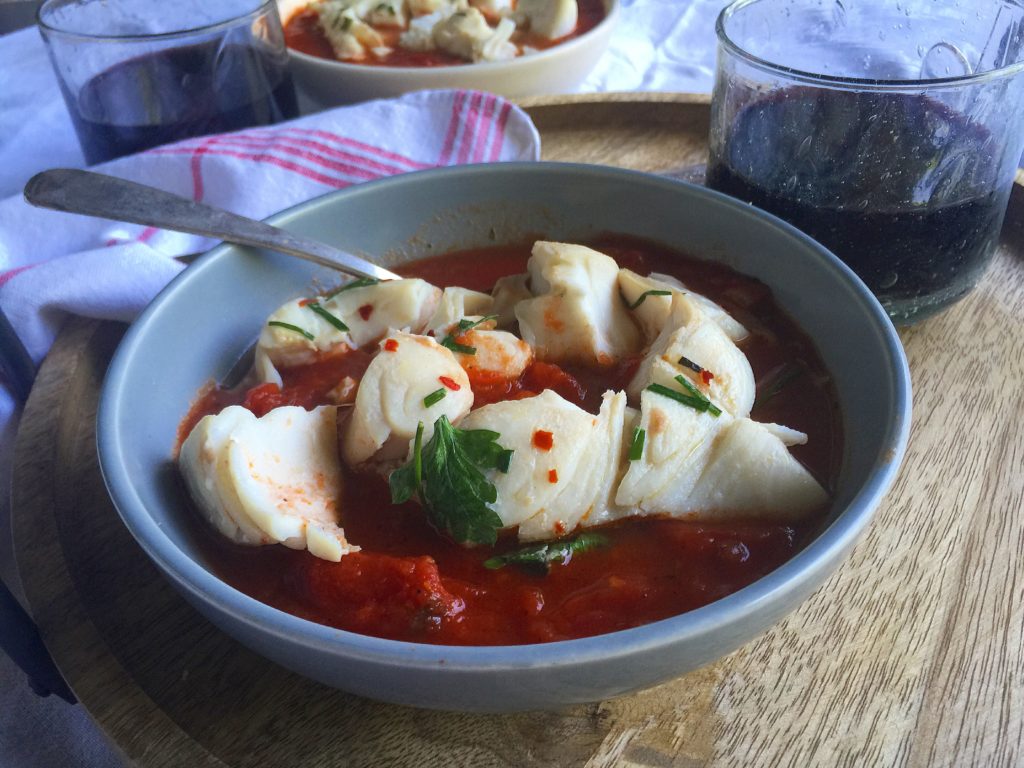
In a flash, the halibut was perfectly cooked, moist, juicy and flaky.

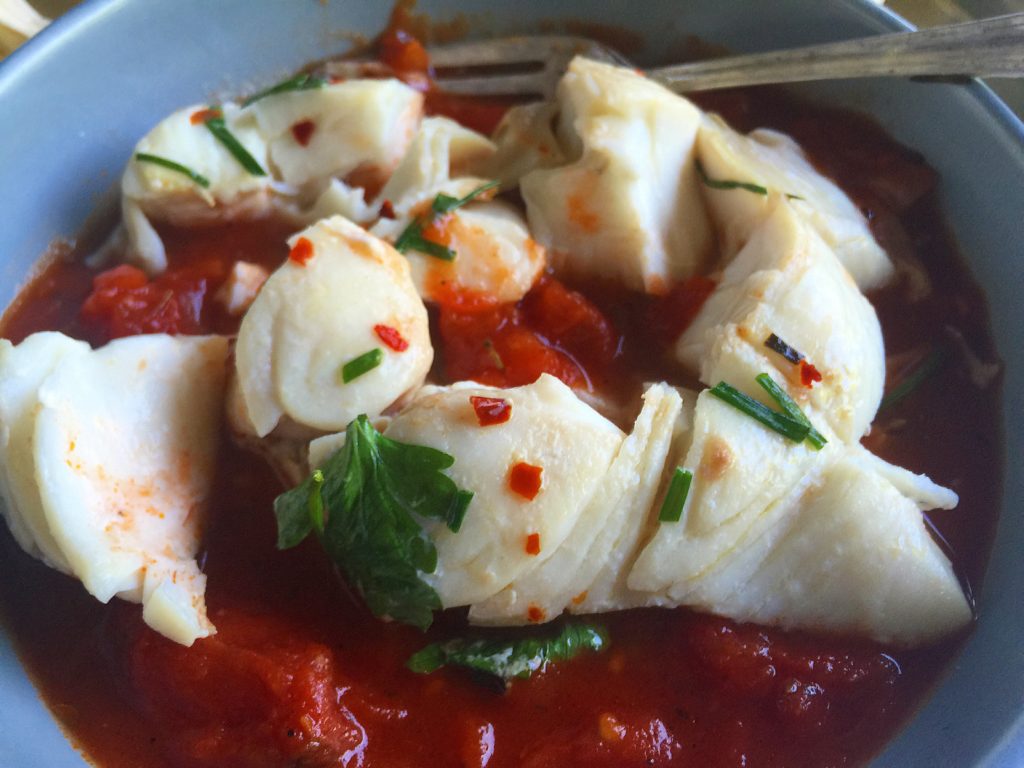
Absolute perfection, I was amazed at how simple & speedy this dish was to make. I admit, the name makes it sound complicated – but in reality this Spicy Marinara with Herbed Halibut en Papillote (meaning halibut in paper with marinara) is practically fool-proof.
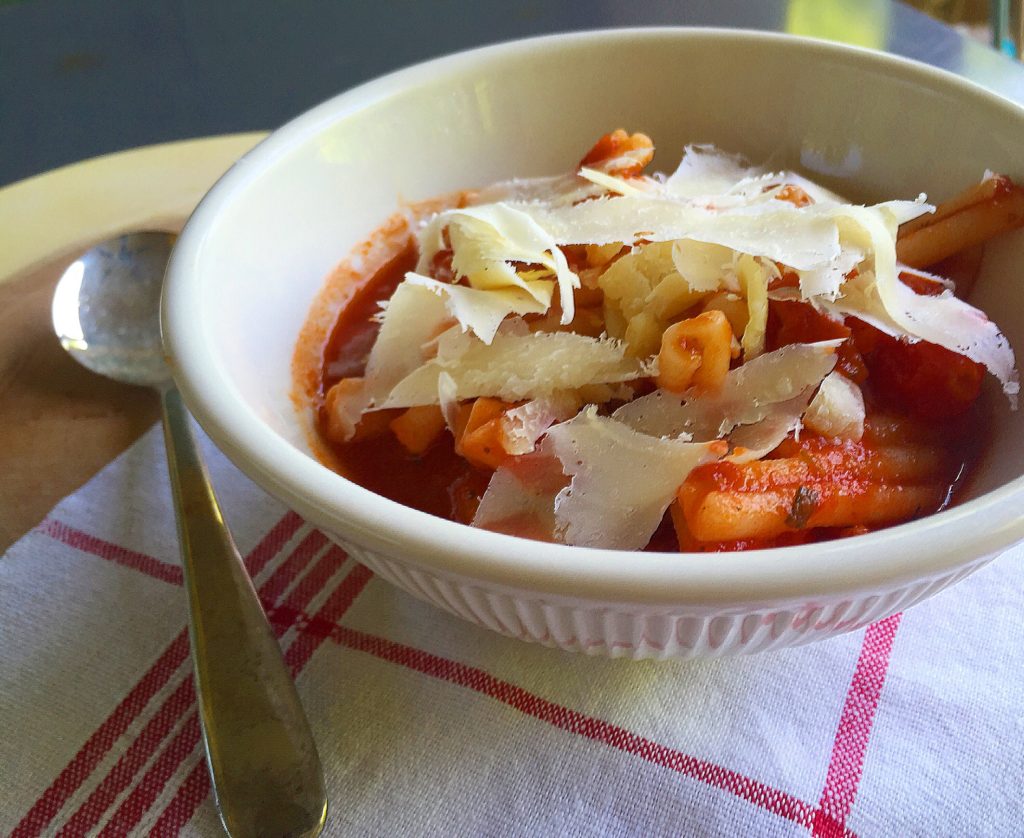
OH – and the leftover spicy marinara is a treat in it’s own right!
Now, that sounds a little like my first impression versus my real life experience with my beloved farmhouse copper kitchen sink.

- 4 garlic cloves, chopped
- 1/2 c white onion, diced
- 2 T dried Italian herb blend
- 3 t kosher salt, more to taste
- 1-2 t black pepper, to taste
- 1-3 t crushed red pepper, depending on heat preferences
- 2-28 oz cans whole peeled tomatoes, Italian style
- 3 c crushed tomatoes
- 3 Roma tomatoes, diced
- 1/3 c tomato paste
- 10 oz red wine (I used a 50/50 blend of sweet red wine & Pinot Noir)
- 1/4 c olive oil
- 1 c carrots, rough chopped
- 10 springs fresh thyme
- 5 sprigs fresh oregano
- 2 T fresh chives, chopped
- 2-8 oz halibut steaks, bone in, skin on (add more steaks depending on the number of guests)
- 2 T olive oil
- citrus infused sea salt**
- crushed red pepper
- 2-3 sprigs of fresh oregano & thyme
- 2 T fresh parsley leaves
- 2 T fresh chives, chopped
- 2 parchment bags
- In a large, 7 to 9 qt. pot, combine all marinara ingredients.
- With a wooden spoon, mash the whole tomatoes to break them down slightly.
- Place the pot over medium high flame, stirring regularly to keep the bottom of the sauce from burning.
- Once the sauce comes to a boil, reduce to a simmer and continue cooking for 20 minutes to 2-3 hours. The longer it cooks the more intense the flavors become.
- Over the next 2-3 hours, continue stirring frequently.
- Prior to serving, taste and add additional salt and pepper as needed.
- Preheat oven to 400°.
- Rub both sides of the fish with olive oil and season (each side) with several pinches of salt & crushed red pepper.
- Place one steak in each bag, place herbs on top & beside each piece of halibut.
- Seal each bag tightly and place on a baking sheet & into the preheated oven. Depending on the thickness (approx. 1") the fish will cook for 12-14 minutes.
- Once the fish is cooked through, open the bags, remove the skin and bone. The fish will naturally break into large chunks at this point.
- Place 1 c of spicy marinara into each bowl and top with halibut.
- Serves 2 with plenty of marinara left over for another meal or two!
- Marinara can be stored in the refrigerator, in an airtight container, for up to 12 days.
- *The marinara can me made ahead of time, stored in the refrigerator and reheated prior to serving with the fish. ((I actually think the marinara is even better the second day!))
- **If you don't have citrus infused sea salt, simply combine 1 T of sea salt with 1/2 t orange or lemon zest. Sprinkle a few pinches of the citrus zest salt on each side of the halibut.
For more recipes from our copper-loving foodie, check out our blog. If you have any questions about copper or copper sinks, our Sinkologists are here to help. Contact us or follow us on Facebook, Twitter, Houzz, Pinterest, or Instagram for helpful tips, recipes, and design ideas.