Drop-In Kitchen Sink Installation 101
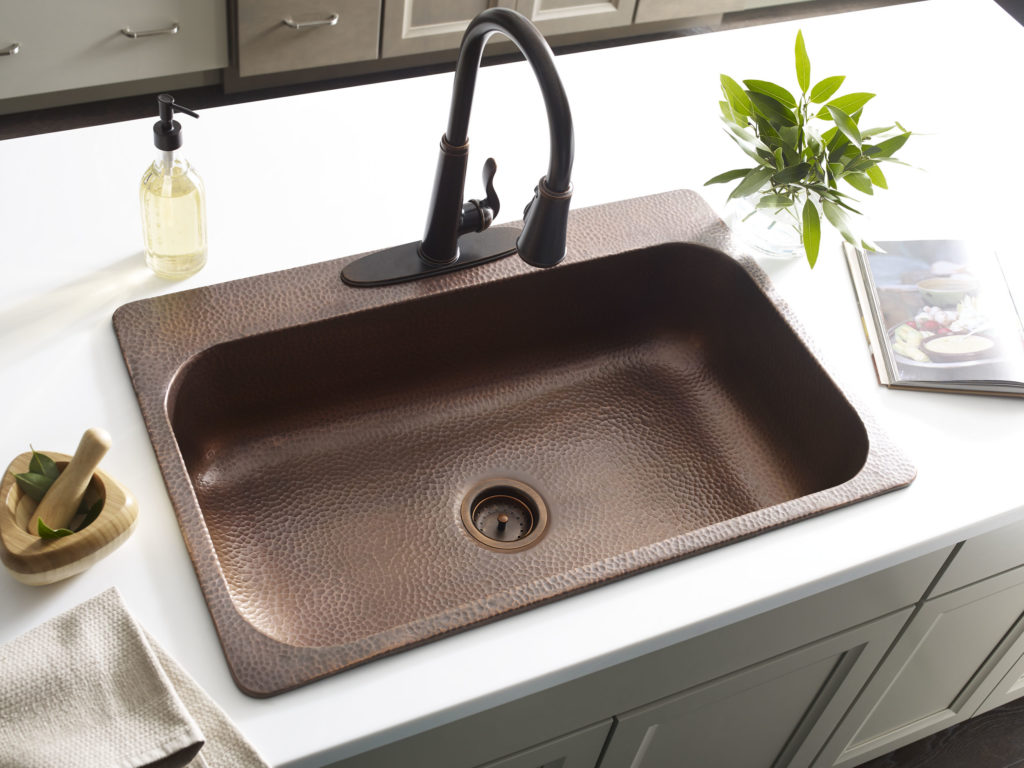
The drop-in kitchen sink is a DIYer’s dream come true. Designed to install simply and beautifully into precut countertops, anyone can tackle a drop-in sink installation project in just a few spare hours on a Saturday. We love how drop-in’s allow homeowners to refresh the look of the bathroom without taking on an entire bathroom renovation so they can enjoy their new sink sooner with less stress along the way.
Now, you may be wondering if the final look of a drop-in sink is as spectacular as the straightforward installation process. We can confidently tell you that yes, even though the project itself won’t cost you much time, the end result won’t look cheap. Drop-in sinks are the easiest way to get a high-end look for less effort. We designed our Sinkology drop-in sinks to fit flush for a seamless, meant-to-be finish in every kitchen. So, whether you love the look of an oversized farmhouse sink or the sleek, multipurpose style of double sinks, there is a drop-in sink to suit your style…and your busy schedule.
But what’s the best drop-in sink installation strategy? We break it down to two simple steps.
1.Plan
Every successful DIY project begins with careful planning, even for straightforward installations like this. We recommend you:
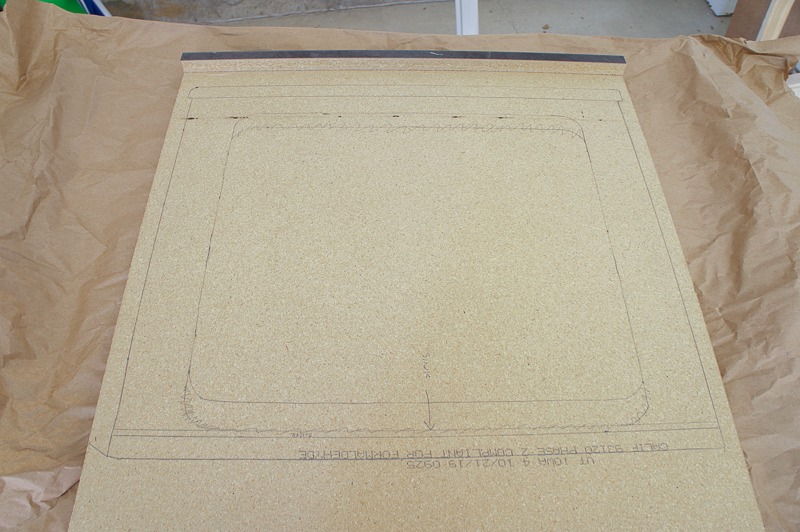
-Flip your Sinkology sink upside down and trace the outside edge onto thick paper. We love using sturdy cardboard. Once the first line is made, draw a second line inside the first, ½” away. This is the line that you’ll work with.
-Take your freshly cut template and place it on your countertop, aligning with the cabinet and plumbing connections. Be sure to mark openings before cutting the countertop at all.
-Before installing, make sure that the sink will fit in the hole. It may seem obvious, but we can’t say it enough: this step is really important.
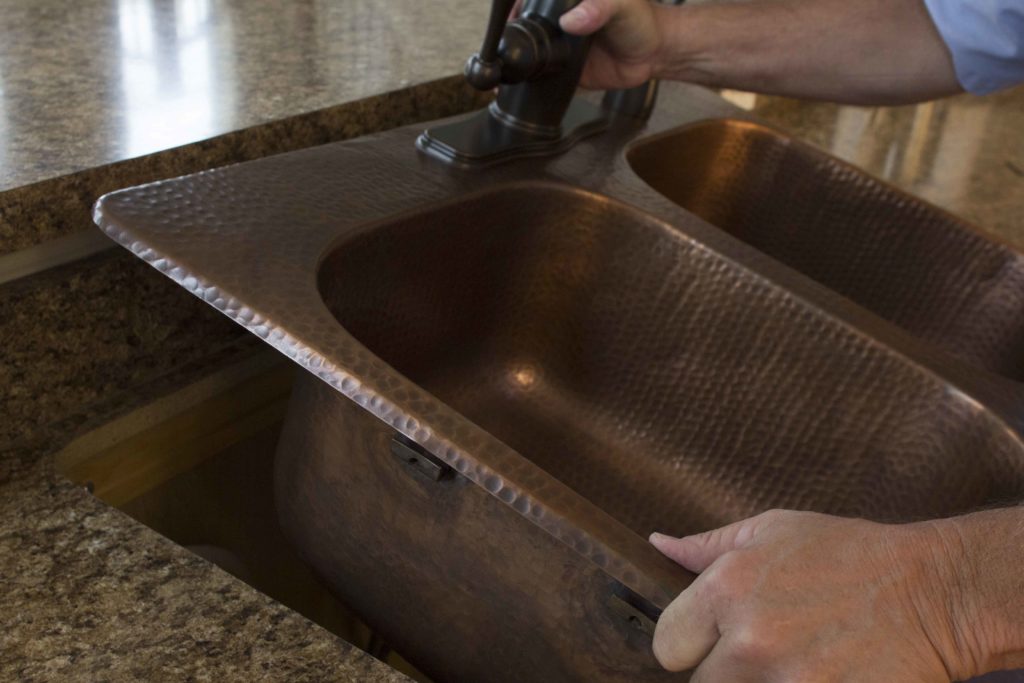
2.Mount
The actual mounting process will depend on the specific sink you buy. Some Sinkology sinks will include mounting hardware, while others do not. No matter how it’s attached to the countertop, we promise you can do it.
-If your sink does not come with mounting hardware, you will use a combination of polyurethane expanding foam, plumbers’ putty and 100% silicone cure to adhere to the countertop.
-If your sink does include mounting hardware, you’ll work with things like bolts, brackets and claws to secure.
Now that you know the gist of a drop-in sink project, we hope you feel ready to replace your existing sink. We have even more resources available for you when you do. Every Sinkology sink comes with detailed instructions that walk you through each step from start to finish. If you need a bit more support, we recommend you explore BILT Intelligent Instructions®. We’ve partnered with BILT to create step-by-step installation support specific to Sinkology sinks in their user-friendly app. First-time DIYers love the interactive guidance in this easy to follow, easy to find app.
After your successful install, share a photo of your new drop-in kitchen sink with us on social @Sinkology with #MyDropInSink.
Still looking? Browse through our Drop-In Kitchen Sinks on our website.
For more helpful how to’s, follow us on Facebook, Houzz, Pinterest or Instagram. If you are looking for personalized questions about your sink installation progress, contact us here.
_____________________________________________________________________
If you have any additional questions during your search for the perfect copper, fireclay farmhouse sink or crafted stainless steel sink, our Sinkologists are here to help. Contact us or follow us on Facebook, Houzz, Pinterest, Instagram, or TikTok for more helpful tips and design ideas.