Spiced Apple & Sugared Ginger Galettes Drizzled with Salted Caramel Sauce
Sinkology is proud to introduce Emily Schuermann, our food-loving guest blogger who runs Food for a Year. Emily is here to share some recipes she has created exclusively for the Sinkology blog that reflect her view of a copper sink: simple, timeless, affordable and beautifully rustic.
Oklahoma may have some 90° days yet to come, but this recent string of cool, crisp mornings is all the confirmation I need. Yes — Fall is upon us! I have pulled out some sweaters, proudly slipped on a pair of fleece-lined moccasins and officially celebrated the passing of summer. Even our bunnies seem to have an extra hop in their… um, hop.

And with the best time of year upon us, what better way to celebrate than to fill the home with the glorious scent of fresh, spiced apples and buttery crust baking away in your oven?! Making an apple galette, which is just a fancy name for a free form, country-style slab pie, is the easiest and quickest way to usher Fall into the kitchen.
Now, before we dive into the particulars of this recipe, let me just start by saying – a homemade pie crust is just an option. It may be a luxurious, flaky, buttery perfect option – but it is still purely optional. I won’t be sharing my favorite pie crust recipe today, but if you are interested in checking out a no fail, tried & true pie crust recipe, head over to Food for a Year, check out my favorite homemade pie crust recipe and help yourself.
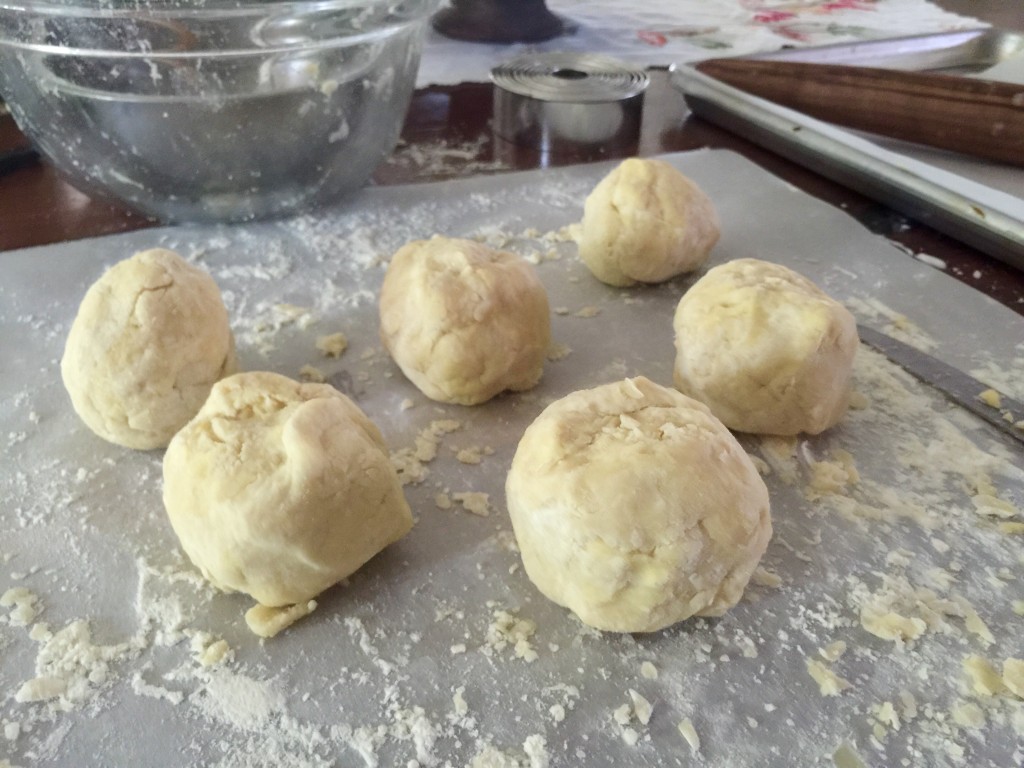
So, start by having your favorite pie crust handy – because once the apples are sliced & peeled ((or peeled & sliced, for that matter)) the galette will be assembled and ready for the oven in minutes! For this recipe, I made one batch of pie crust dough, yielding enough for 2 sheets. Instead of dividing the dough into 2 equal portions, I decided the kids & hubby would like their own mini galette – so I made 6 equal portions.
If you don’t NEED 6 minis or 2 – 9″ galettes, simply half the recipe . But let me just pause to say, I don’t believe there is such a thing as too much apple pie – do you?
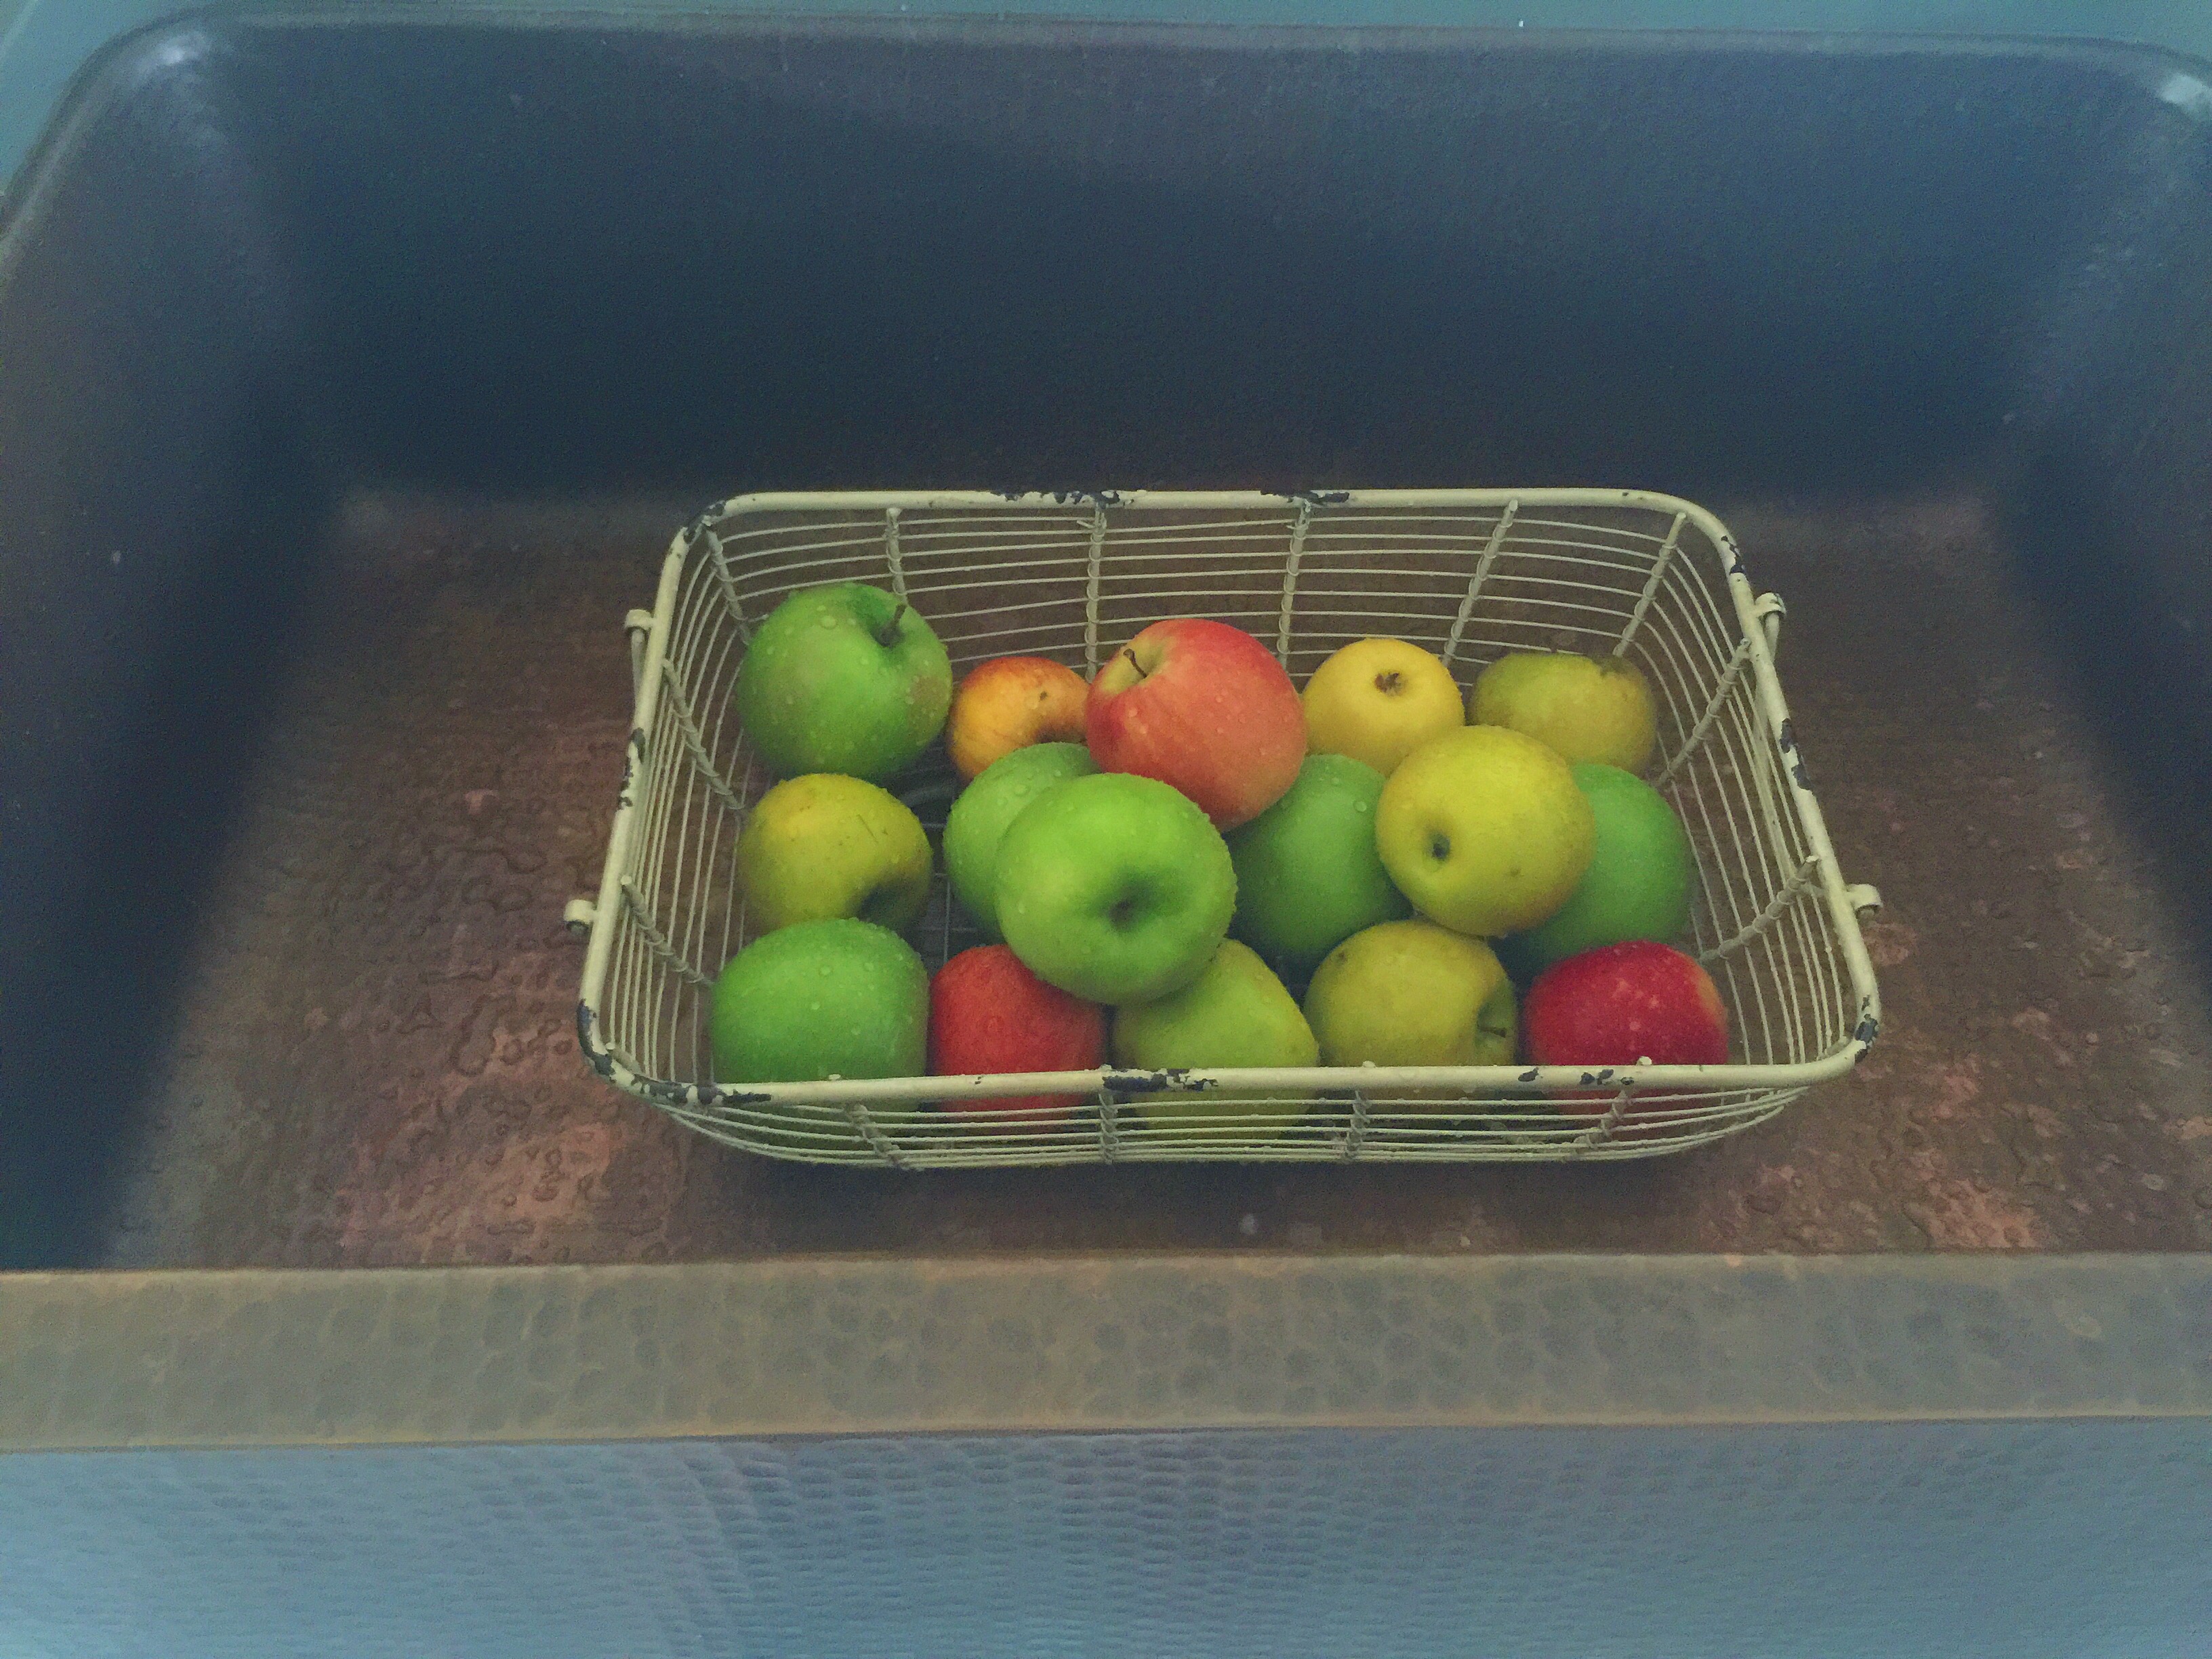
Notice my choice of apples and that pretty farmhouse copper sink in the distance.
Moving on – let’s talk about the apple filling. I am letting you in on my secret for making the best apple pie: I use a combination of apples, making sure to get a good mix of sweet, tart, crisp, crunchy. For this recipe, I used equal parts: Granny Smith, Golden Delicious & Honey Crisp.
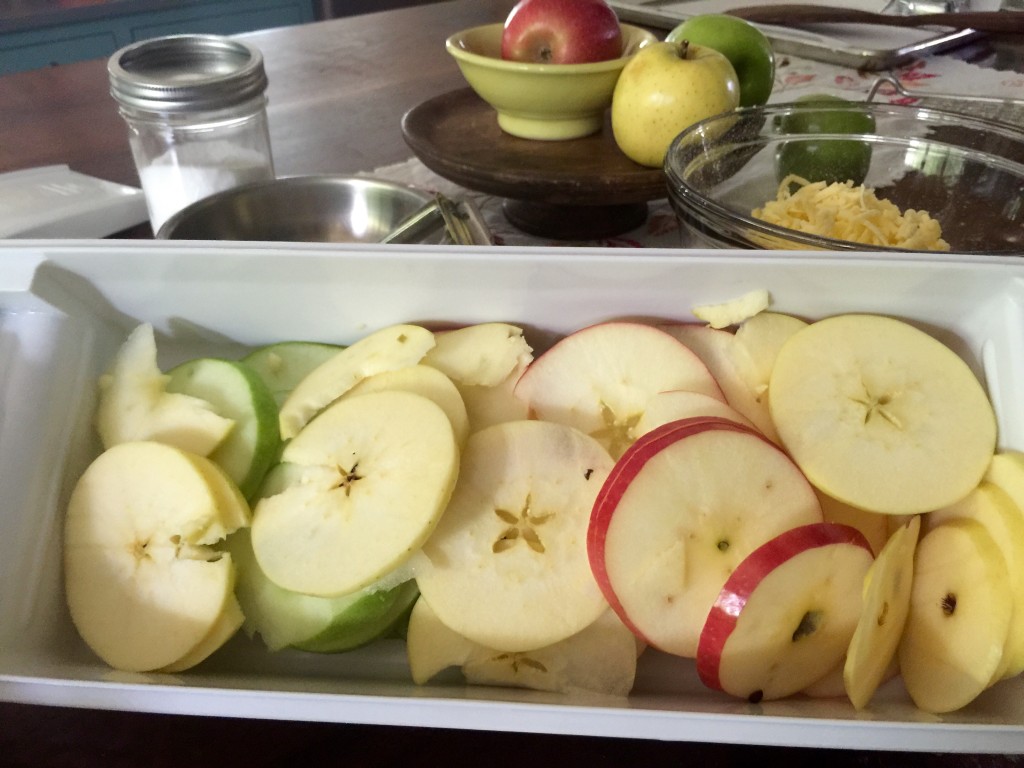
I used a mandolin to evenly slice my apples into pretty rings, then I used my circular cutters to peel and core the slices.
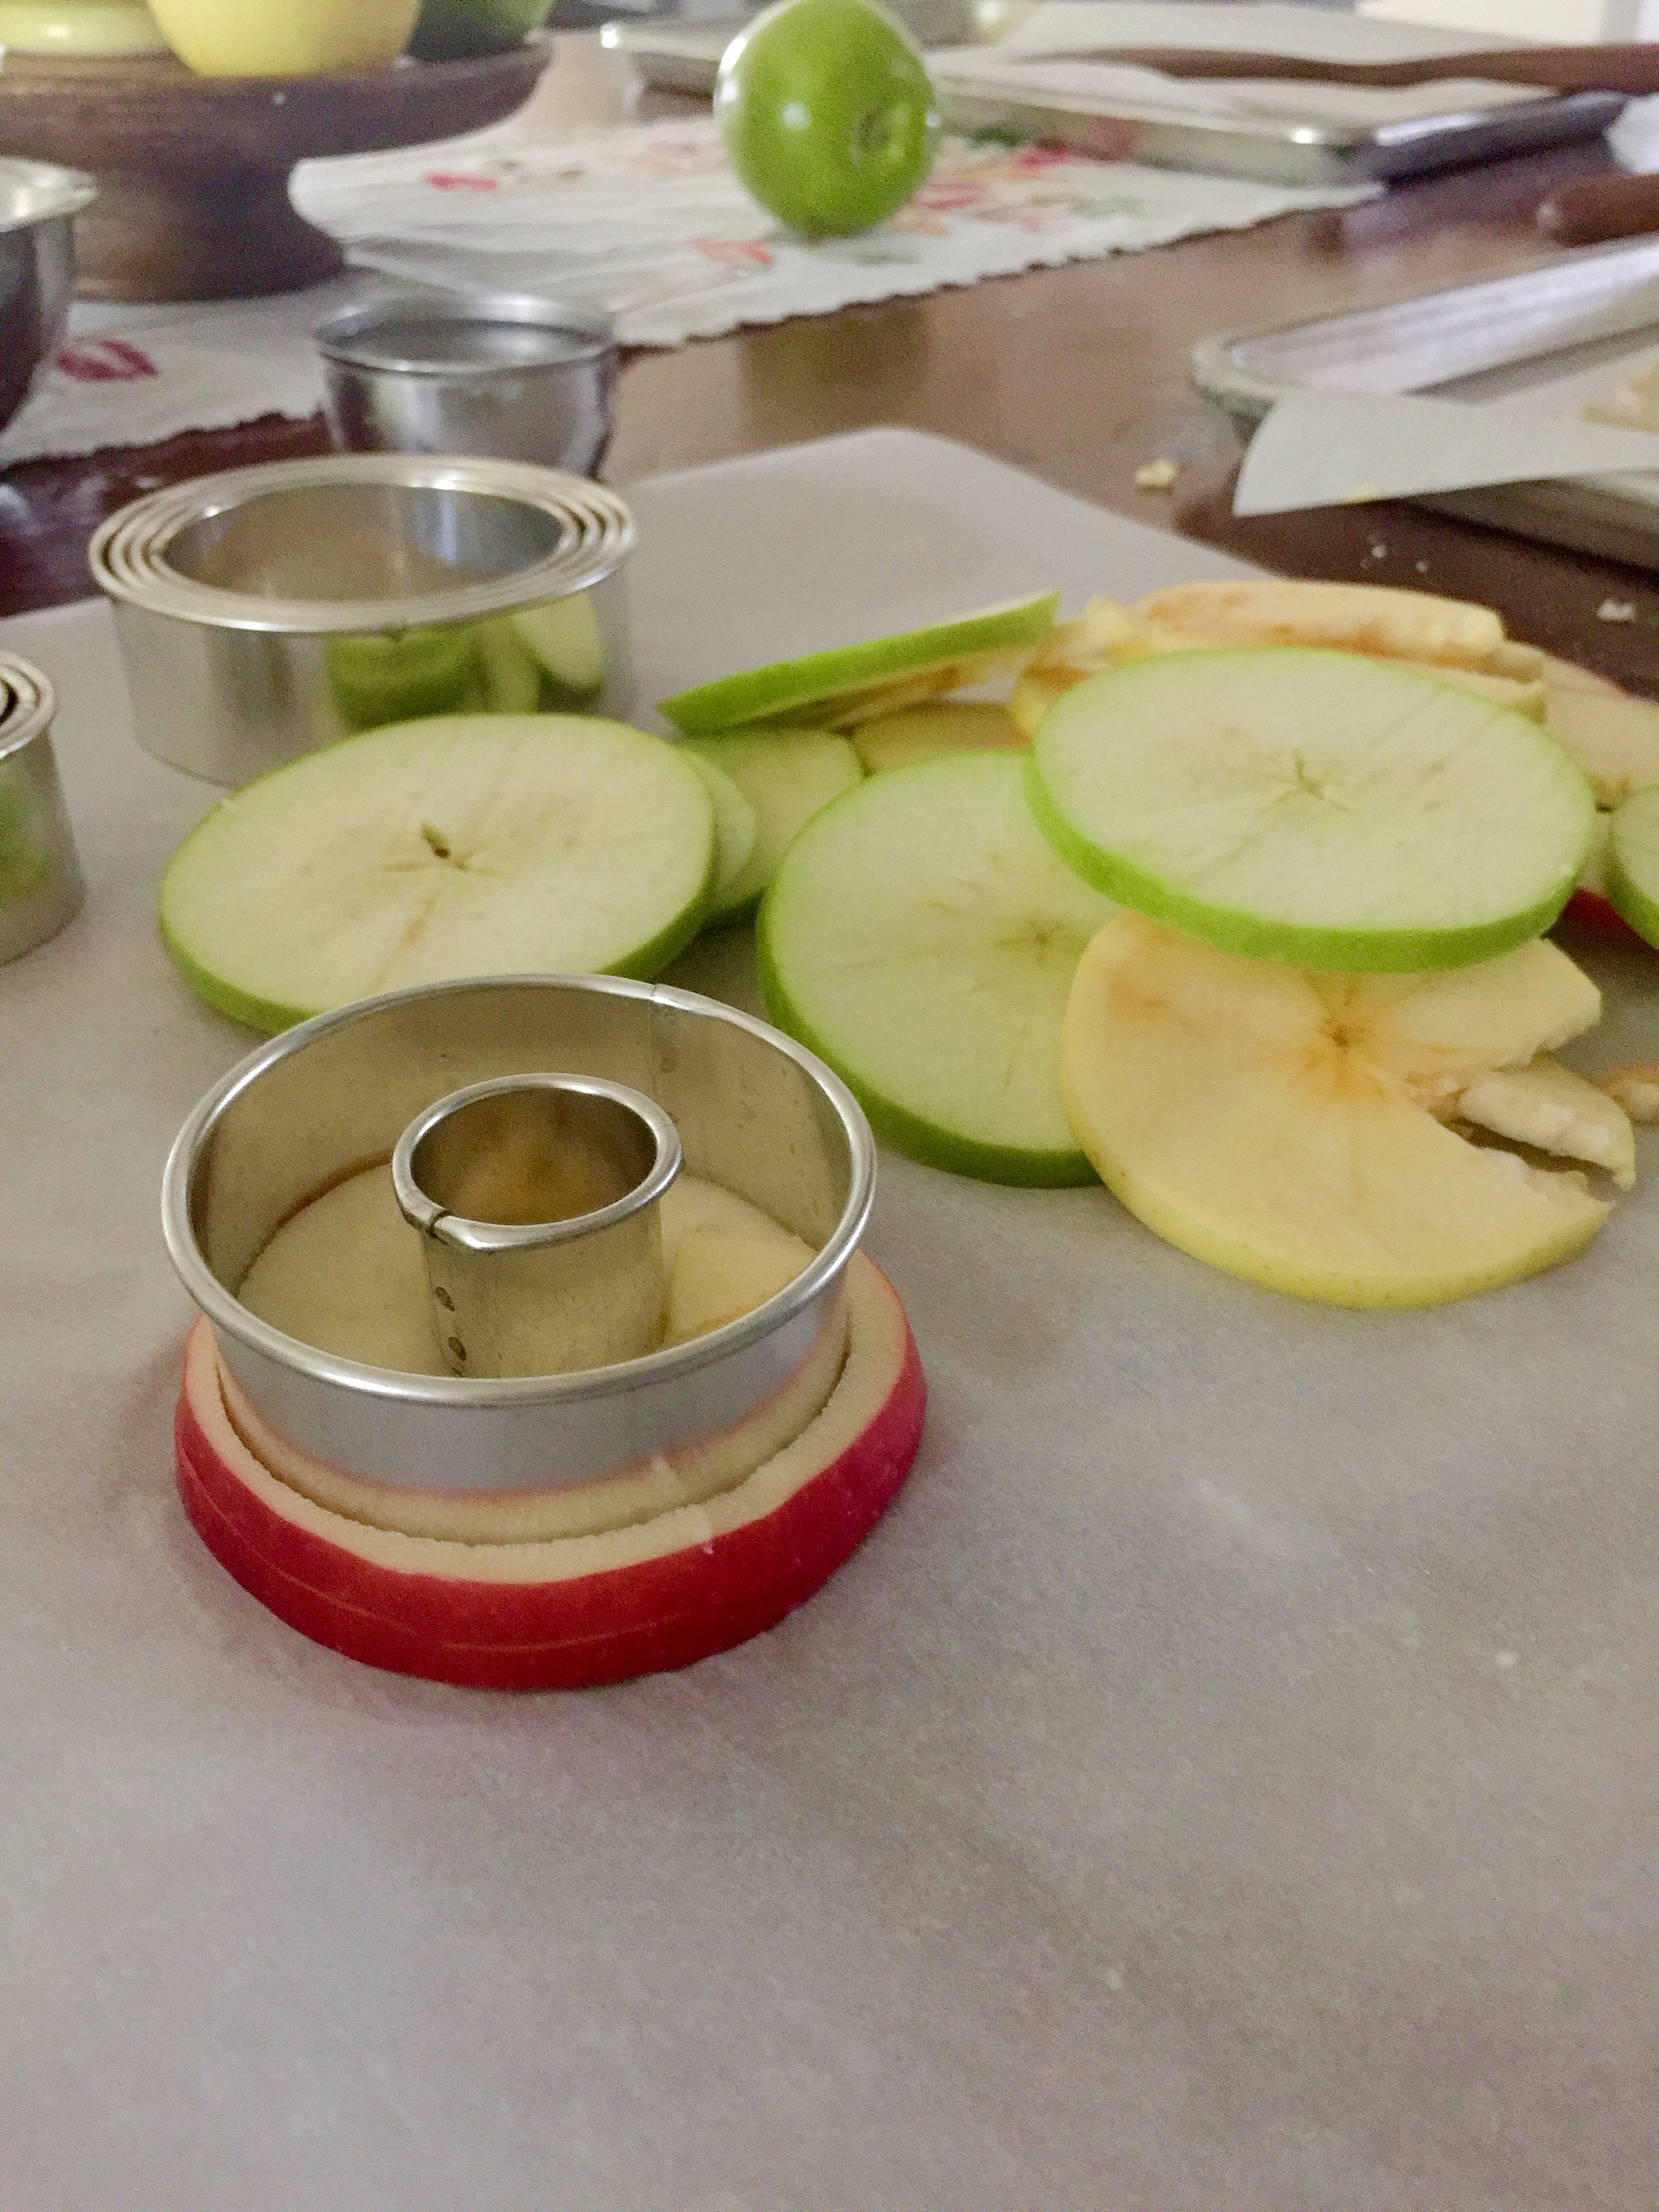
Using circular cutters to peel and core make this step the perfect job for a kiddo! Mine happened to be on a field trip, otherwise they would have been enlisted for sure!
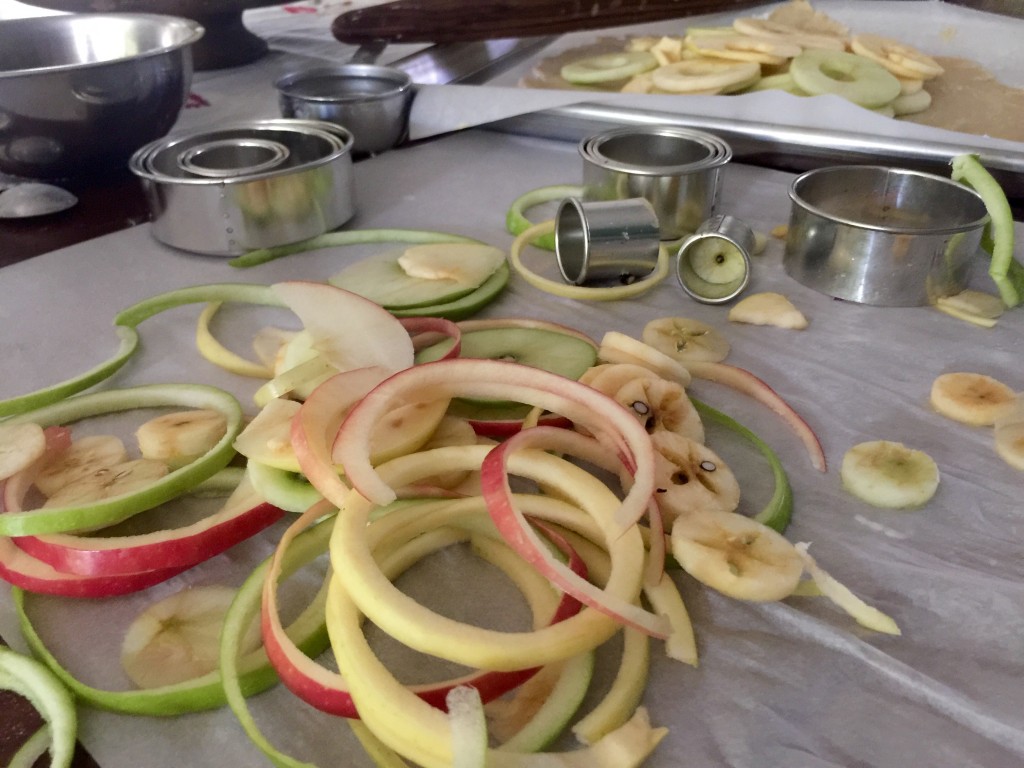
The bunnies were happy to see these kitchen scraps come their way!! Now, I can admit – slicing & peeling in this manner is a slightly more labor intensive((and vain, haha)) process than just getting a parring knife and going to town. But just look at those perfect circles?! Don’t they make for a pretty picture?! Feel free to use another method for this step, just be sure the apples pieces are uniform in size and thickness to ensure uniform baking.
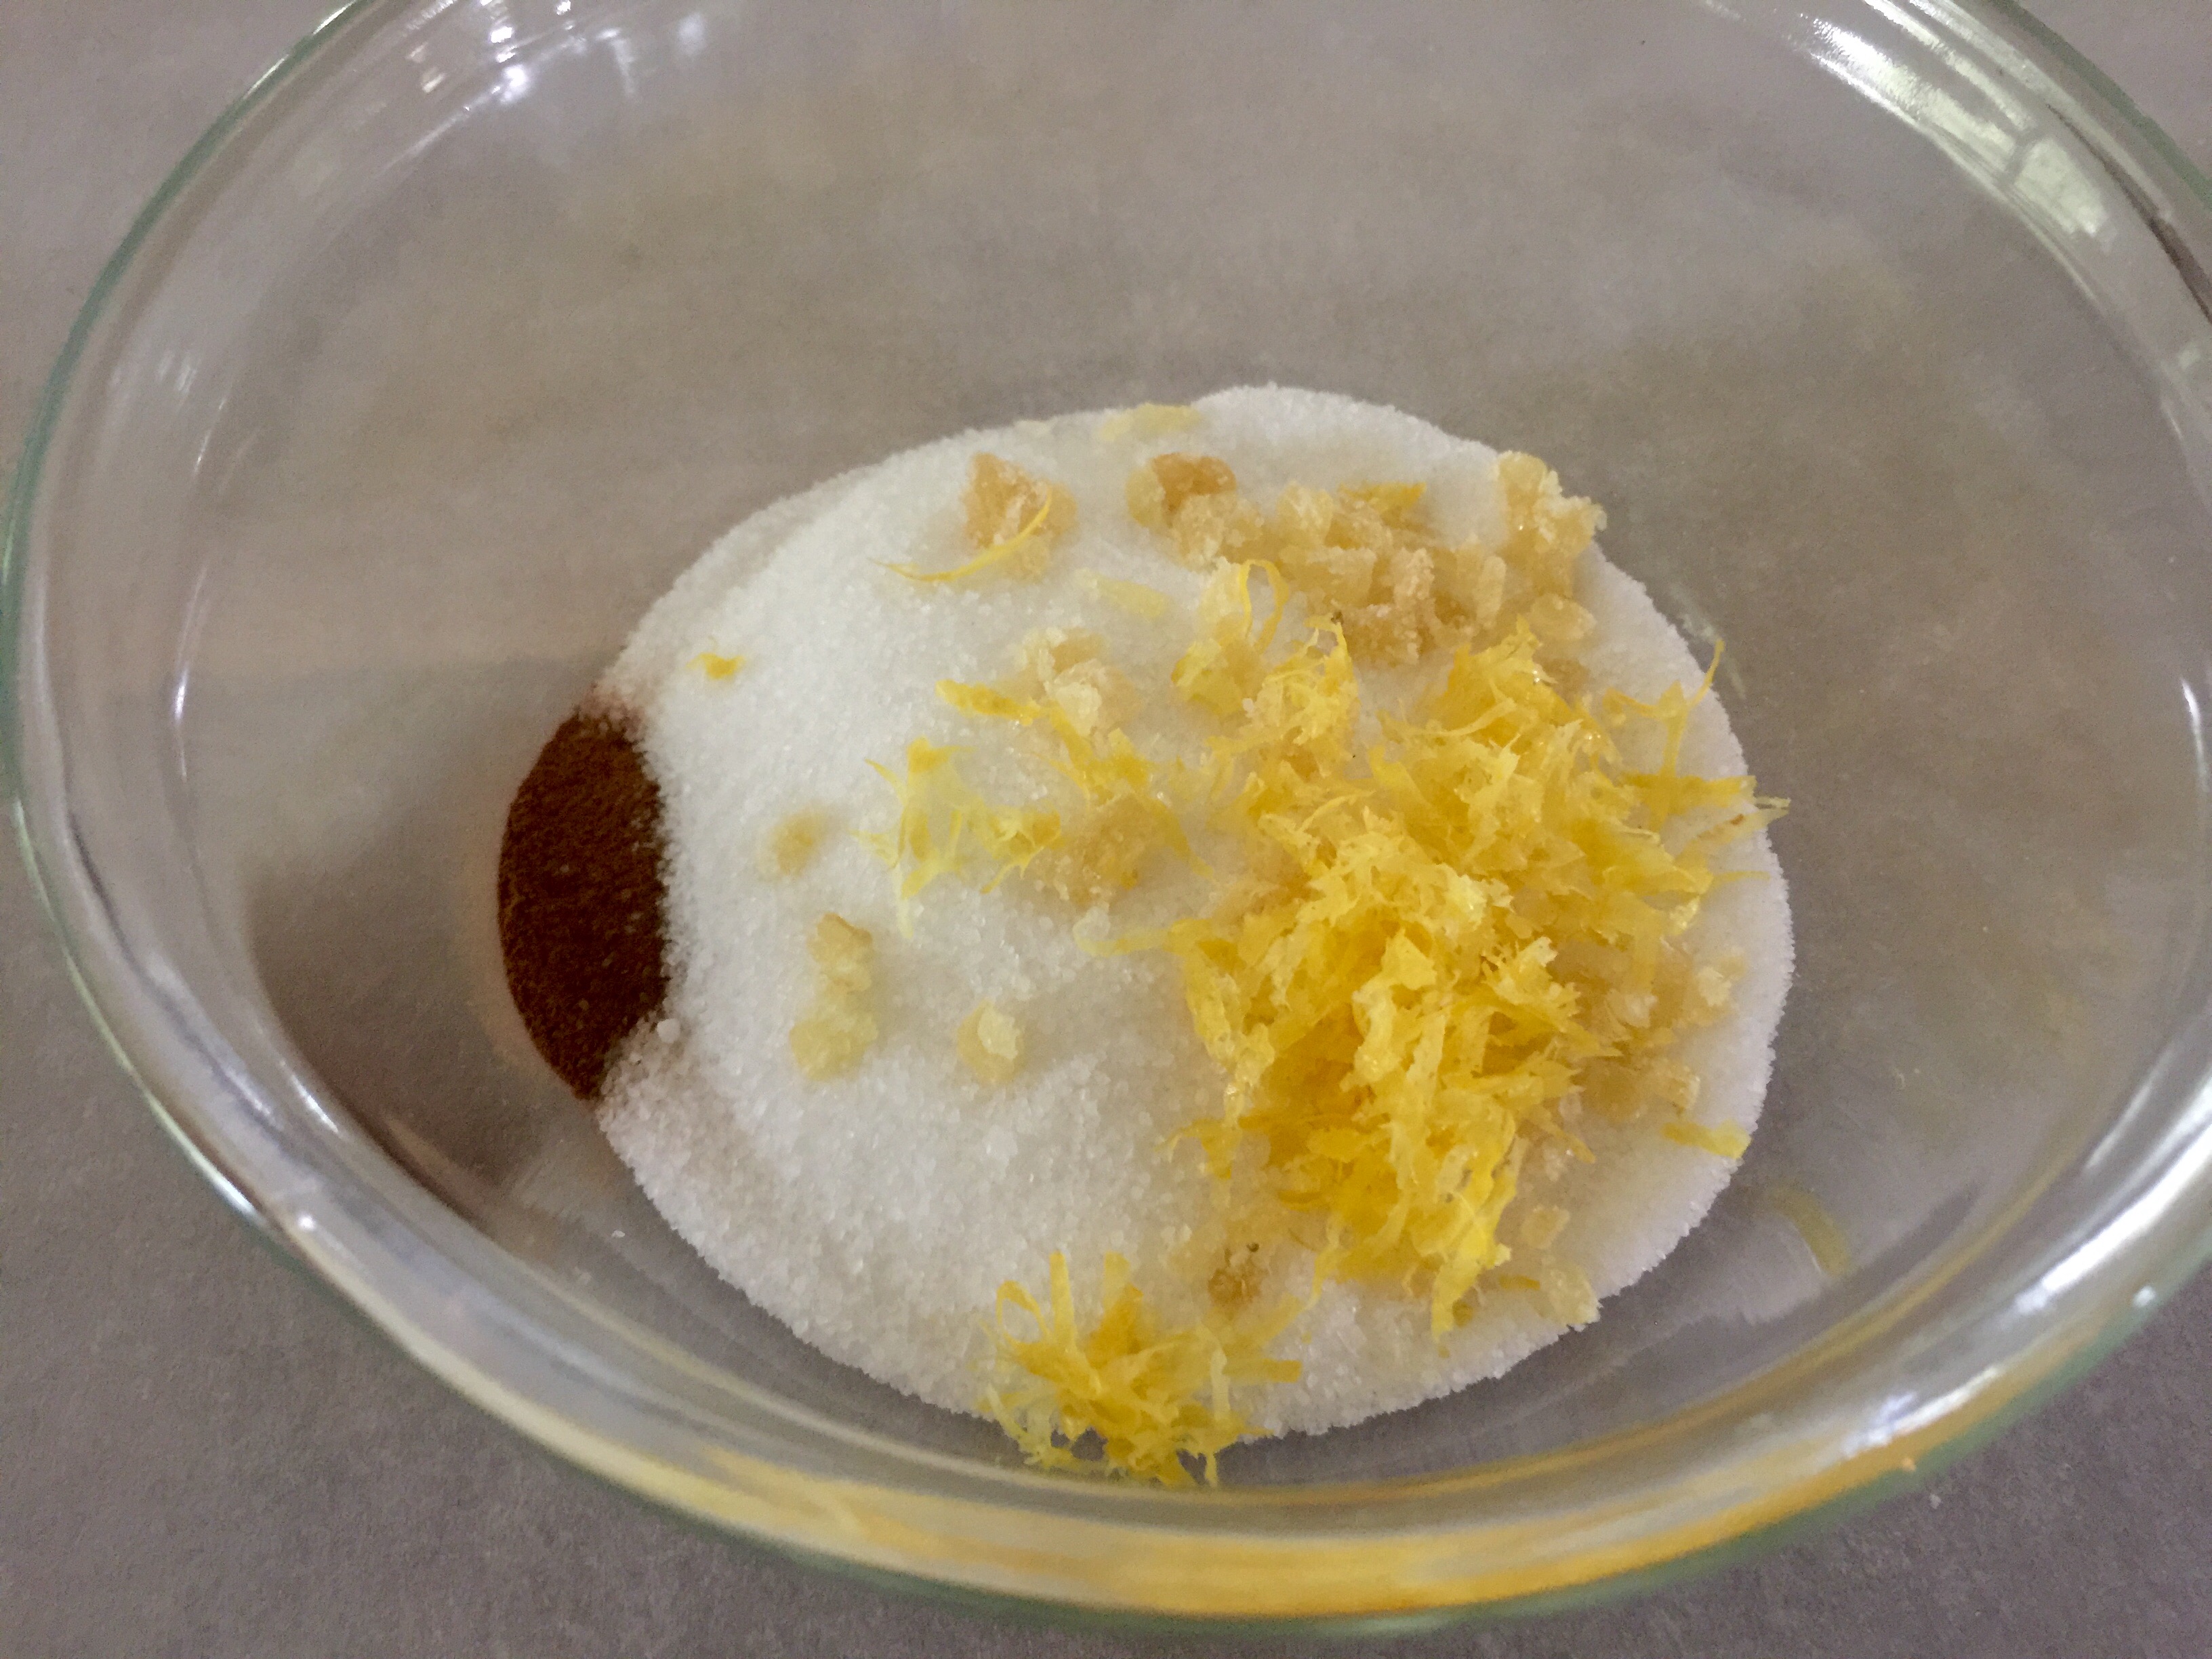
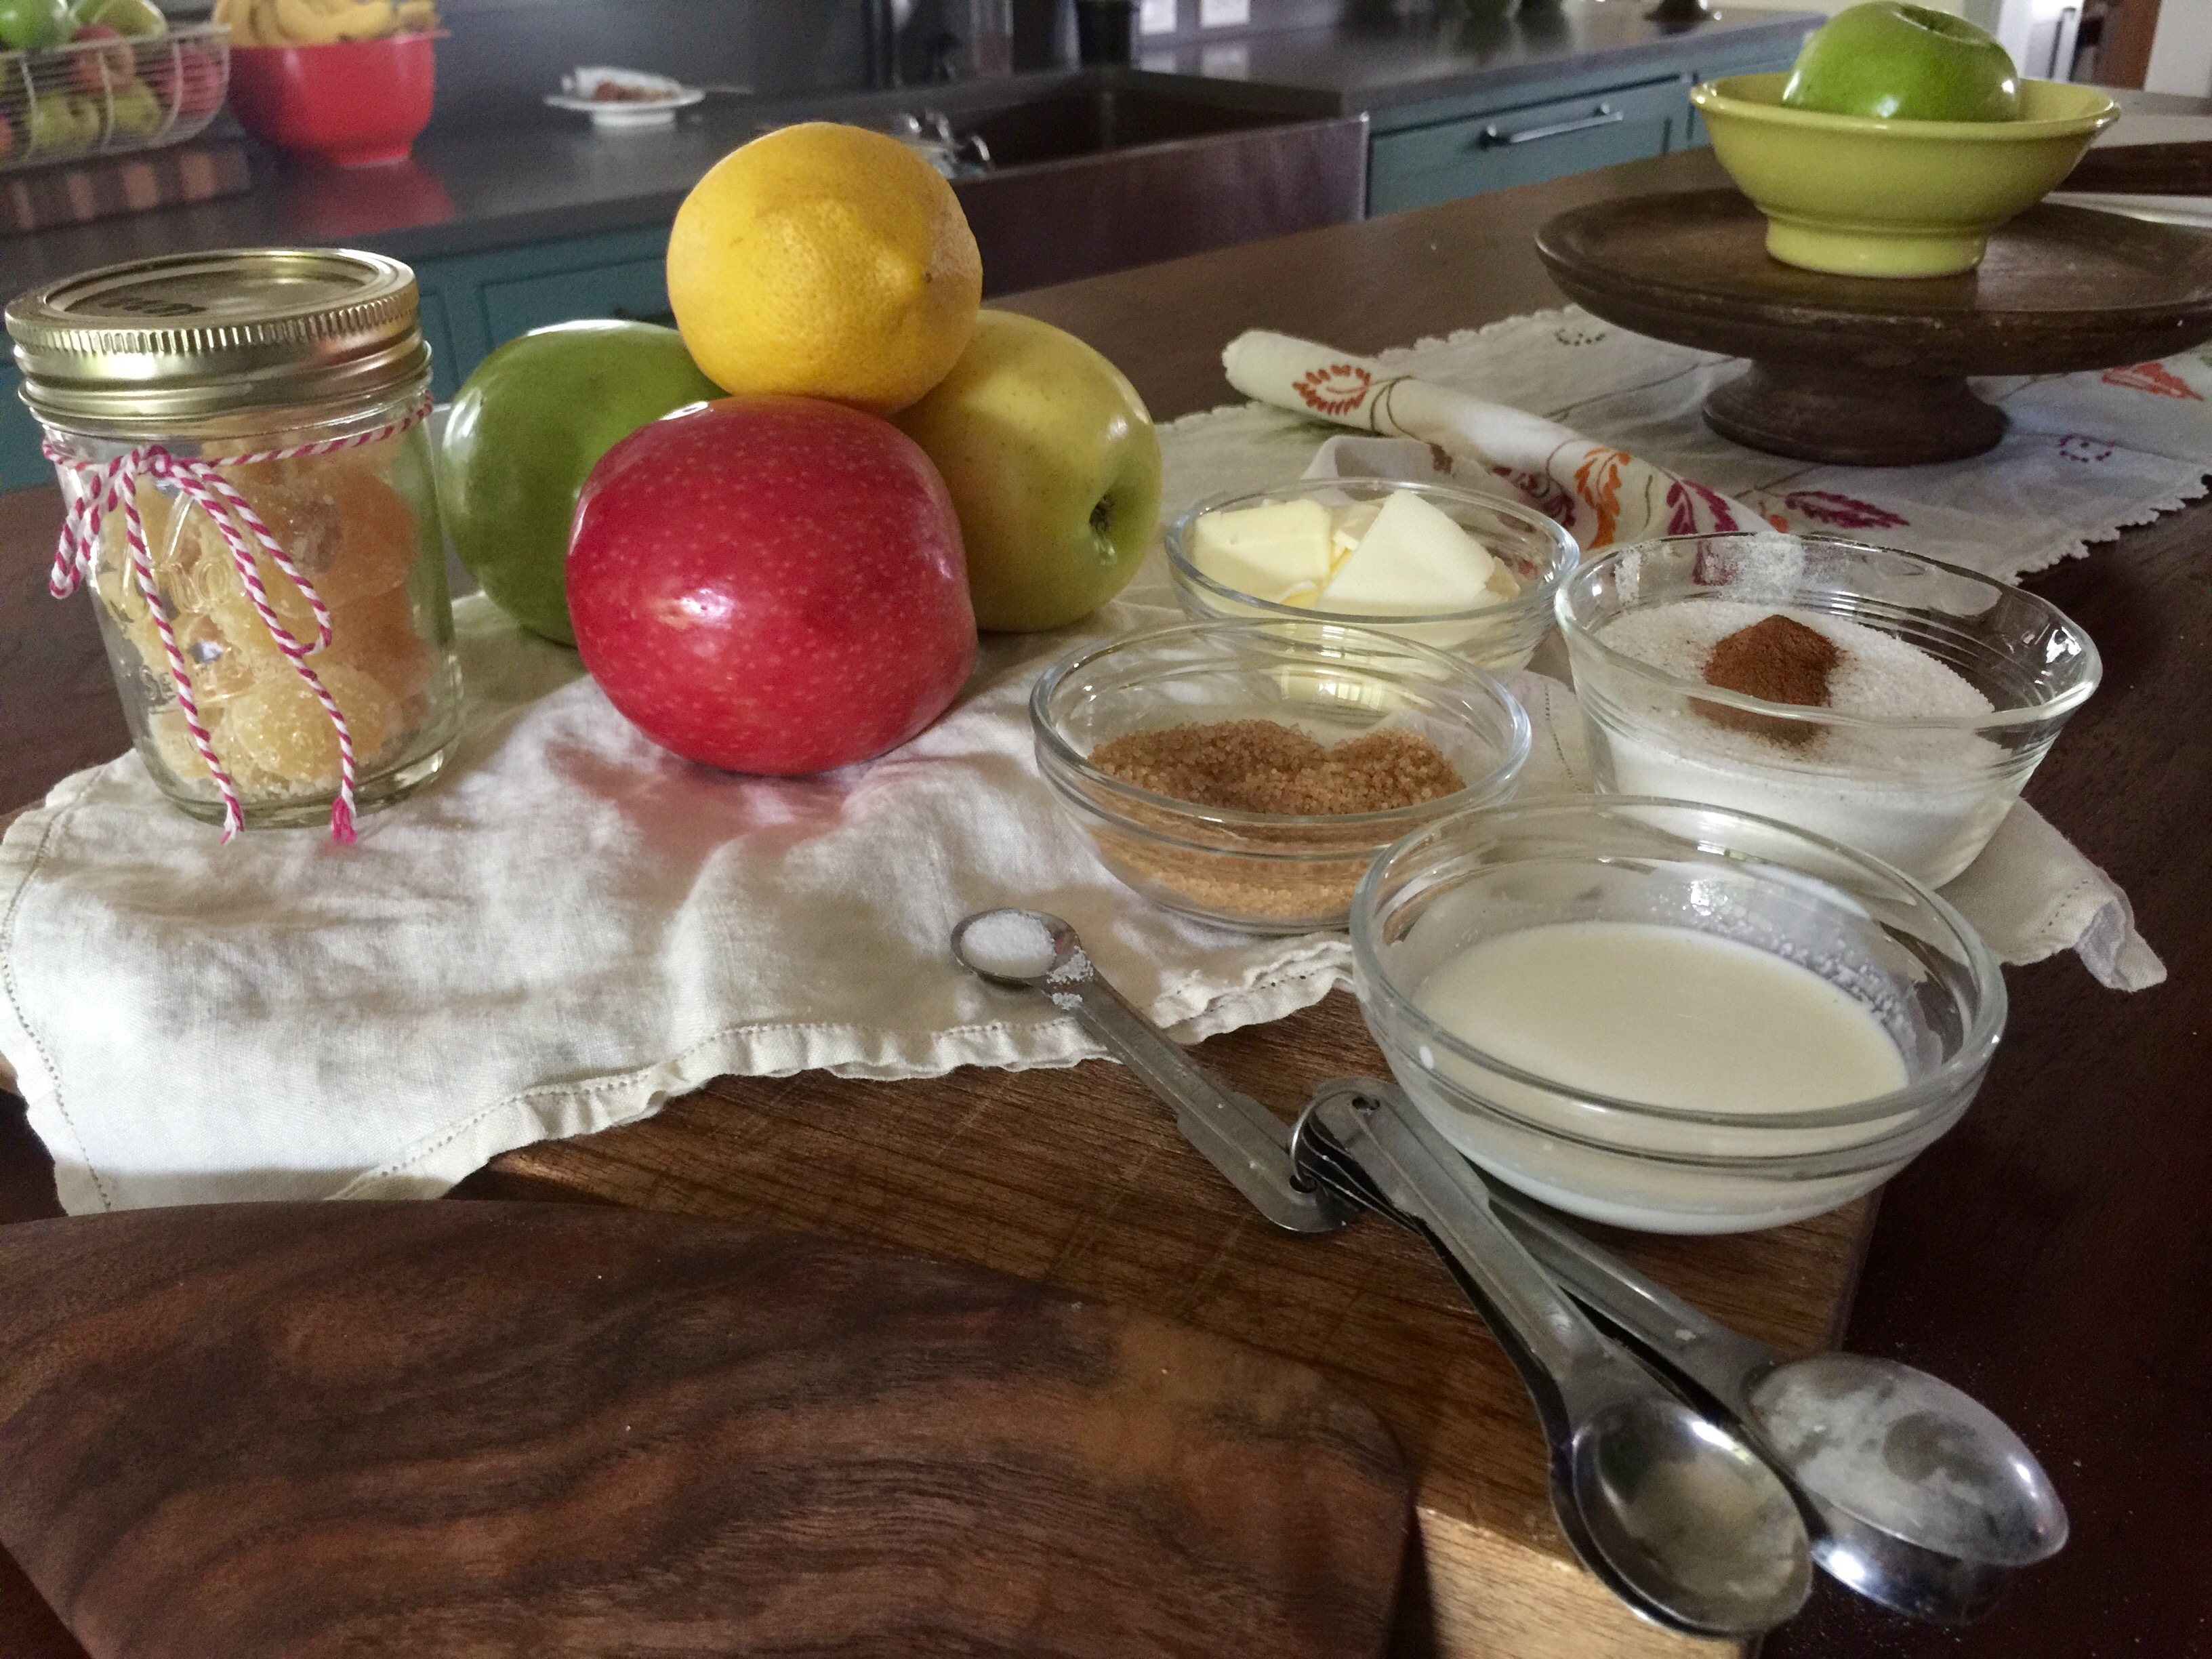
Along with the perfectly sliced & peeled apples, I combined the zest of one lemon, 2 t ground cinnamon, 4 T finely chopped candied ginger and ¾ cup granulated pure cane sugar.
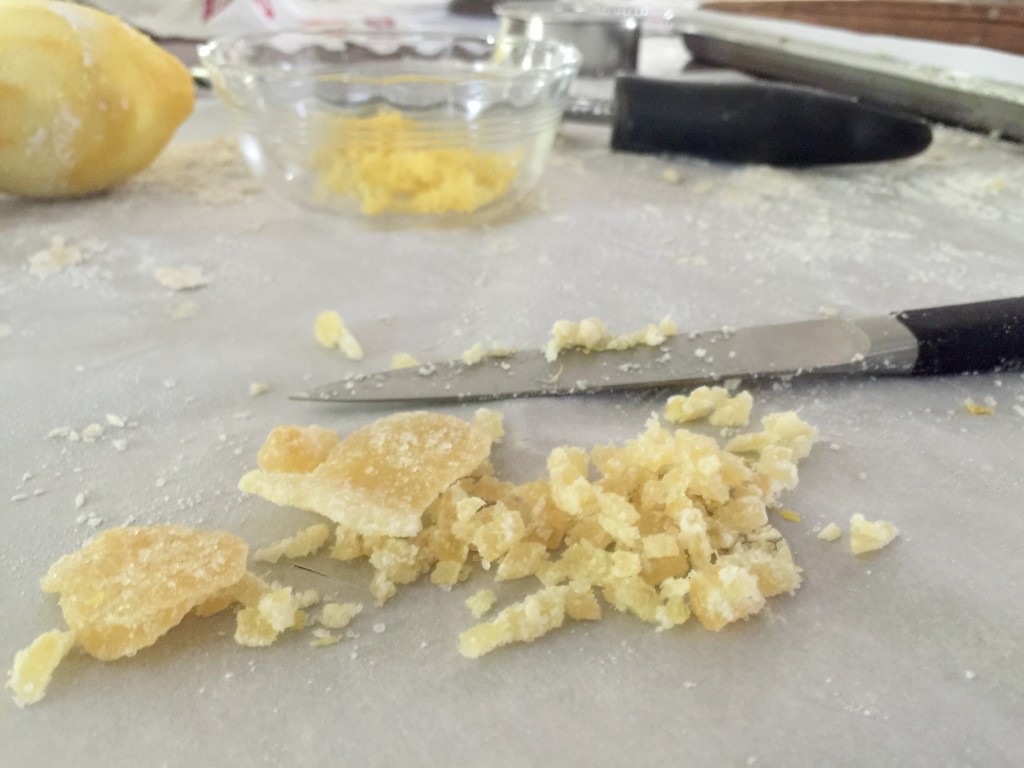
Finely chopped candied ginger gives this galette little pops of peppery sweetness, ((it’s a tastebud surprise!)). By adding just 3-4 tablespoons, you get enough of the ginger flavor to notice, but not too much to overpower the apples and buttery crust. If you can’t find candied ginger, either omit or use 1-2 teaspoons of freshly grated ginger.

Combine the sugar mixture and begin assembly.
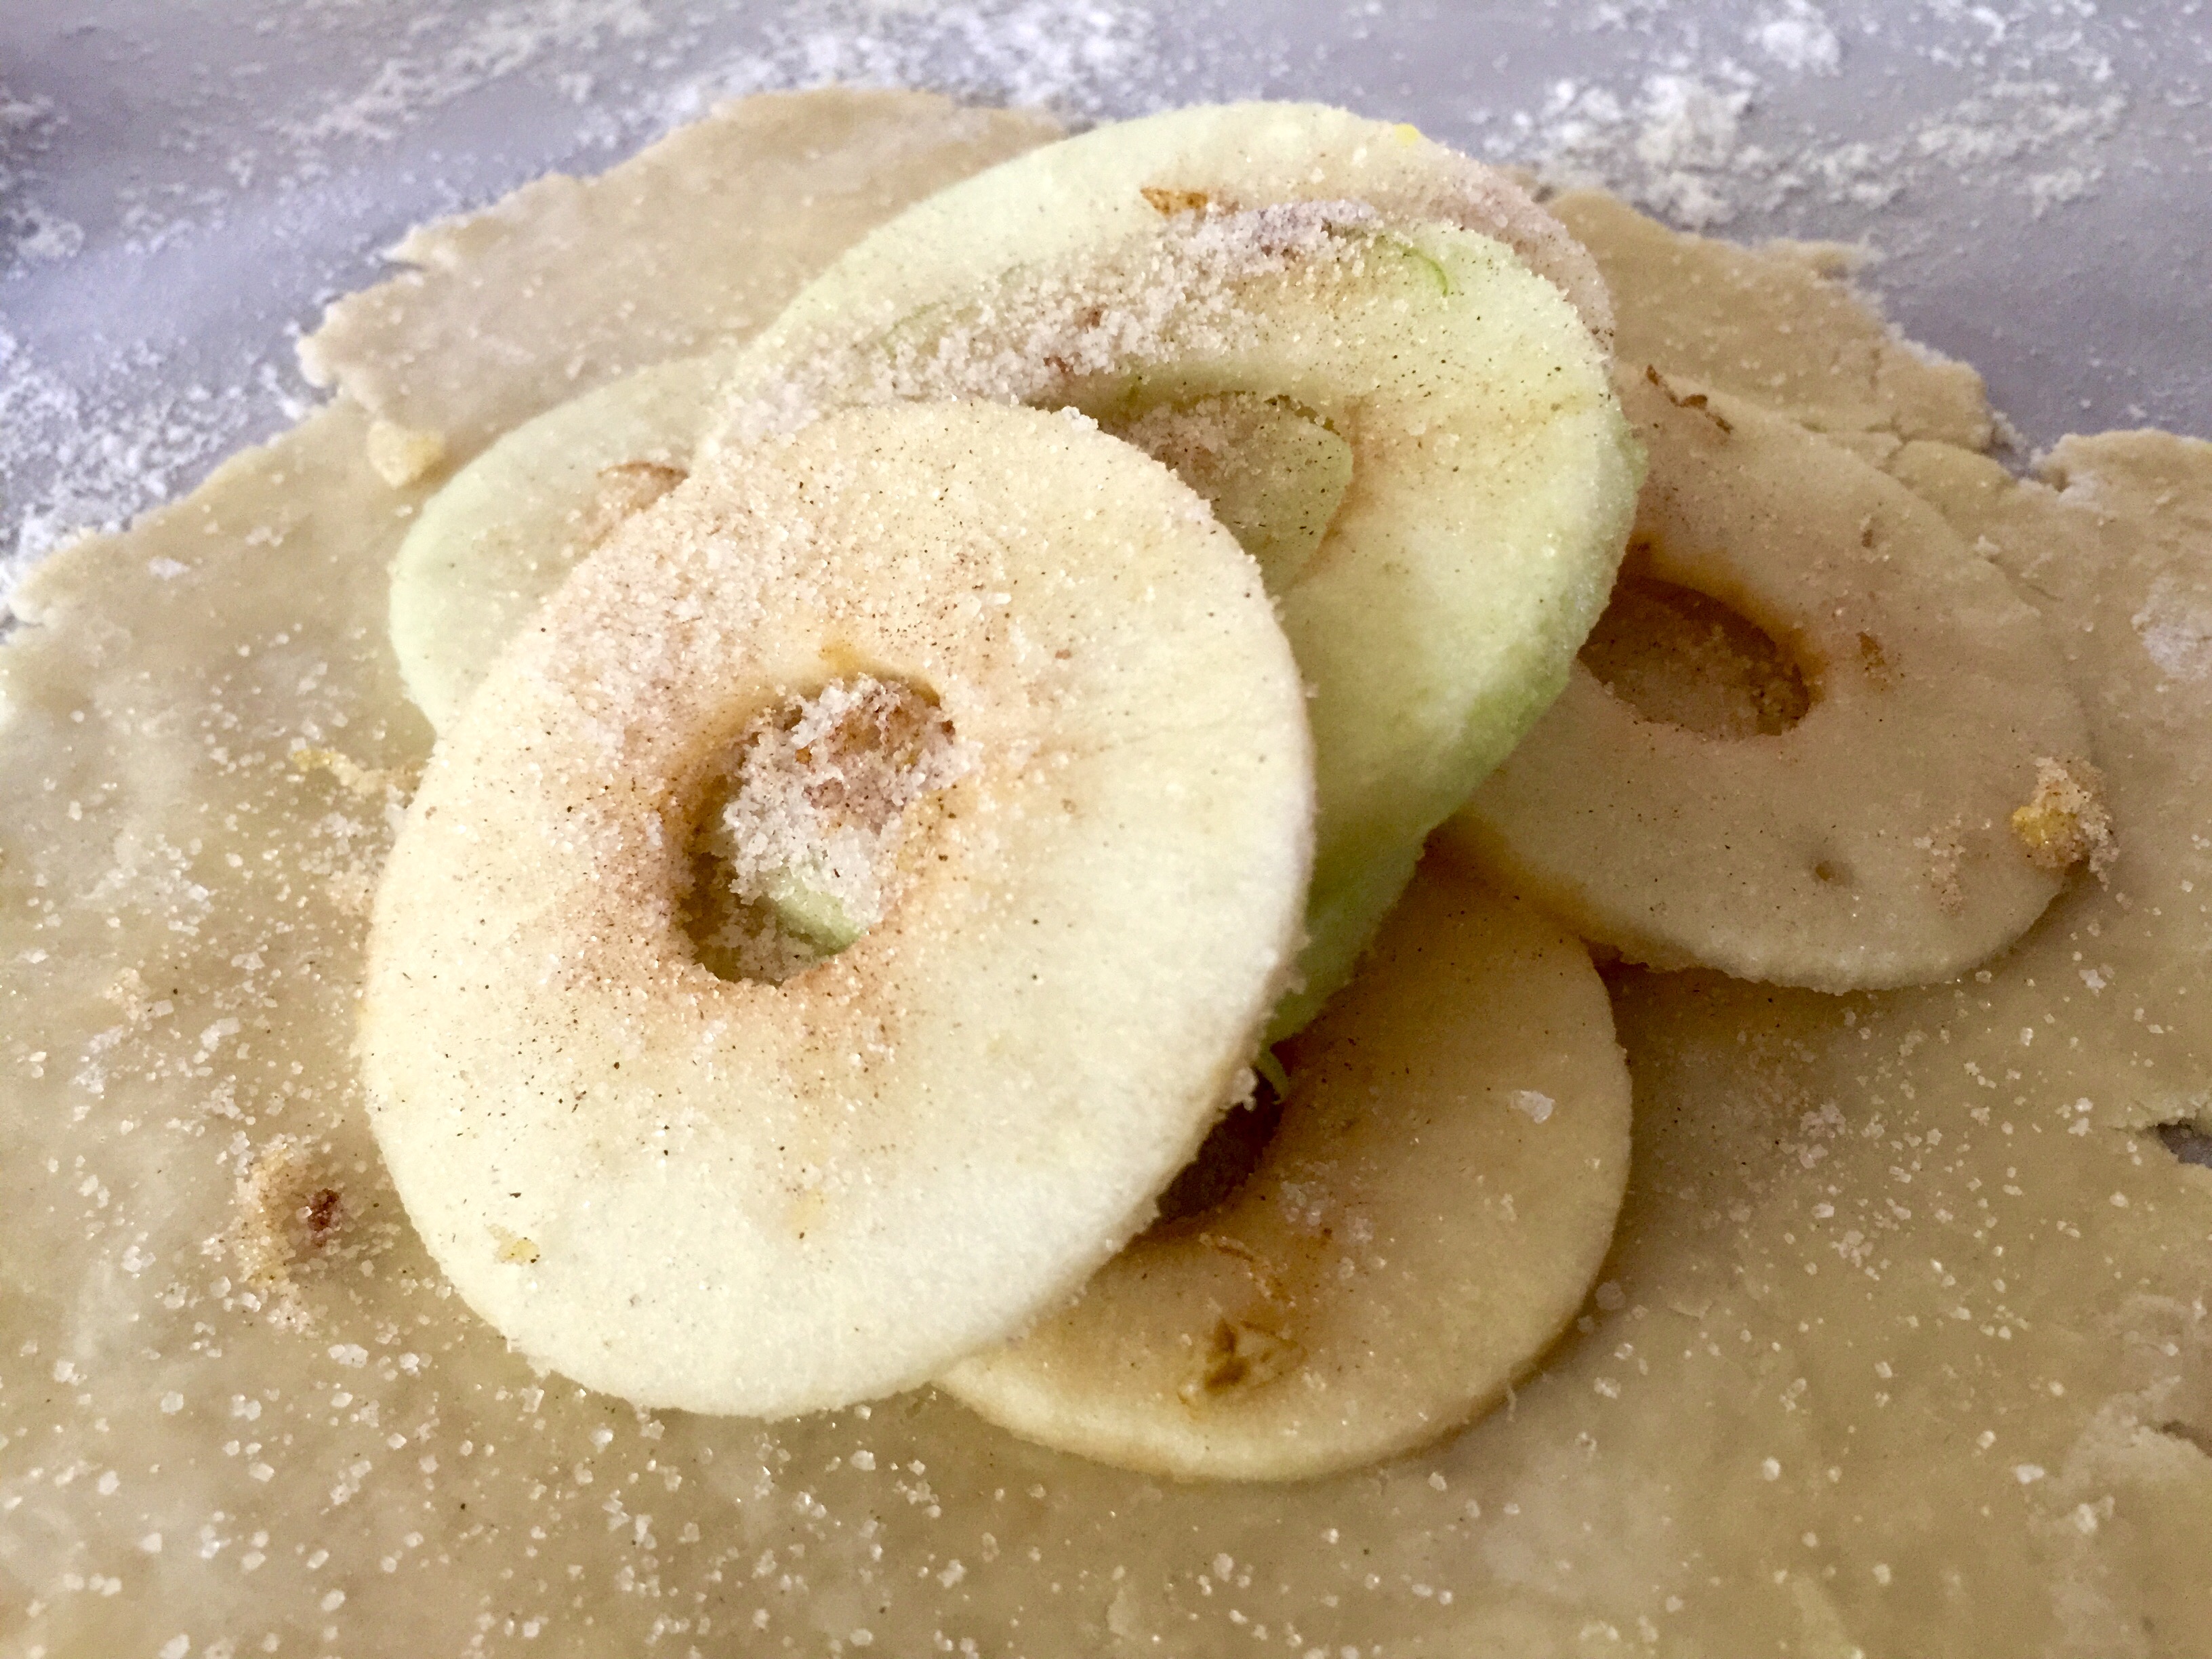
Place apples in the center of your pie crust ((my pie crust is rolled out on parchment for easy transfer)), being sure to leave 1″ – 2″ of crust around the edges. For minis, I sprinkled approximately 3 tablespoons of my sugar blend between and on top of the apple layers.
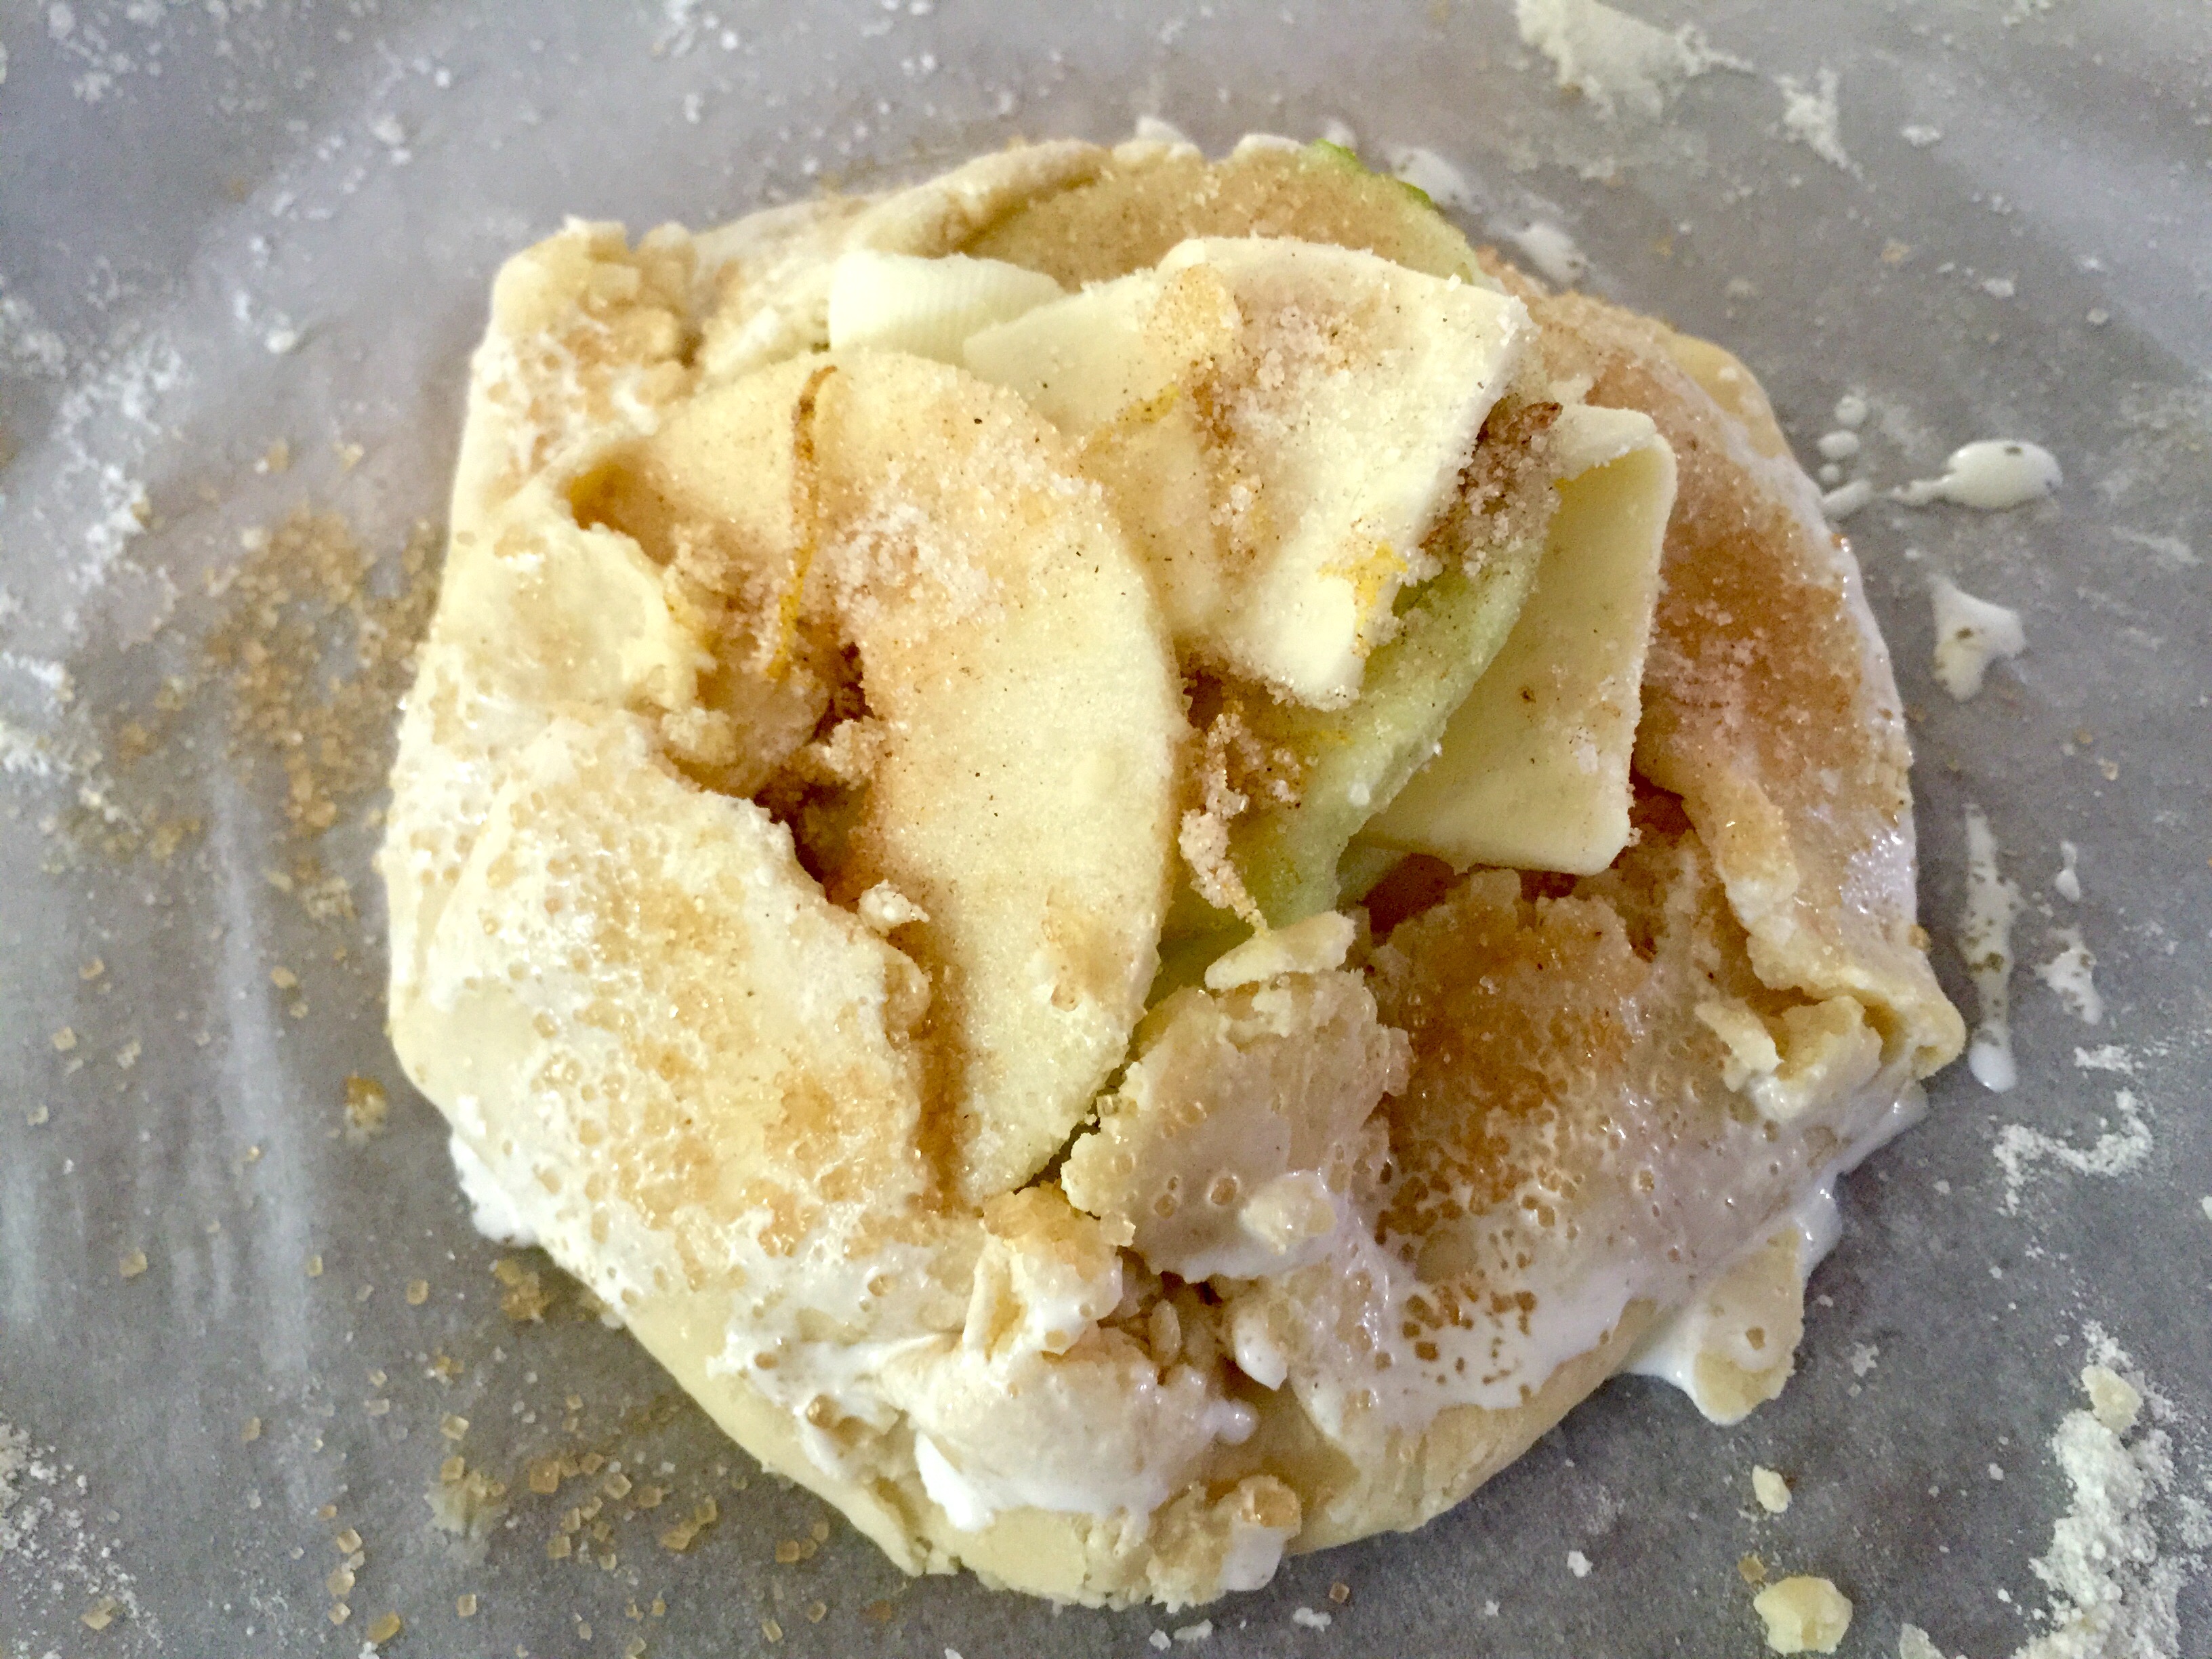
Fold the dough over the apples and gently press as you work your way around. Finish the galette off by tucking a few pats of butter into the layers of sugared apples, brushing the edges of dough with heavy cream & sprinkling a few teaspoons of raw sugar crystals over the cream.
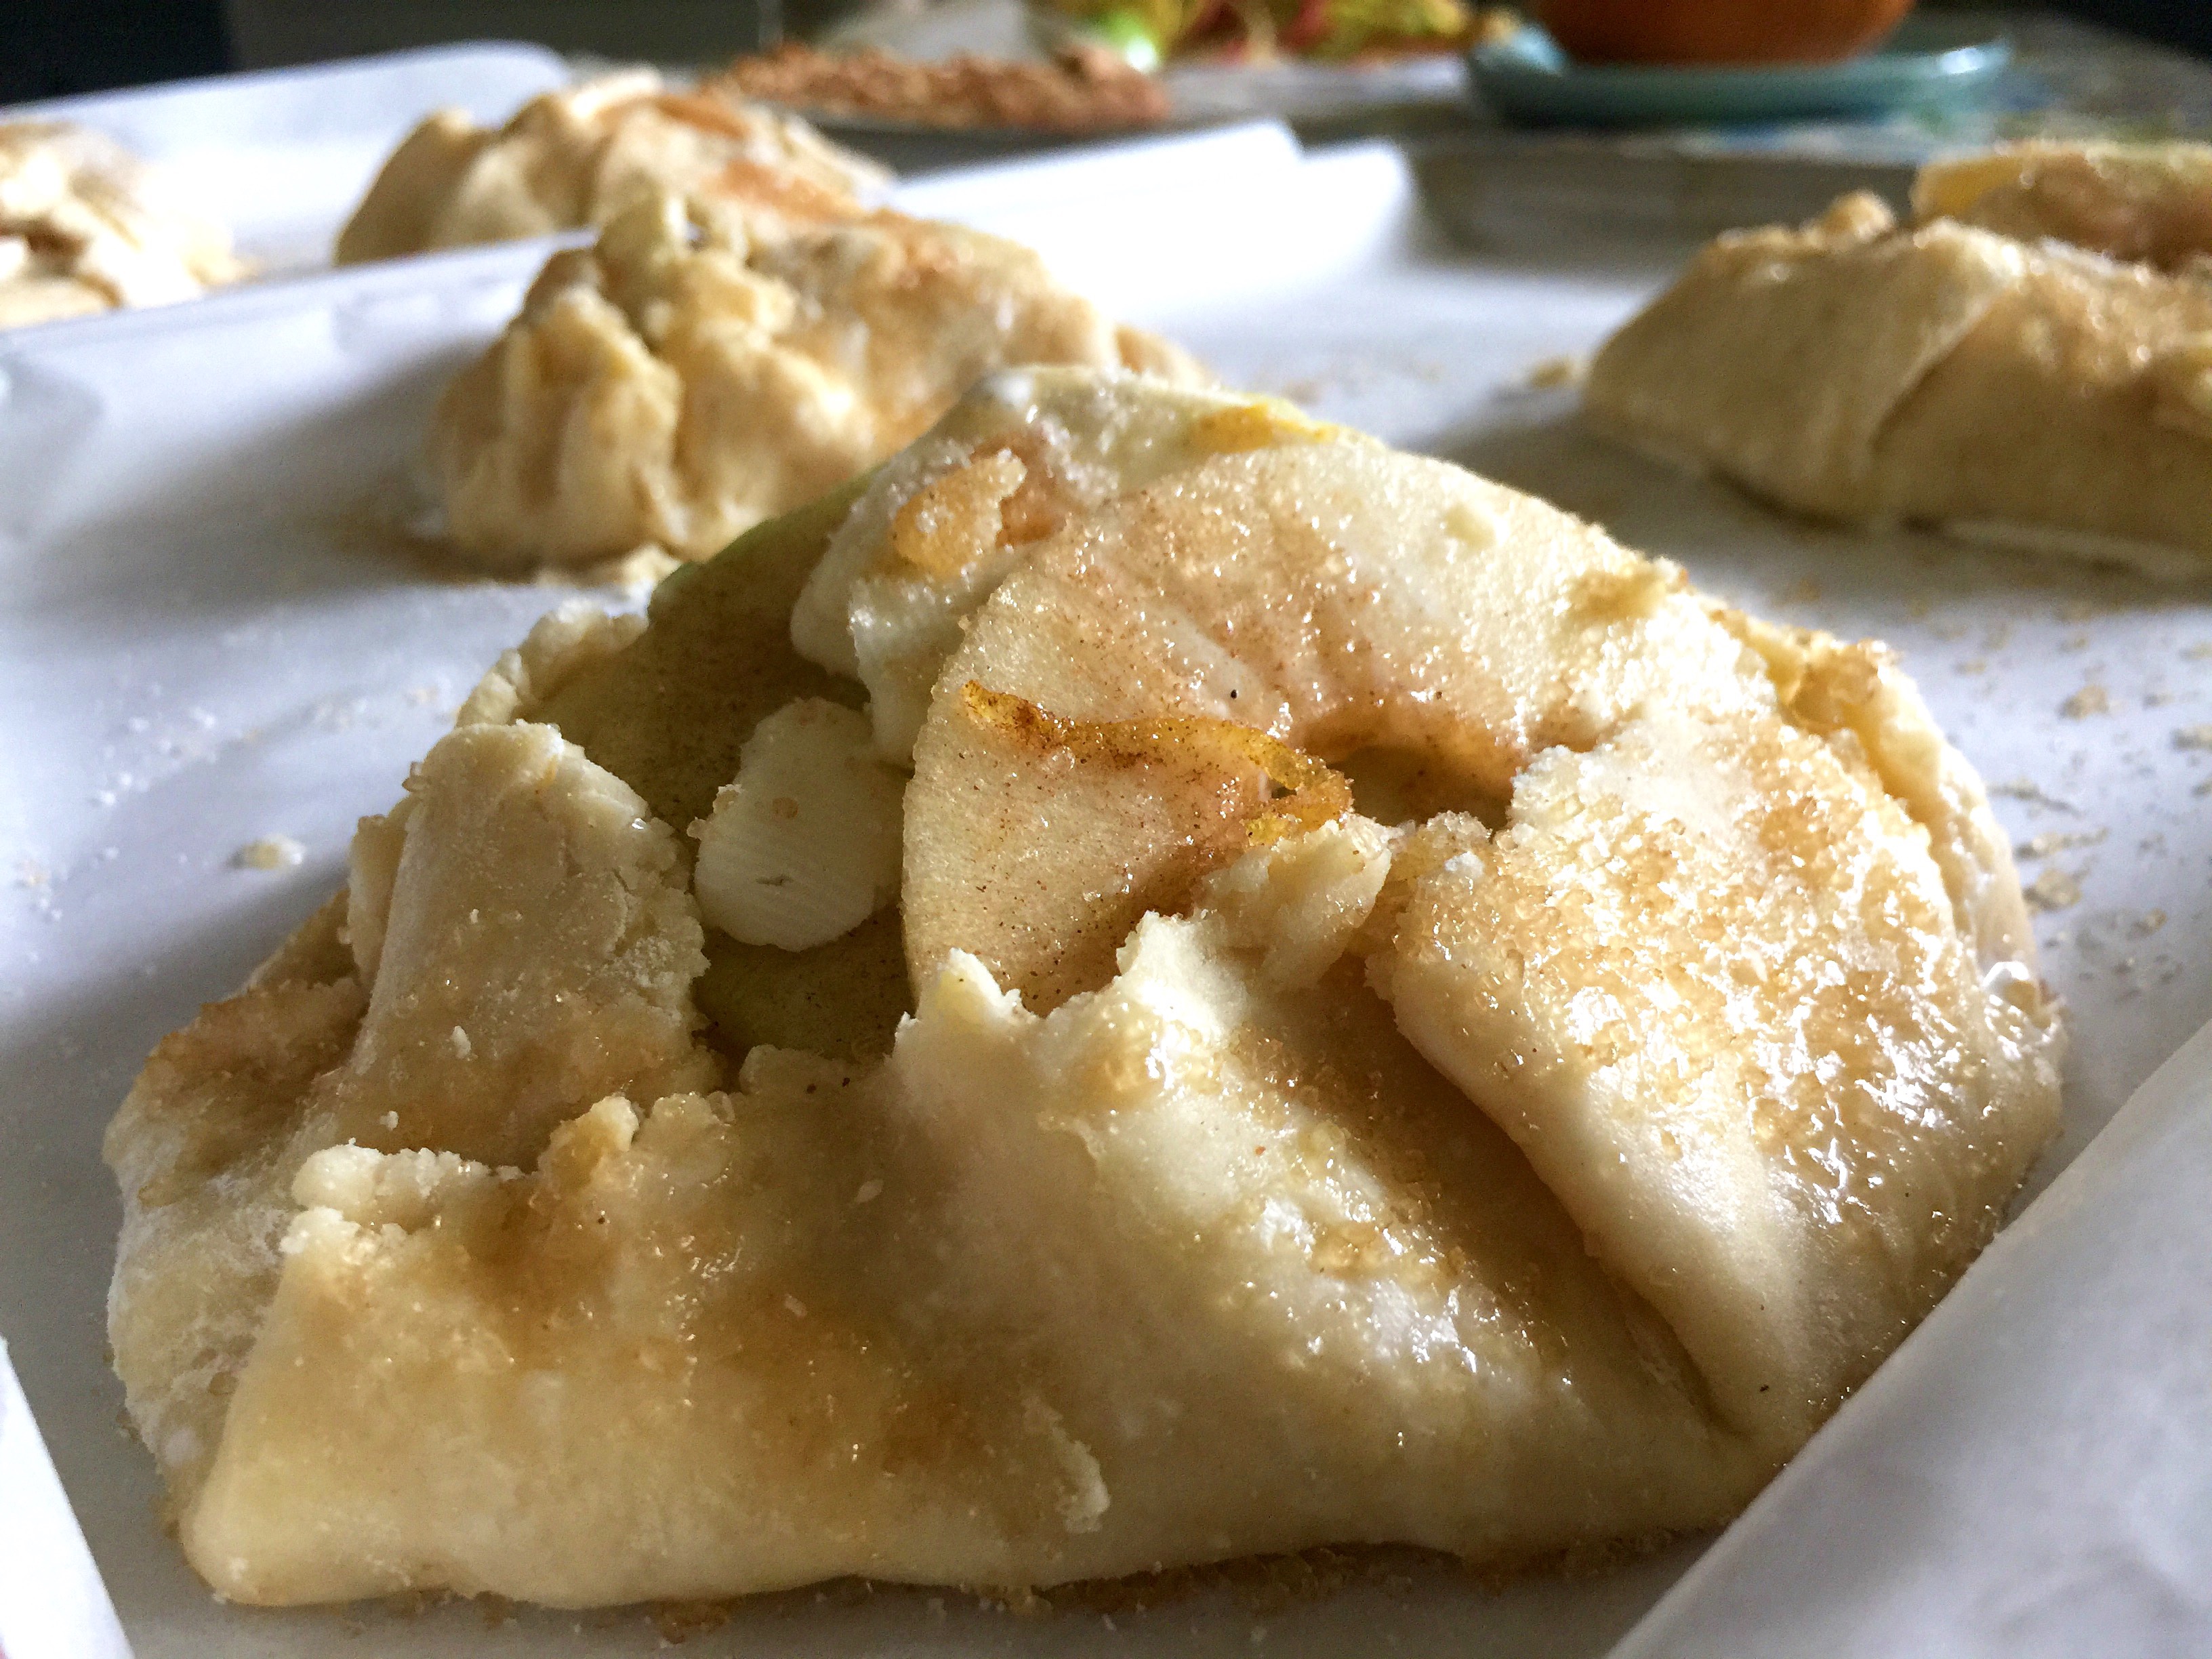
Repeat the same process with the remaining galettes & pop into your preheated oven for about 20 minutes. Then, just sit back and wait for Fall to come rushing into your kitchen. The aroma of warm cinnamon apples mixing with the baking pie crust? Ahh, now it is officially Fall.
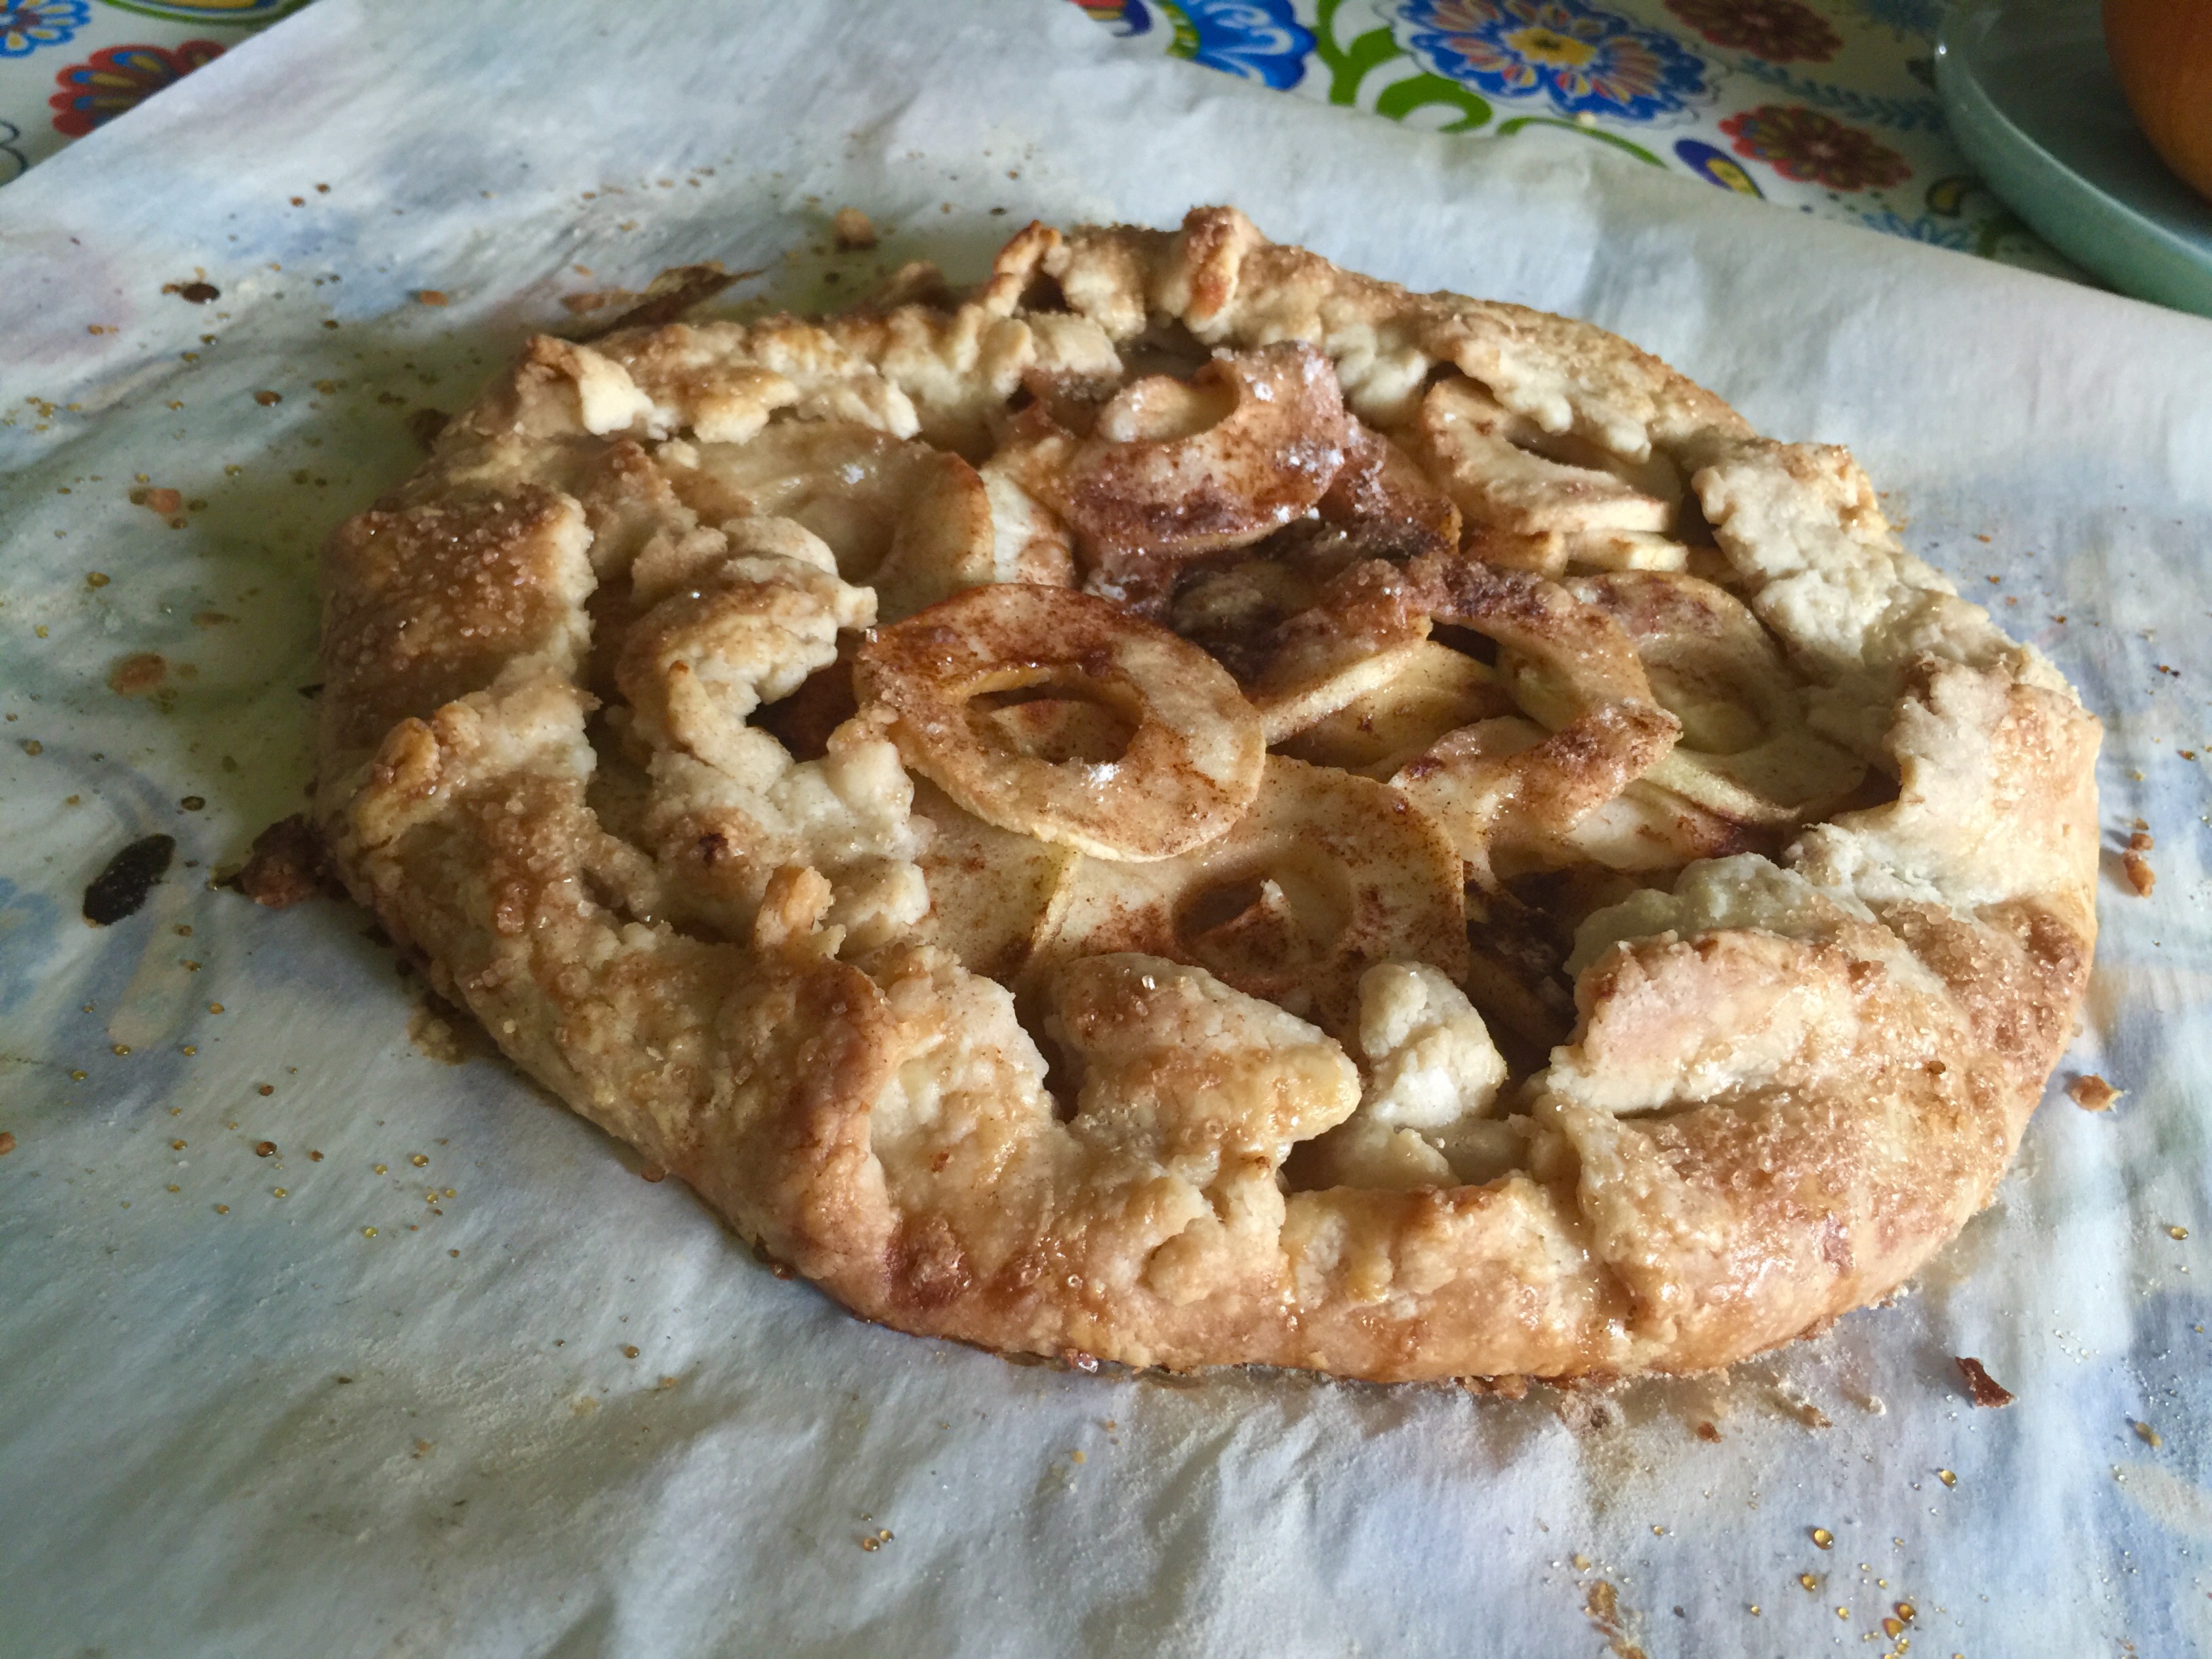
I happened to make a little more than just 6 mini galettes. Isn’t the large galette gorgeous?? I love the perfect apple slices, but it seems to be missing a little something. So, I whipped up a batch of homemade salted caramel sauce. With that simple drizzle of sugary, salty goodness – the galette was made perfect.
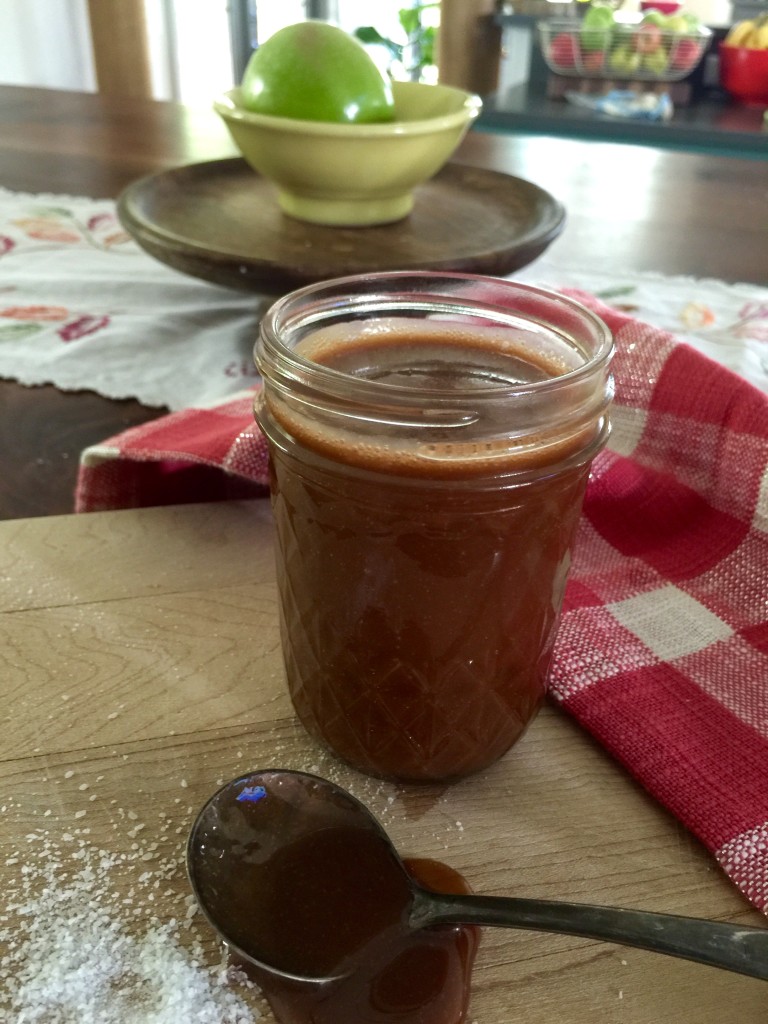
Homemade salted caramel is a fast and furious, gratifyingly delicious task — it’s surprisingly easy too. I will include my recipe for this caramel sauce in the recipe card below. However, store bought caramel is a good substitution for this step, so don’t feel like you have to make your own!

Oh my, please Fall, will you stay forever?!

- 6 large apples, peeled and thinly sliced (I used 2 of each: Golden Delicious, Honey Crisp & Granny Smith)
- 1 batch of homemade pie crust*, or 2 sheets of pre-made refrigerator pie crust
- 3/4 c granulated pure cane sugar
- zest of 1 lemon
- 4 to 5 T sugared ginger, finely chopped (optional)
- 2 t ground cinnamon
- 1 t kosher salt
- 4 - 6 T salted butter
- 4 T heavy cream
- 4 T raw sugar crystals
- 1 c granulated pure cane sugar
- 1/4 c water
- 1-2 t light corn syrup
- 1/2 c heavy cream
- 1/2 -1 t kosher salt
- 2 t high quality vanilla extract
- Preheat oven to 400°.
- Place 3/4 c portion of granulated sugar, lemon zest, sugared ginger, cinnamon & kosher salt in a medium mixing bowl, stir to combine and set aside.
- Lightly flour an approximate 20” square of parchment paper & roll out pie crust dough to desired thickness. If you are making individual galettes, I have found it easiest to roll out all of the pre-portioned dough in one step and then transfer them one round at a time to a parchment-lined baking sheet. ((Three individual crusts, or one large pie crust will fit on one baking sheet.))
- Once the dough is rolled out and positioned on the parchment-lined baking sheet, place equal amounts of apple slices in the middle of each galette and sprinkle with the sugar mixture, being sure to get the sugar between apple layers (using equal amounts of sugar until it is gone). Place a few pats of butter on top of the apple slices and fold in the edges of the dough, pressing gently as you work all the way around until all of the edges are folded up, forming sides for the galette. Brush the sides of the pie crust dough with cream and sprinkle heavily with raw sugar crystals.
- Place in the oven and bake for 20 to 25 minutes or until the crust has turned a pretty, light-golden color.
- While the galettes are baking, make the caramel sauce by placing sugar, water and corn syrup into a medium saucepan over high flame, bringing the sugar to a rolling boil while stirring continuously. Take care to keep from splashing the sides of your saucepan with the sugar water, as this will cause sugar crystals to form which can lead to a grainy caramel sauce. Watch the liquid closely, within 5-8 minutes of boiling, the color of the sugar will shift from clear to amber. That color-shift happens in a flash, as soon as the color changes, turn the flame to low, add the cream, salt & vanilla and continue stirring until the caramel reaches the desired consistency. If you delay at all in reducing the flame & adding the cream, you will likely burn the sugar, so move quickly - having your ingredients pre-measured and within arm’s reach. Once the caramel is thickened, pour it into a lidded glass jar. (The process of making caramel is simple, but you need to be cautious of the molten sugar splatter; keep the kiddos away from this portion of the recipe.)
- Once baking is complete, remove from the oven and drizzle with salted caramel sauce & serve.
- Store caramel at room temperature for up to 4 weeks.
- *1 batch of homemade pie crust makes 2 pie crusts. You can either make 2 9-10” galettes or divide the pie crust dough according to how many galettes you wish to make. If using store bought pie crust dough, I think the easiest thing to do is make 2 large galettes.
- **Homemade caramel sauce is optional, store-bought is a great, time-saving substitution.